The Mitsubishi A6M Zero came as a shock to many in the west. Quick and incredibly maneuverable it could outfly nearly everything in the sky. The fighter dominated opponents in China and Burma early in the war. It’s “introduction” to American airmen came on December 7, 1941.
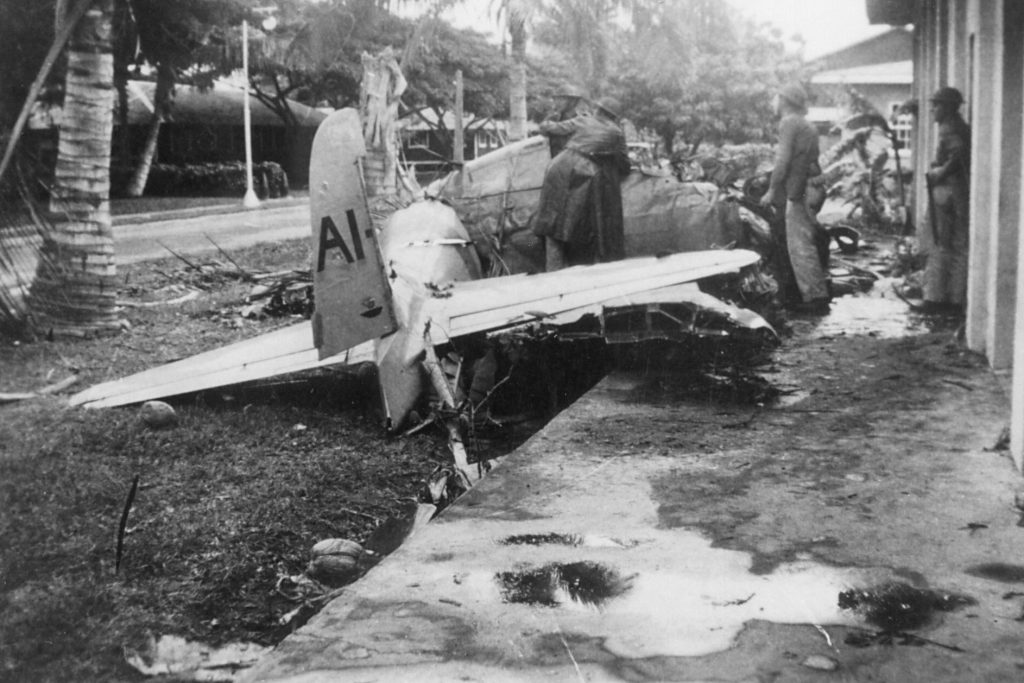
Petty Officer 1st Class Takeshi Hirano was part of the first wave of the attack in an element of three fighters from the carrier Akagi. After strafing Hickam Field, including some of the B-17s trying desperately to land, Hirano’s Zero was peppered by machine gun fire from the ground.
The pilot struggled to bring his damaged fighter down but clipped a number of trees and crashed into the entrance of Fort Kamehameha’s ordinance machine shop, killing Hirano. His was one of only 29 aircraft brought down during the attack.This particular Zero would become the object of intense scrutiny by US intelligence officers looking for kinks in the vaunted fighter’s reputation.
The Kit
Tamiya, Inc. produces one of the most accurate scale models of the Mitsubishi A6M2 Type 21. First released in 1973 the 1/48th scale kit still holds up well against some of the higher priced models. It’s an ideal kit for the beginner, simple, well-engineered and easy to build. The more experienced modeler will be more than tempted to add some extra detail.
Construction starts with building and painting the multipart cockpit, which comes with an optional pilot figure. Tamiya cockpit green (XF-71) takes the guesswork out of what to paint the floor, sidewalls and instrument panel. A decal reproduces the dials and indicators well. The seat is flat aluminum, a belt harness from an aftermarket detail set is a nice touch. (Note: Japanese naval fighters used a single diagonal shoulder strap with a standard lap belt.)
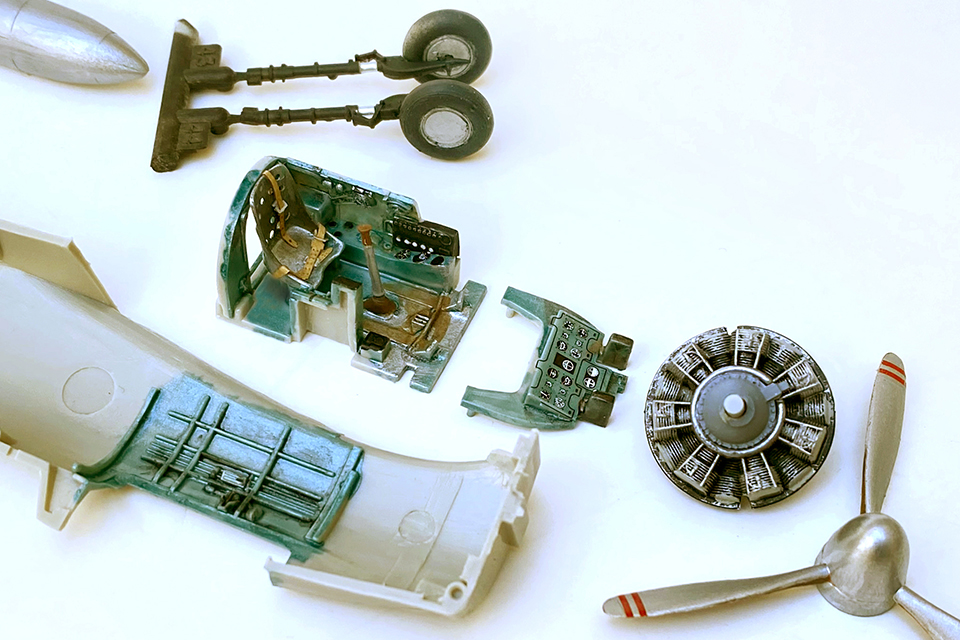
With the cockpit complete, paint the 940-hp Nakajima Sakae Type 12 engine flat aluminum, then use a black wash to bring out the details. Next, glue together the two-piece cowling and paint it with a mixture of semigloss black (FS-27031) and a few drops of cobalt blue, to duplicate the cowling color reportedly seen on many WWII Japanese carrier planes. Glue the completed engine into the cowling and set it aside to dry.
Next, join the fuselage parts together. Slip the finished cockpit through the fuselage’s underside, making sure it is seated correctly before applying dabs of glue to hold it in place. Next add the completed wing. The fit here is very good, but there is still a small gap at the wing root that will need attention.
For this model we’ll add an extra detail. The type 21 Zero was the first version to have folding wings (more accurately, folding wing “tips.”). It was a new addition meant to help maximize space aboard the carrier. The Czech company Eduard makes a great resin detail set of the folded wingtips. Designed for their own A6M2 Zero kit, it will need a little extra surgery and sanding, but it can easily be made to fit the Tamiya kit. It’s a great addition to the model. Cement the horizontal stabilizers in place and set the assembly aside.
Now that the basic construction is complete, it’s time to check over your work and fill and sand any seams. Most imperfections can be smoothed over with an application of Tamiya’s surface primer.
Camouflage
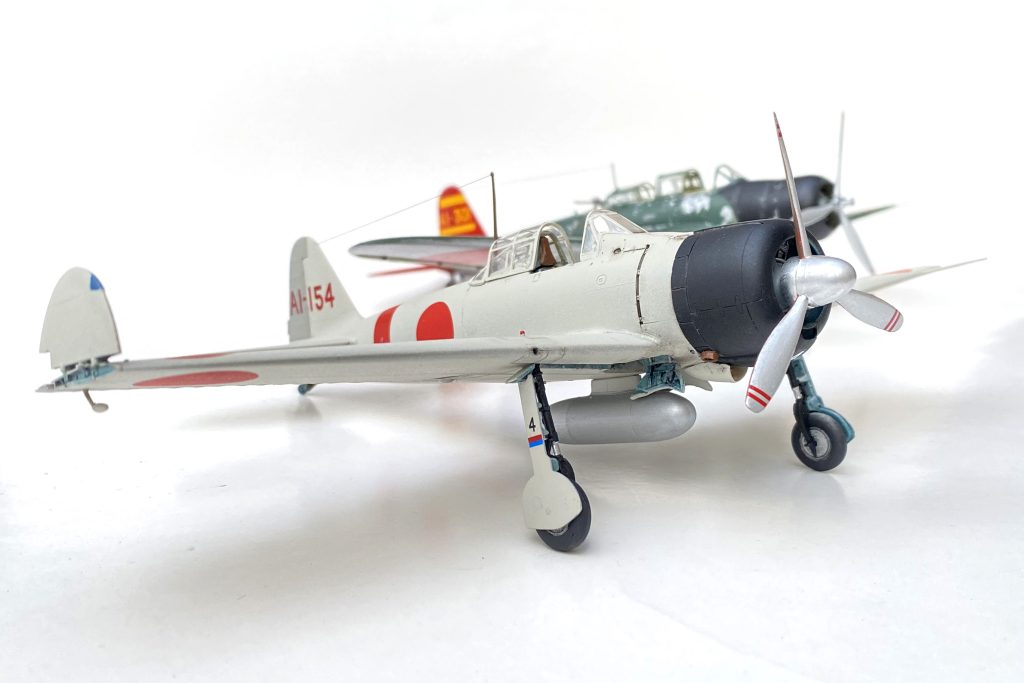
The A6M2 Zeros that took part in the Pearl Harbor raid were painted Imperial Japanese Navy gray-green overall. This color is available in both a spray can (Tamiya AS-29) or bottle (XF-76). Before painting, stuff facial tissue into the cockpit and wheel wells to protect them from overspray.
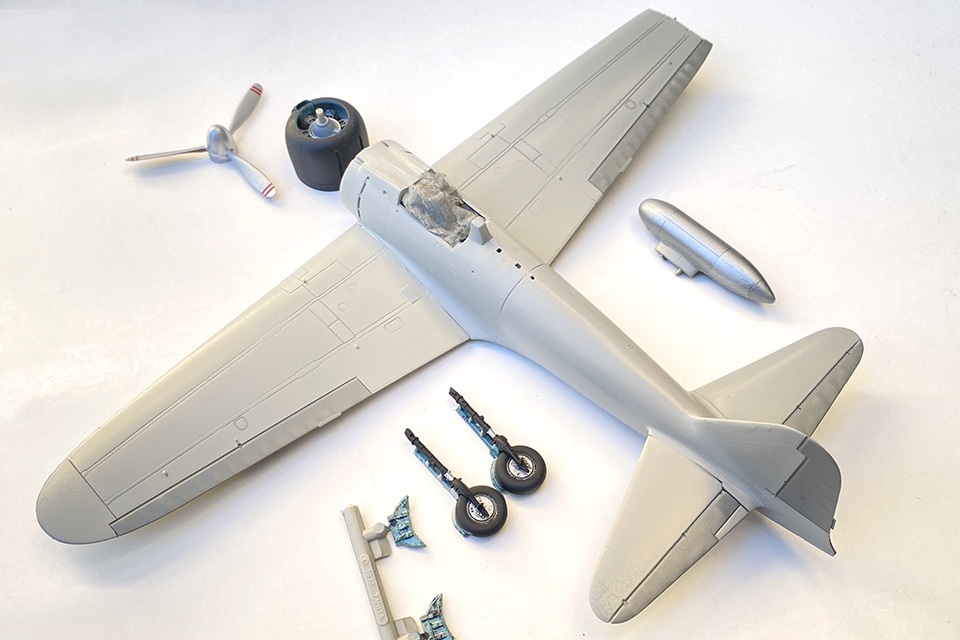
The wheel wells and the inside of the main landing gear doors should be painted the same interior metallic blue-green as the cockpit. The landing gear legs are semigloss black, with dark brown “rubber” colored tires and aluminum hubs. The propellers on Pearl Harbor Zeros were unpainted aluminum, with red warning stripes near the tips. The back of the propeller was painted a flat deep brown to reduce glare for the pilot.
The fabric-covered moveable surfaces, ailerons, rudder and horizontal stabilizers were painted a gray primer. It was thought that the weight of an additional layer of paint would alter the delicate weight and balance and effect performance. Mask off these sections and paint them a slightly darker gray.
After all the painting is complete, apply a coat of gloss varnish to provide a smooth surface for the decals to adhere to.
Bringing the Zero to Life
Hirano’s aircraft had simple, standard markings. The kit markings work well and settle into the nooks and crannies with a little decal softener. The tail number, AI-154 was cobbled together from other Zero decals that were in “the stash.” Add a mild amount of weathering, soot from the exhaust ports and a mild bit of fuel and oil staining are all that’s needed. Once the decals are complete, give the fighter a light coat of a clear flat varnish and put it aside.
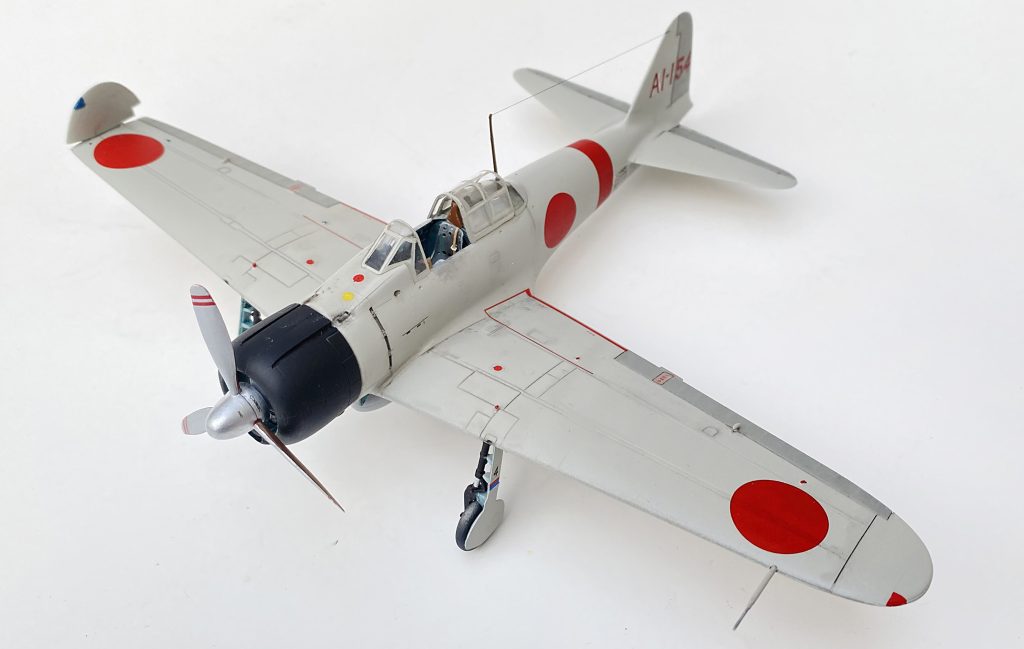
On to the canopy. There is an option for an enclosed one-piece canopy, but you’ll want to show off that cockpit detail so opt for the three-piece open version. Painting the cockpit canopy frames will be easier if you mask and paint the horizontal ribs first, then the vertical frames. Attach the clear parts with white glue and finish off your model by gluing the landing gear, gear doors, arresting hook and tail wheel into place. Don’t forget the pitot tube and small weights on the top and bottom of each of the ailerons. Last but not least, add that folding wingtip and Takeshi Hirano’s Mitsubishi A6M2 is ready for its sortie into history.