Going Home
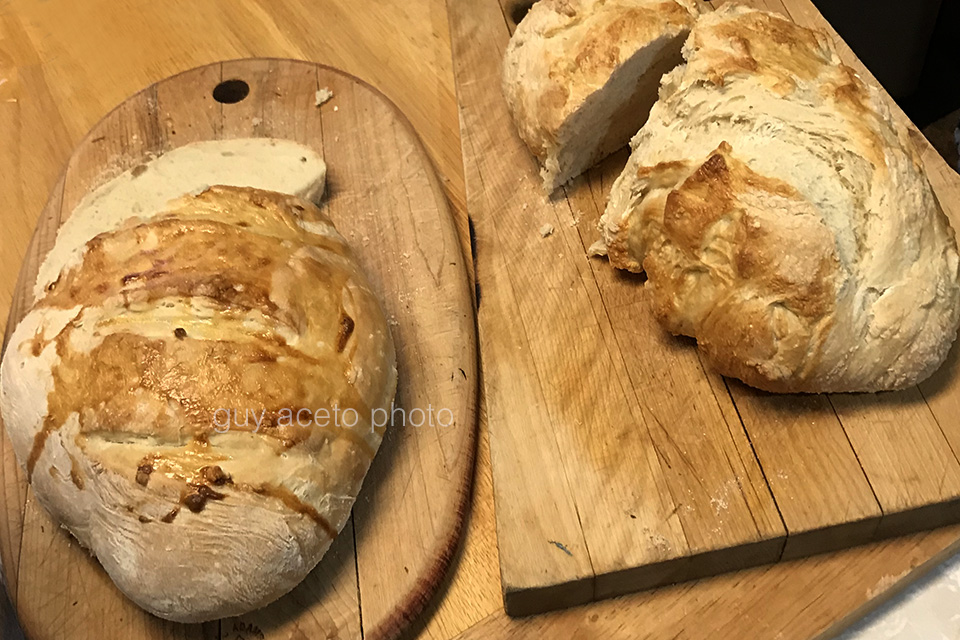
The past few weeks have been particularly difficult. I suddenly found myself in an empty house, the house I grew up in. It’s a place I know intimately, every nook, every corner. Not entirely certain of what to do next, I cooked. I made myself some dinner and filled the kitchen with smells that make the empty room feel full again, garlic, tomatoes, the yeasty fragrance of fresh bread, the sizzle of pancetta in an old cast iron skillet.
That heavy black skillet. It’s the pan I remember steak and eggs being cooked in, nearly every morning, as my father made breakfast before school. I got up early, he was up earlier. It was a brief moment when it was just the two of us. There were times we barely spoke, “Do you want some?” Sometimes entire conversations took place with barely a word.
I walked around the house looking at deeply familiar things, they looked different, the whole house was different. I suppose out of habit, I found myself taking pictures, desperately trying to capture something before it was gone.
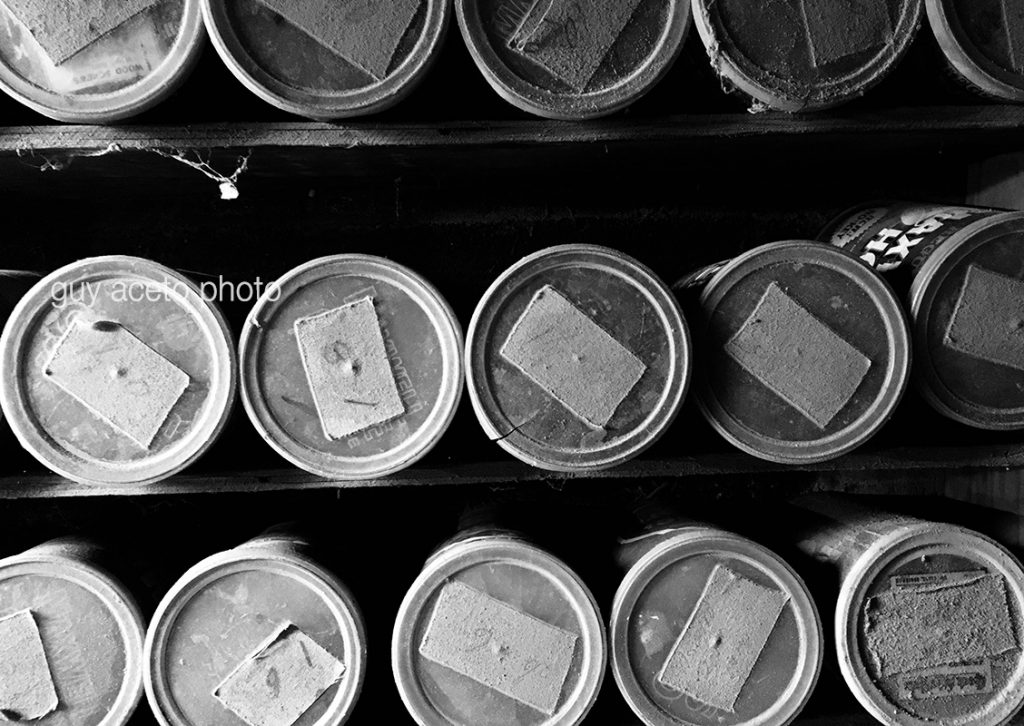
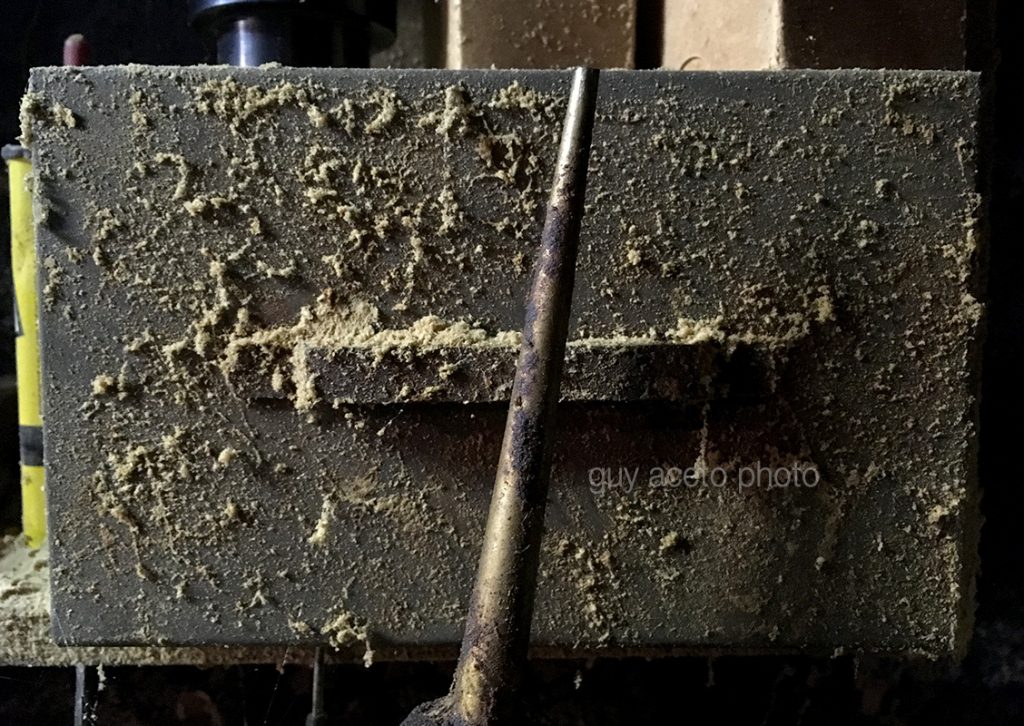
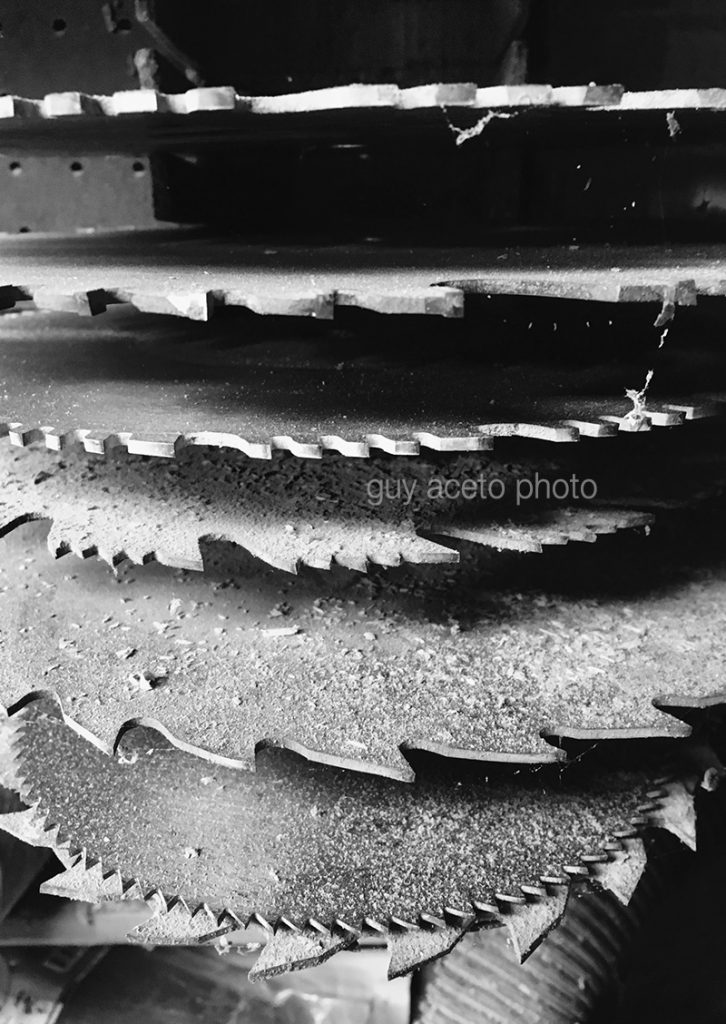
Growing up, the basement was a playground, a classroom. Sawdust covered everything, the air full of the smell of wood and varnish. Coffee cans carefully labeled with the size of every nut, bolt, screw and nail anyone might ever need.
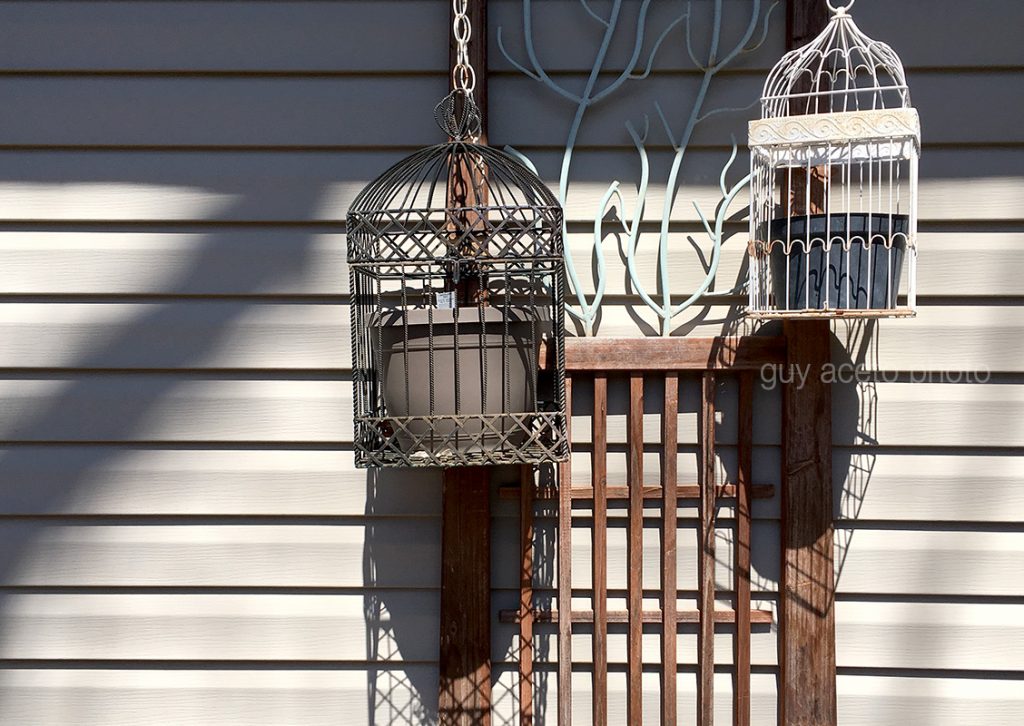
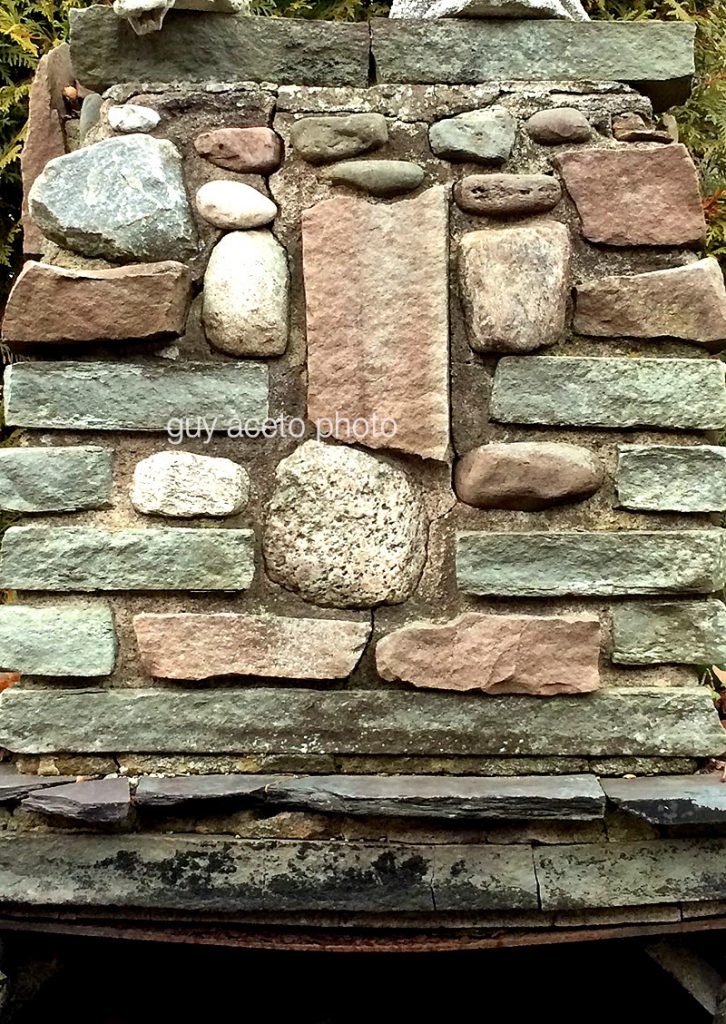
Outside is the scene of countless summertime dinners and clam bakes, a patio of carefully laid brick, a stone fireplace centerpiece. The garden delivered not only color from countless flowers, but thyme, parsley, rosemary, tomatoes, squash, eggplant … it was its own little neighborhood ecosystem.

This is the place I played, I grew, I learned the things they don’t teach in school (a terrible cliche isn’t it). Now it’s quiet. The plants need water. It feels as if someone has just left and in a minute or two, the door will open and … everything will be ok.
Soon there will be another summer, that deep green everywhere you look, the birds, those damned squirrels. It’s different now, but If I stop for a minute, I can hear it, the cacophony of another summer in this house, or a fall, or any other season. I will always carry it inside of me and I can go home whenever I want. If you don’t mind, I’m going outside to play.
My Photographic Low Point
At 282 feet below sea level Death Valley is the “low point” of my photographic career.

Driving west from a very different but still otherworldly landscape, (Las Vegas), I came over a rise that looked down into what earlier residents, the Timbisha, called the Panamint Shoshone, a long desert basin better known as Death Valley. Past scrub and dusty hills were white crusty “pans” of common salts and Borax (yes, that 20 Mule Team stuff). It has looked relatively the same since the Pleistocene era, between 10,000 to 12,000 years ago.
Driving down into the valley you could feel the temperature rising. Standing in the Badwater Basin, I looked up at a small wooden sign set into a cliff 282 feet above us that simply read “sea level” (I kept wondering, who exactly, put the sign up there?). We made our way through aptly maned places like Stovepipe Wells and Furnace Creek where in 1913 The US Weather Bureau recorded a temperature of 134 °F. As hot as it is in the summer it actually dips below freezing in winter (on average for 8 or 9 days).
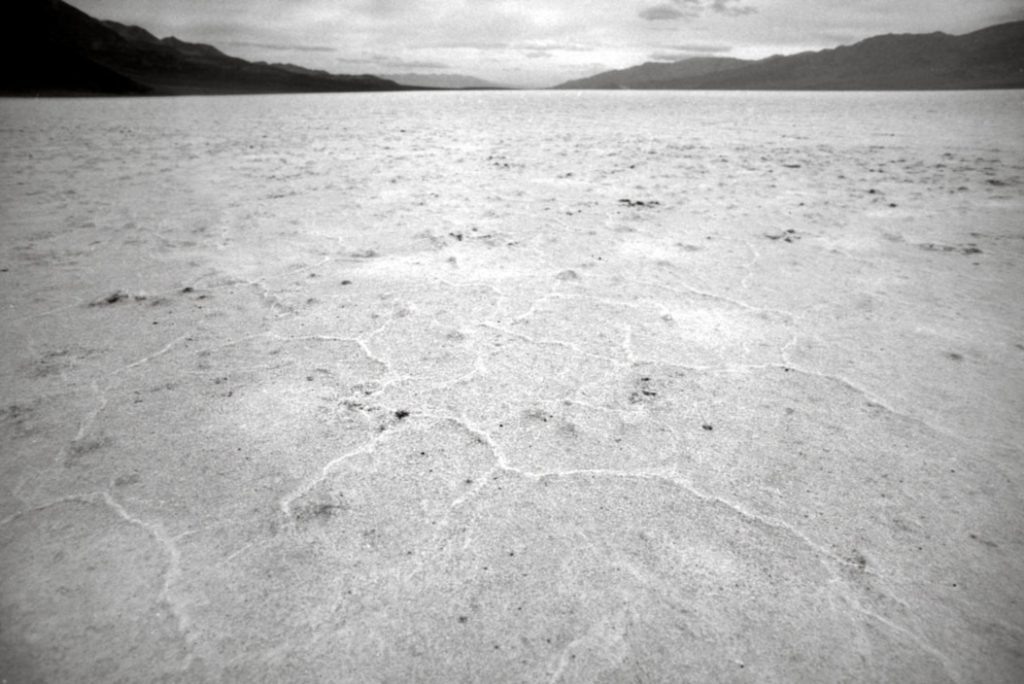
It’s an amazing place that leaves you wondering about the resilience of the plants and animals that actually live here (there are plants and animals that actually live here). To think that something here, in one of the most desolate places on earth, thrives, and grows, in spite of what you might feel are insurmountable odds. And has been doing it for a thousand years. What is it that I can learn from the creosote bush or the Death Valley pupfish?
When I was at my “lowest” what did I do? I took pictures.
My Hometown
After eighteen years of growing up in a small town in western New York, I professed my heartfelt feelings by wanting to get as far away from it as I possibly could. I can’t stress that enough, I wanted to get the hell outta dodge and put that place far, far behind me.
I have bit of a love/hate relationship with my hometown.
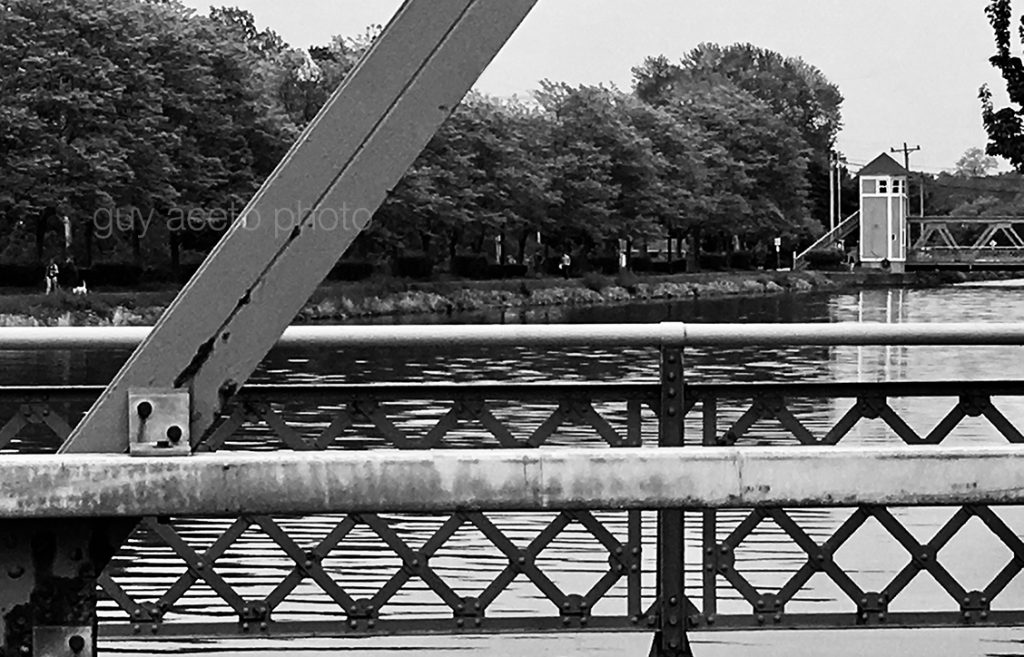
When you’re a kid, it’s all about your block, your friends, baseball in fields behind the houses, climbing that huge Ash tree next to the house that doubled as a ladder to the roof, a dip in the Erie Canal on a hot summer day. Growing up, I loved my hometown, or at least my little piece of it.

Eighteen years later and all I could think of was to put that town behind me. I swore I’d never go back … except maybe for Christmas. Christmas dinner in an Italian household is something to behold.
Yeah… I’d go back for that.
You go out, see the world and make your way. You find yourself, lose yourself and find yourself again, but your hometown is always a part of you, whether you realize it or not. No matter how annoyed you might have been with your life in this quaint little town, you find yourself wanting to go back, you need to go back. At some point all is forgiven … well … most of it anyway.
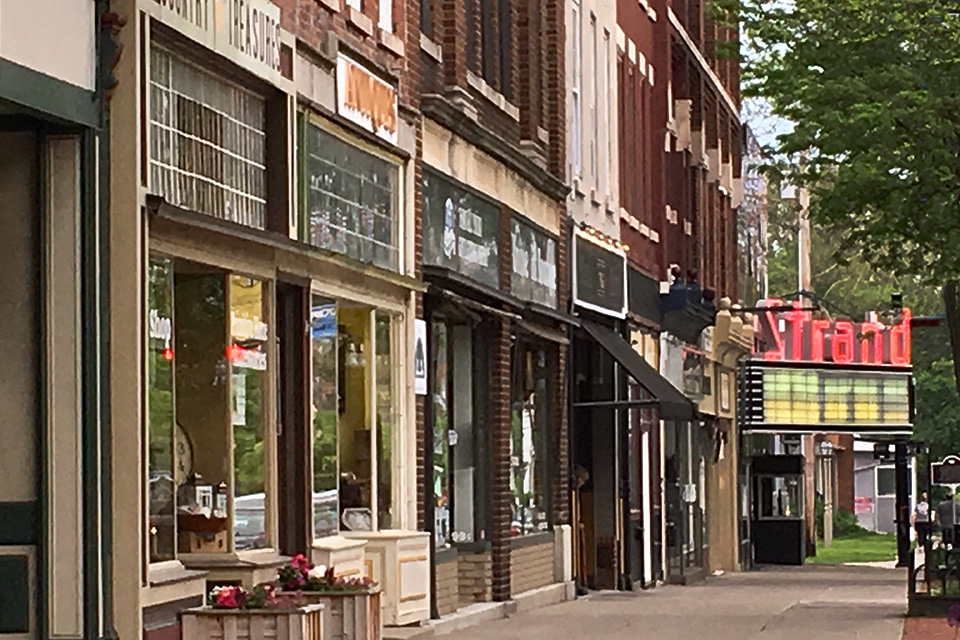
It’s a “young” little Victorian town. Young in the sense that the university brings throngs of new faces every September, that seem to double the population. It’s a college town and the students bring with them a fresh pair of eyes. They infuse the town with different views from an endless variety of backgrounds. I think that being a “townie” exposed you to a wider view of the world. It gave me that “wanderlust,” it made me want to get out there and see some of it.
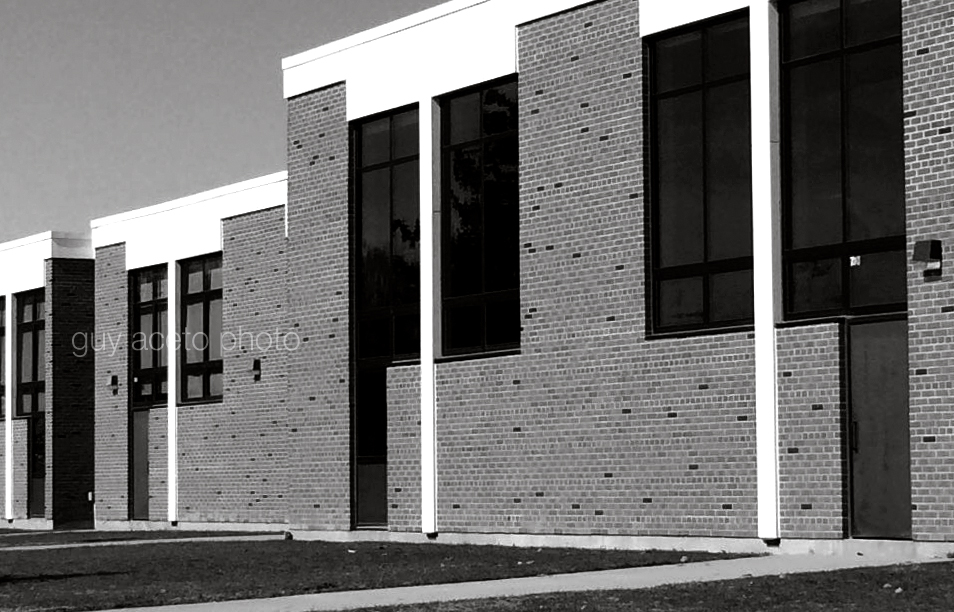
Going back years later you’re struck by the Yin and Yang. Sure… things have changed but a lot is still the same. Stately Victorian homes stand in contrast to the rigid modern architecture of the high school, or the big box department store/strip mall on the edge of town. Older neighborhoods (like the block I grew up on) are in contrast to the boxy angular apartments that fill what used to be the empty lot where you used to play.
Just when you think it’s all changed and the hometown you remember is gone, you walk past a spot that still has a memory waiting for you. It’s as if it was sitting there all this time just waiting for you to come along, pick it up and remember.
Touching a Dark Side of History
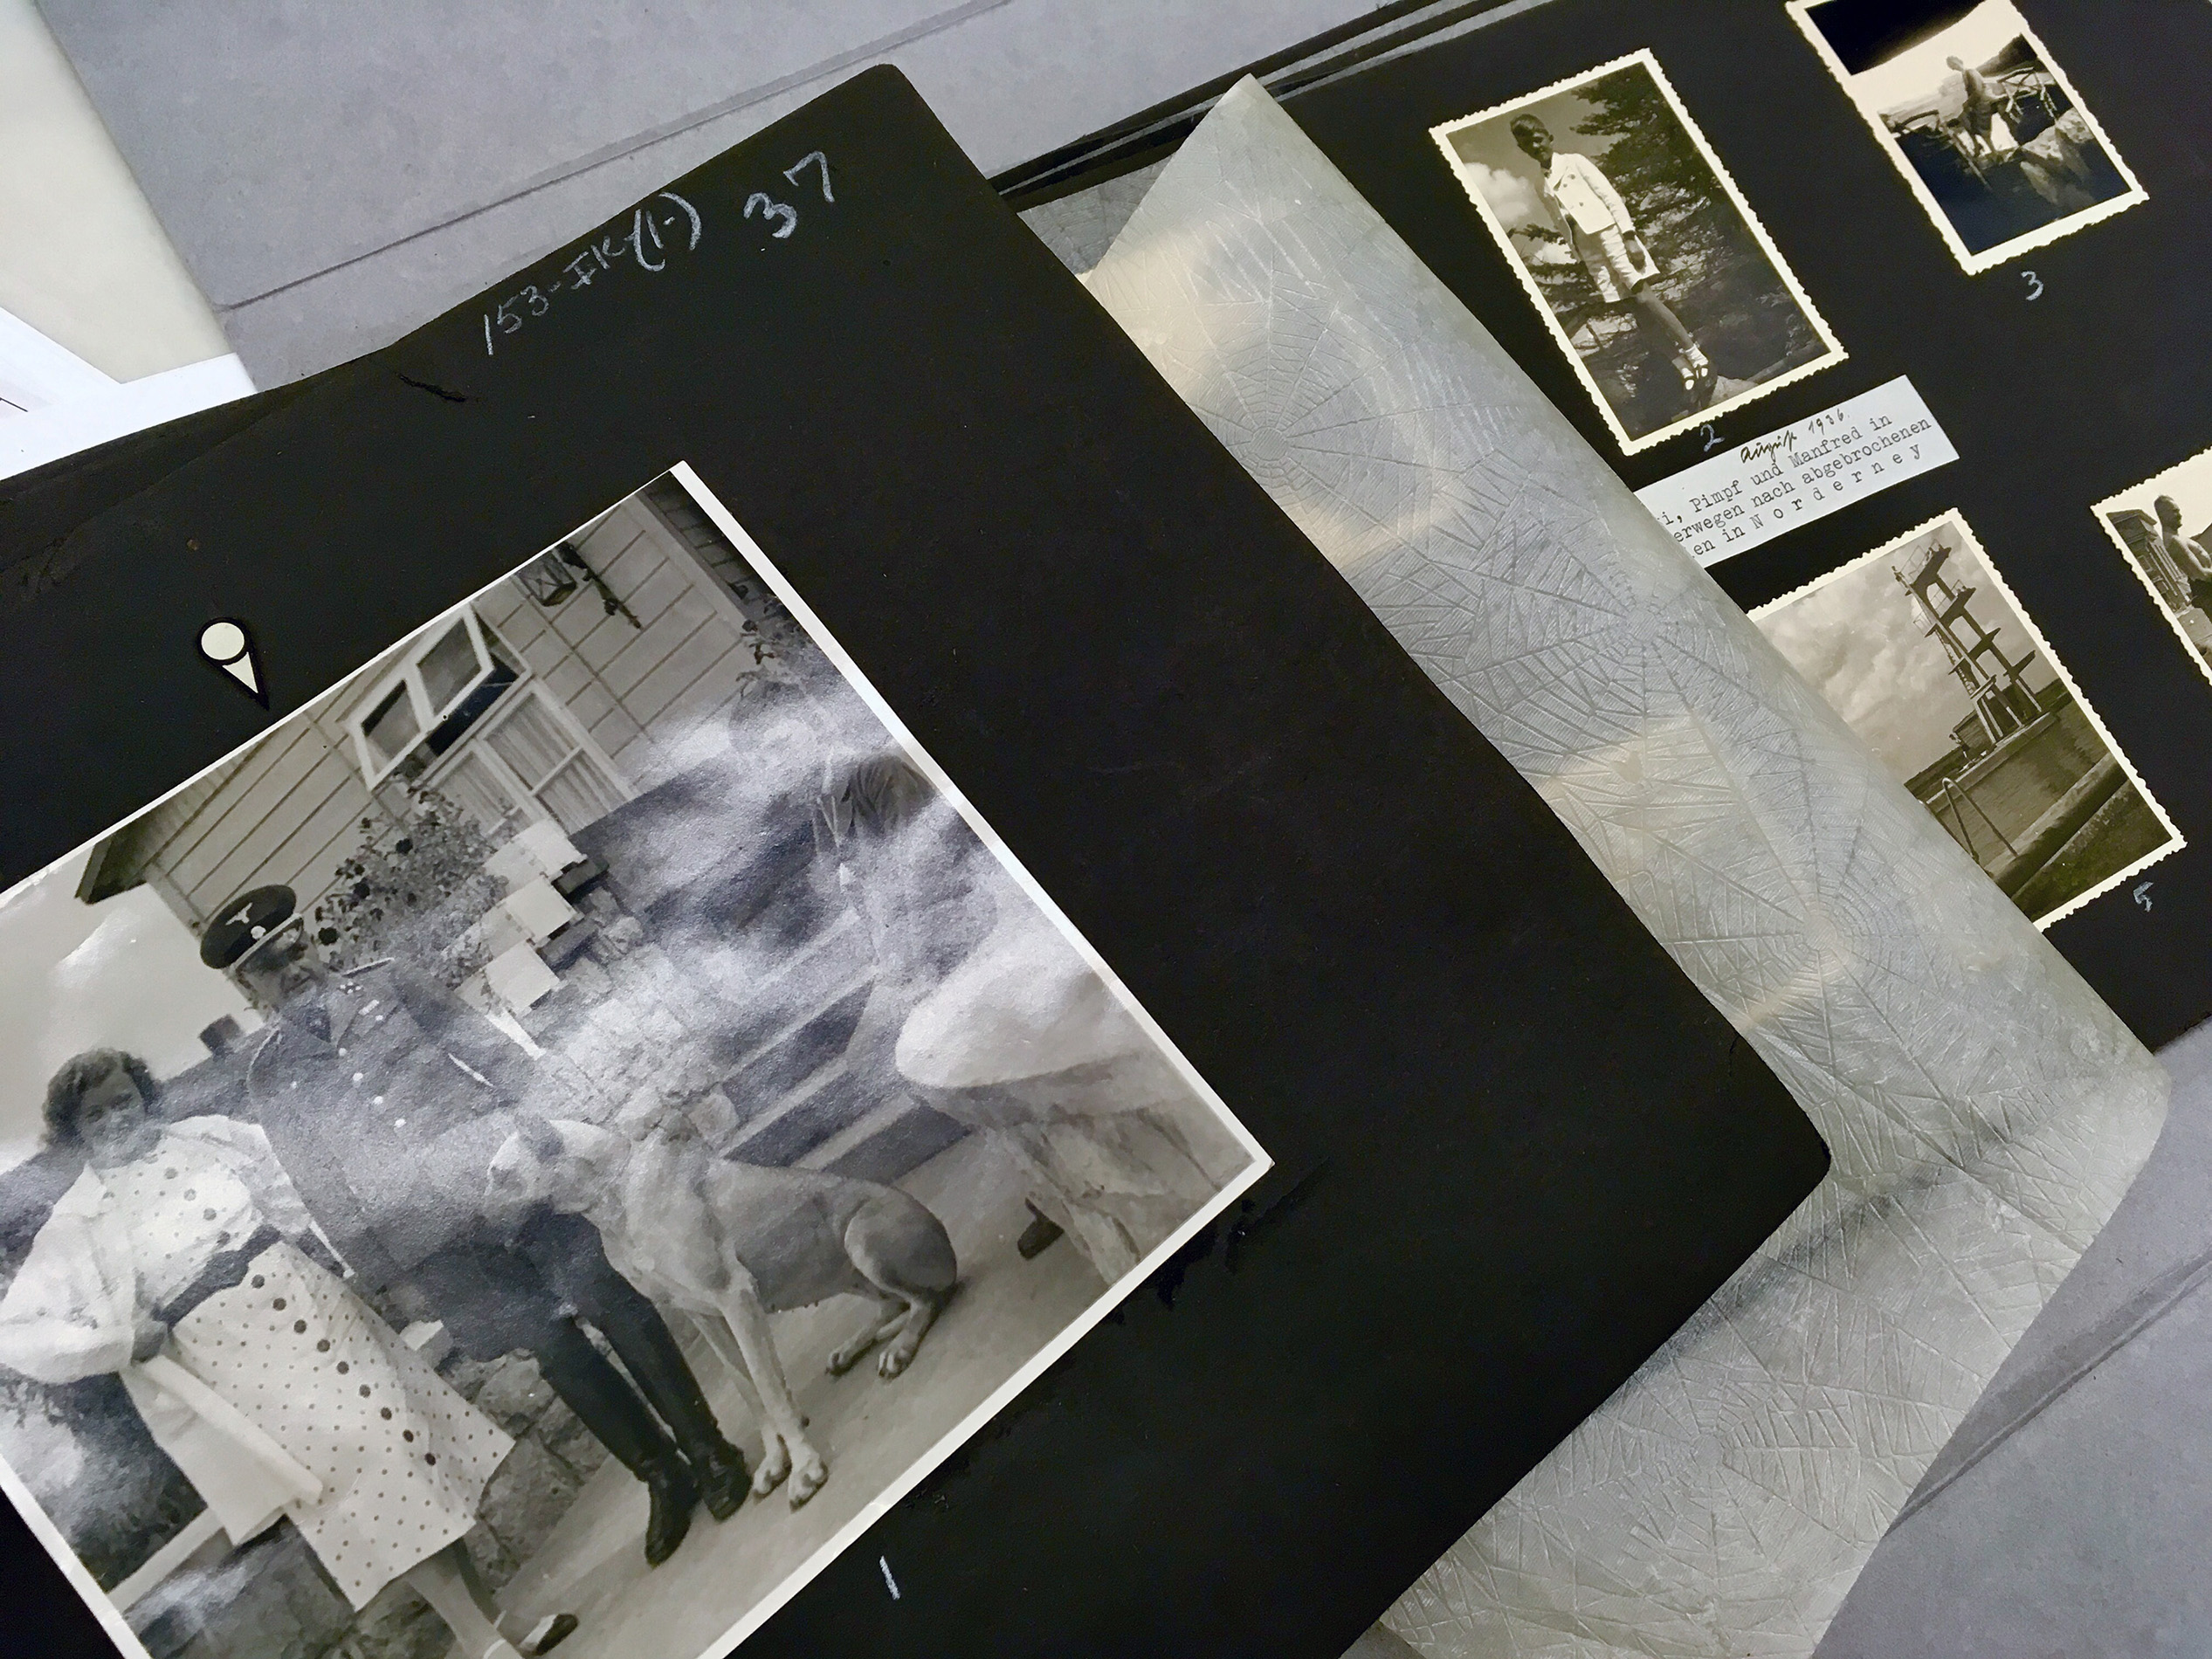
From time to time, I do photo research at the National Archives repository in College Park, Maryland. As often as I see photos I’ve seen a thousand times before, I run across things completely new to me. One of those I found especially chilling.
I was sifting through images of Germany’s Buchenwald concentration camp for an upcoming story and found myself examining the family photo album of Karl-Otto Koch, the camp’s first commandant. The album, full of mostly mundane photos, was assembled by his wife, Ilsa Koch—who became known as “The Witch of Buchenwald” (among other harsher nicknames) because of her savage treatment of prisoners at the camp. She’s notorious in particular for her collection of lampshades and other items made from human skin, often bearing a tattoo she’d spotted and taken note of on a living prisoner.
What creeped me out was that in my hands I held the album where, like so many of us, she had carefully placed her family photos—her husband, their kids, the dog: everyday behavior from someone who then went off to participate in some unthinkably gruesome and sadistic things. Imprisoned after the war for her crimes, Ilsa Koch hanged herself in her cell in September 1967.
An Old Fashioned Experiment
I’ve noticed a fun trend on “social media.” Photographers using older cameras and expired film to create images that have all the attributes of a piece of art. Who am I not to give it a shot?
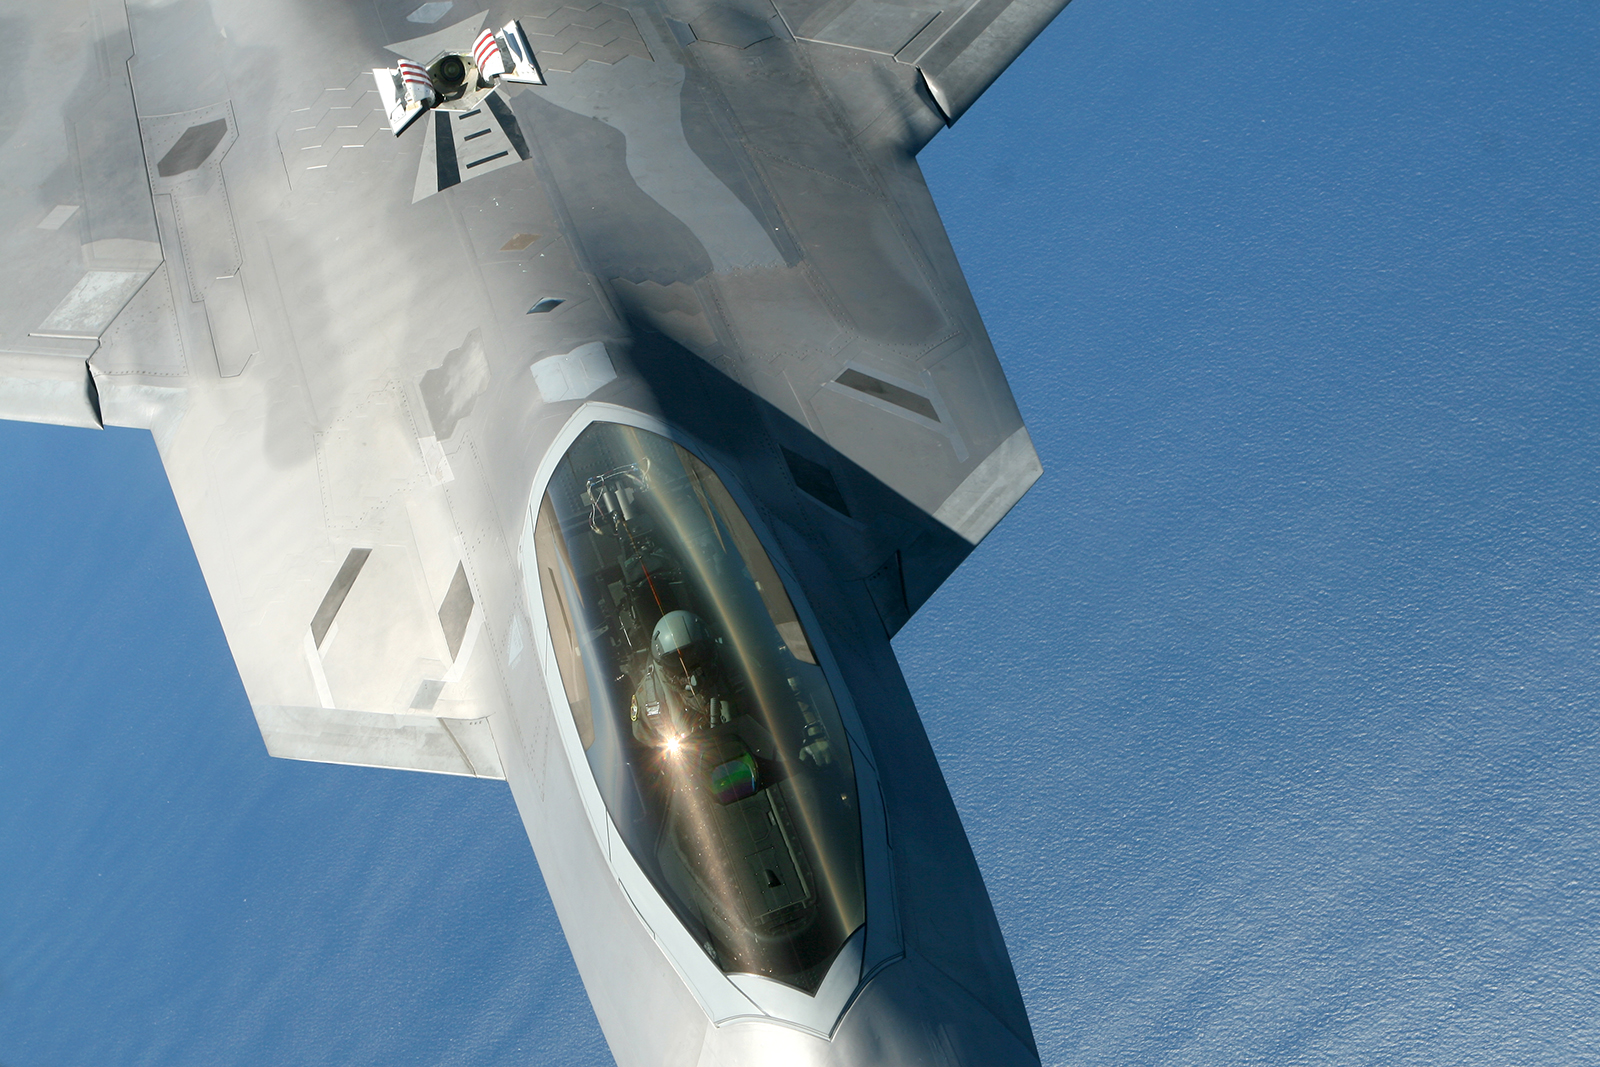
Walking Battlefields at 20,000 Feet
Belleau Wood, Antietam, Okinawa, they’re all real, physical places, you can stand there, “on this spot,” the battle was won or lost, history changed. It’s a tangible thing that, for some, puts the moment in perspective.
For others, there are no broad sunlit fields with the occasional statue or memorial. For the flier, it’s a battlefield that exists in the rarified air at 30,000 feet. It’s for the pilot, the aircrew, to invite you to their battlefield through their stories. There are no tours through their ethereal combat zone, the cockpit is much too small.
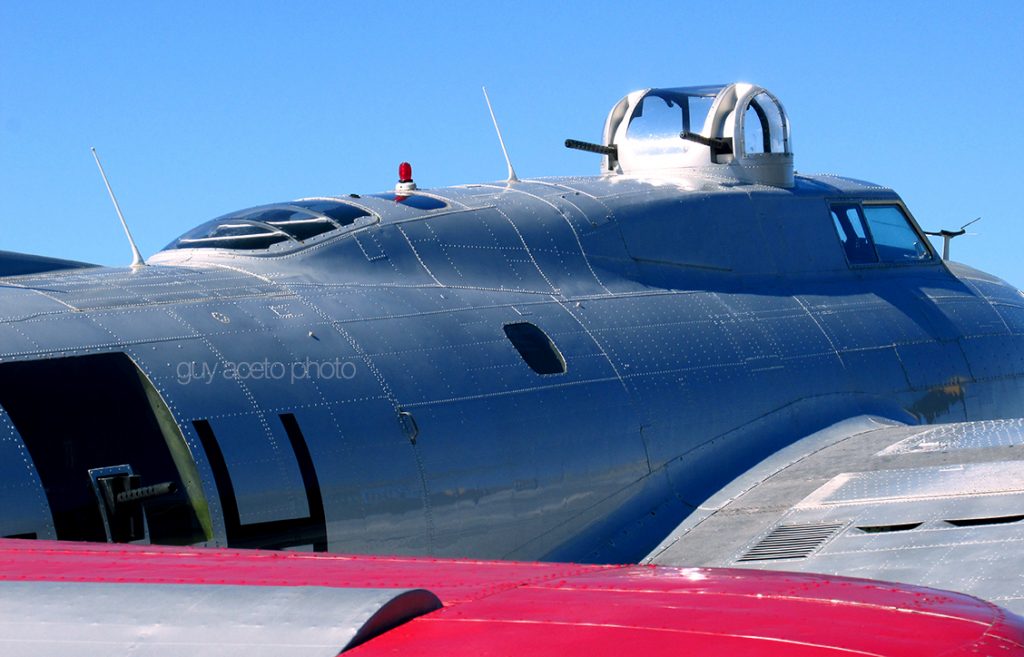
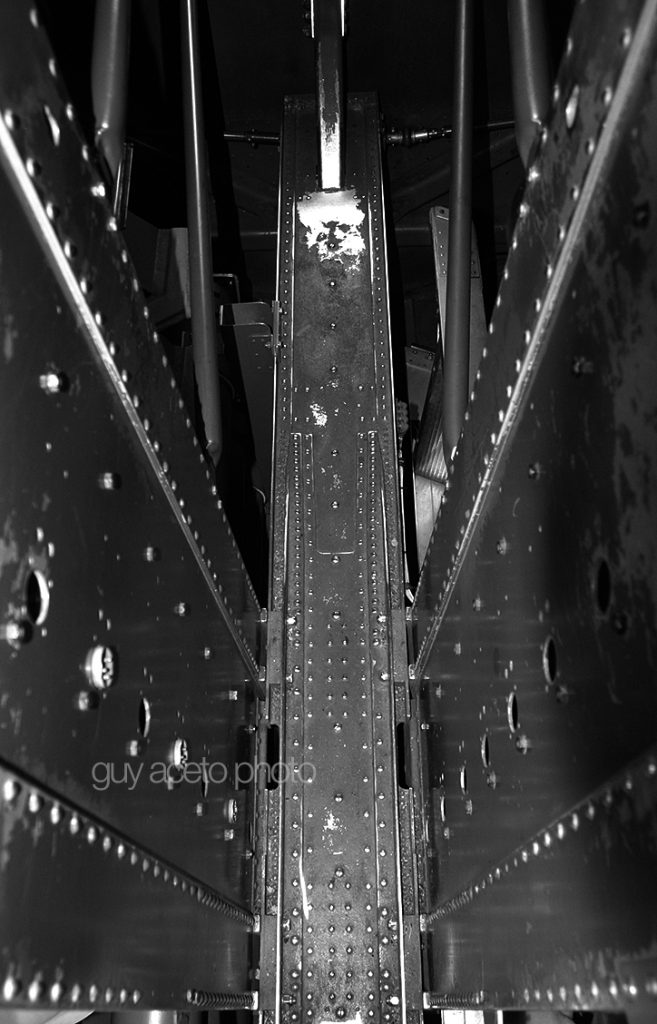
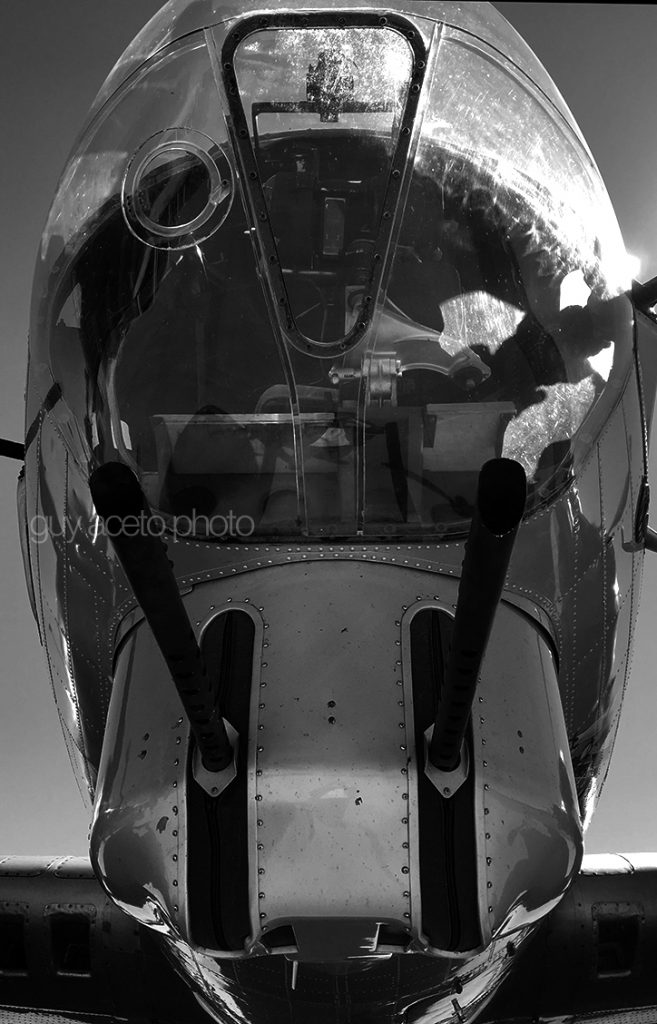
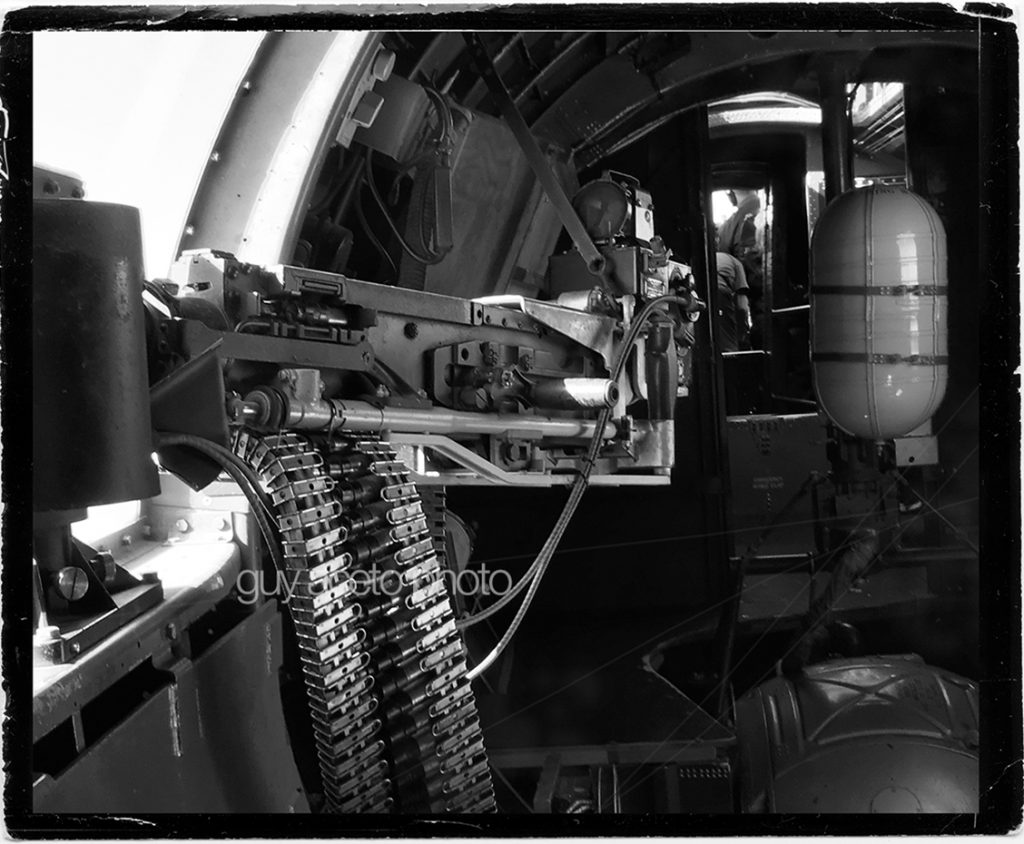
For the ten-man crew of a B-17 Flying Fortress, the “battlefield” is the limited space inside an airplane only a little over 74 feet long and clearly designed around the measurements of a skinny 19 year old kid from the Midwest, or Alabama, or Brooklyn.
Over 12,000 of these aircraft were built in the few short years between 1936 and 1945. Today, most of them are gone, shot down over Germany, lost over New Guinea, scrapped in desert boneyards. A few are in museums, a very few, have been restored and still fly today.
Over 12,000 of these aircraft were built in the few short years between 1936 and 1945. Today, most of them are gone, shot down over Germany, lost over New Guinea, scrapped in desert boneyards. A few are in museums, a very few, have been restored and still fly today.
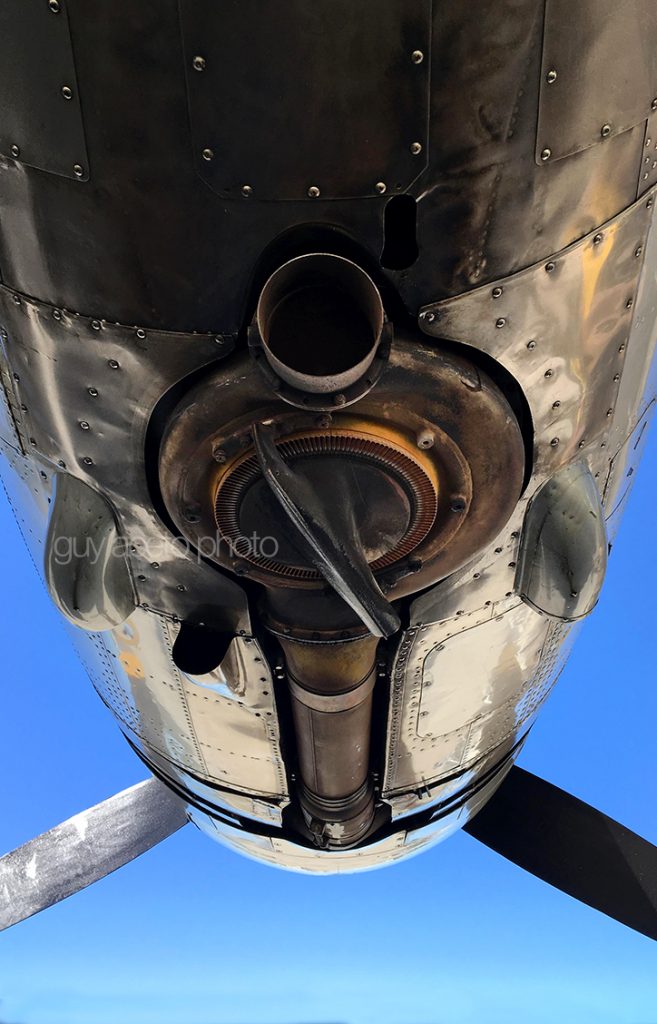
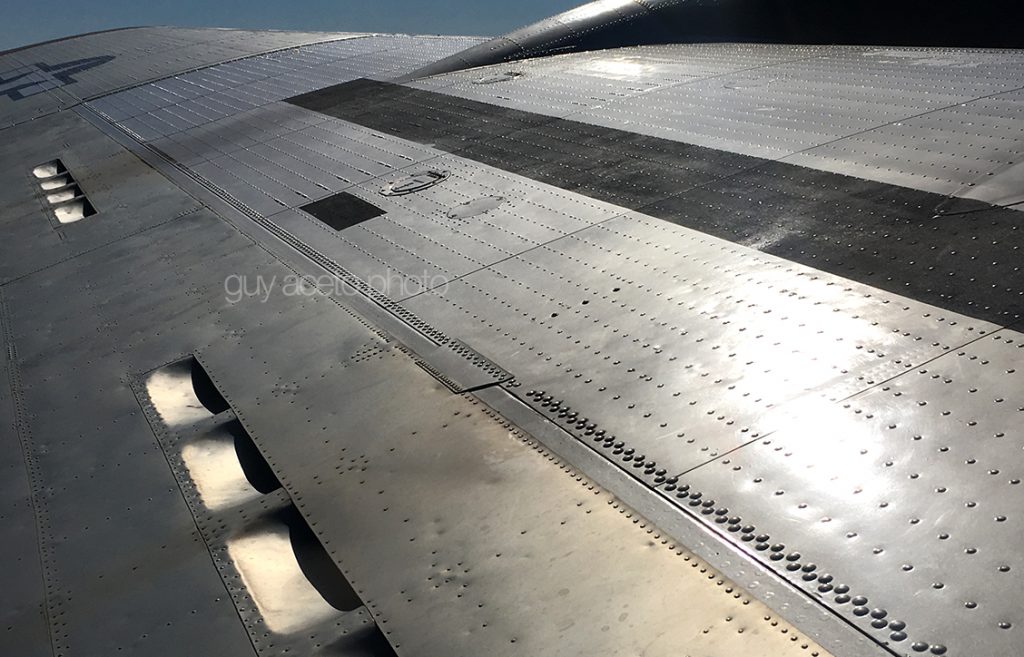
A gleaming silver B-17G dubbed Aluminum Overcast is one of the last of its kind, meticulously maintained both inside and out. It’s quiet and empty now, but in a few short hours she’ll come alive. Four huge throbbing engines, ready to take this icon of another time for one more sortie, one more “mission.”
This was the stage where an extremely violent death or a leisurely flight on a sunlit afternoon, played out some 75 years ago. A cramped, cold little battlefield, one of hundreds, spread out in carefully choreographed formations. Faded black and white photos only hint at what this scene must have looked like five miles above an angry countryside.
The airplane bounces in rough air, metal and wood clanking, groaning as if it was alive. The smell of oil, rubber and sweat make it easy to imagine the floor ankle deep in spent .50 caliber brass, the cordite smoke that stings your eyes.
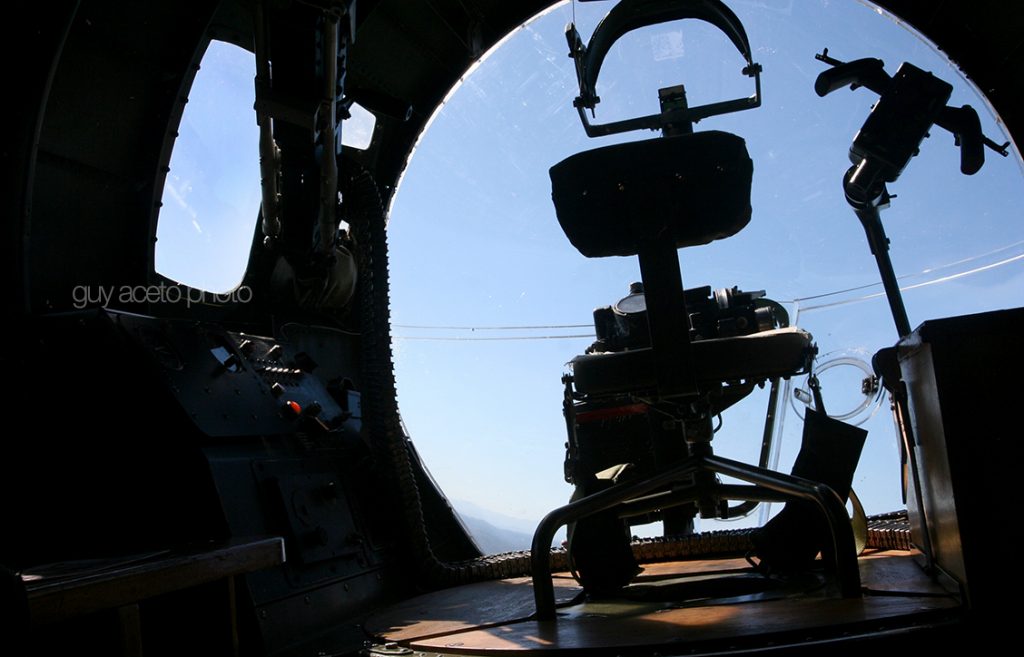
Today, sunlight pours in through windows instead of holes left by jagged pieces of flak. Your flight is an all too brief fifteen minutes or so, nowhere near the eight hours or more you might have spent on a trip in 1944.
After a moment at the waist gunner’s position, you make your way the length of the airplane, through the bomb bay, crawling into the nose of the big bomber. The bombardier sat right there, exposed. It’s like looking out of a fishbowl, the whole world around you and a Norden bombsight in front of you, a reminder of what this airplane was designed to do.
It does make you think.
Sure Didn’t See That Comin’
A world wide pandemic, infecting millions, killing hundreds of thousands, forcibly transforming society as we know it. Sounds more like a bad apocalyptic movie script, but it’s not. It’s been almost three years since it started. While the scientists dropped everything, rolled up their lab coat sleeves and went to work on a vaccine, over five million people died. A million people in. this. country. died. Many of them, alone, isolated, unable to hold a hand or say goodbye.
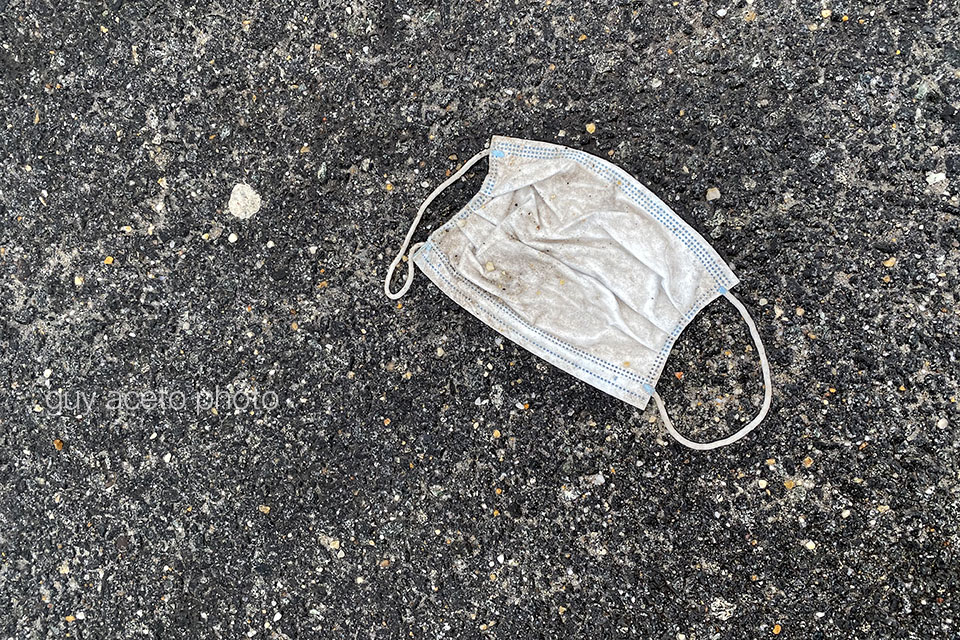
Most of us withdrew into our caves, spraying 2020’s eau d’cologne, Lysol, over all the “touch points” around the house and washed our hands raw. Gingerly heading out to a grocery store wearing a surgical mask quickly became a bizarre fashion statement.
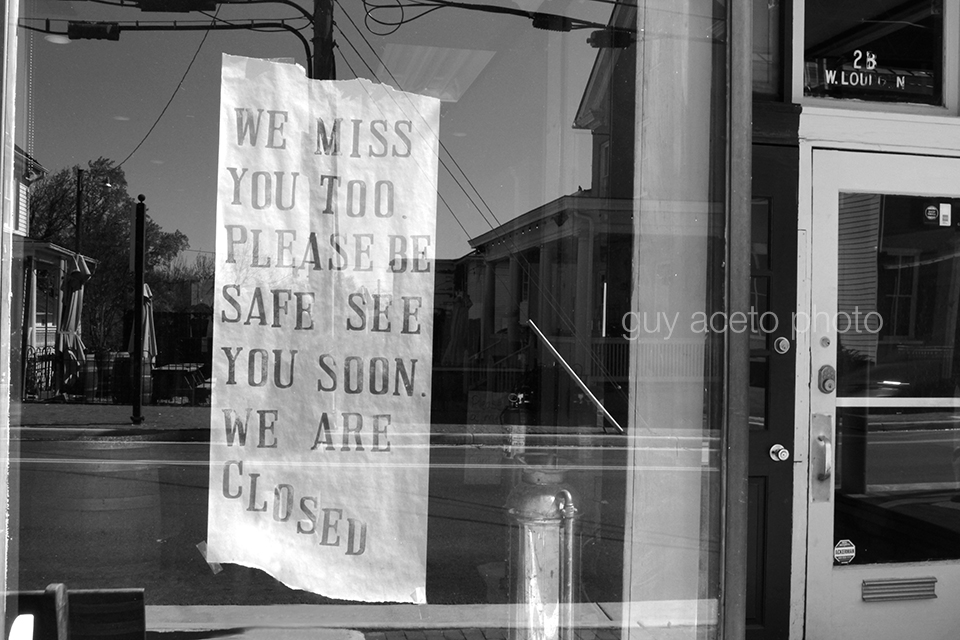
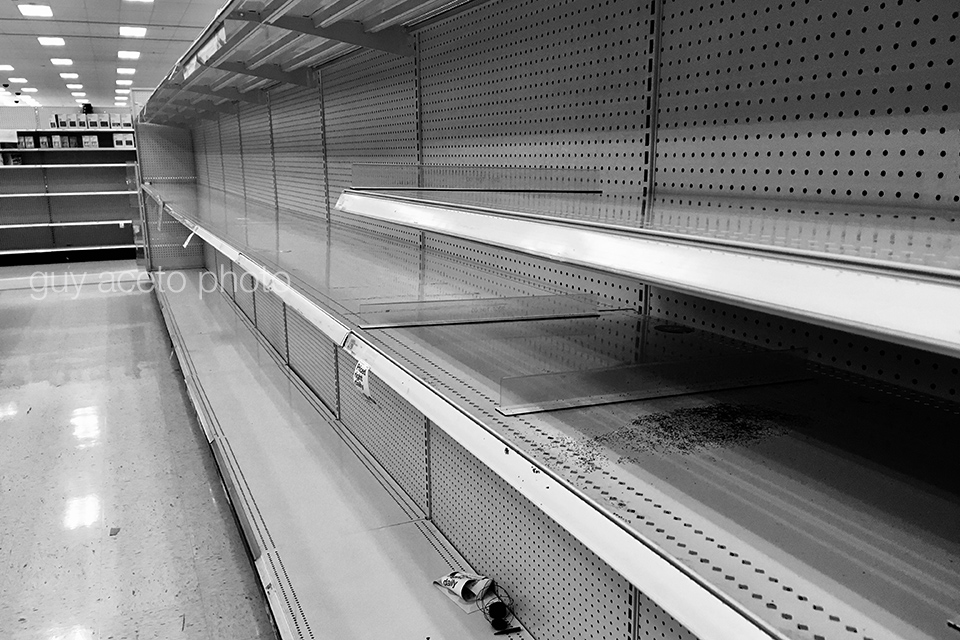
Businesses fought to survive, especially “mom and pop” stores, the local shops that are part of the fabric of small communities across the country. More than a few didn’t make it. For most of the spring and early summer, of 2020, empty storefronts and vacant parking lots became all too familiar.
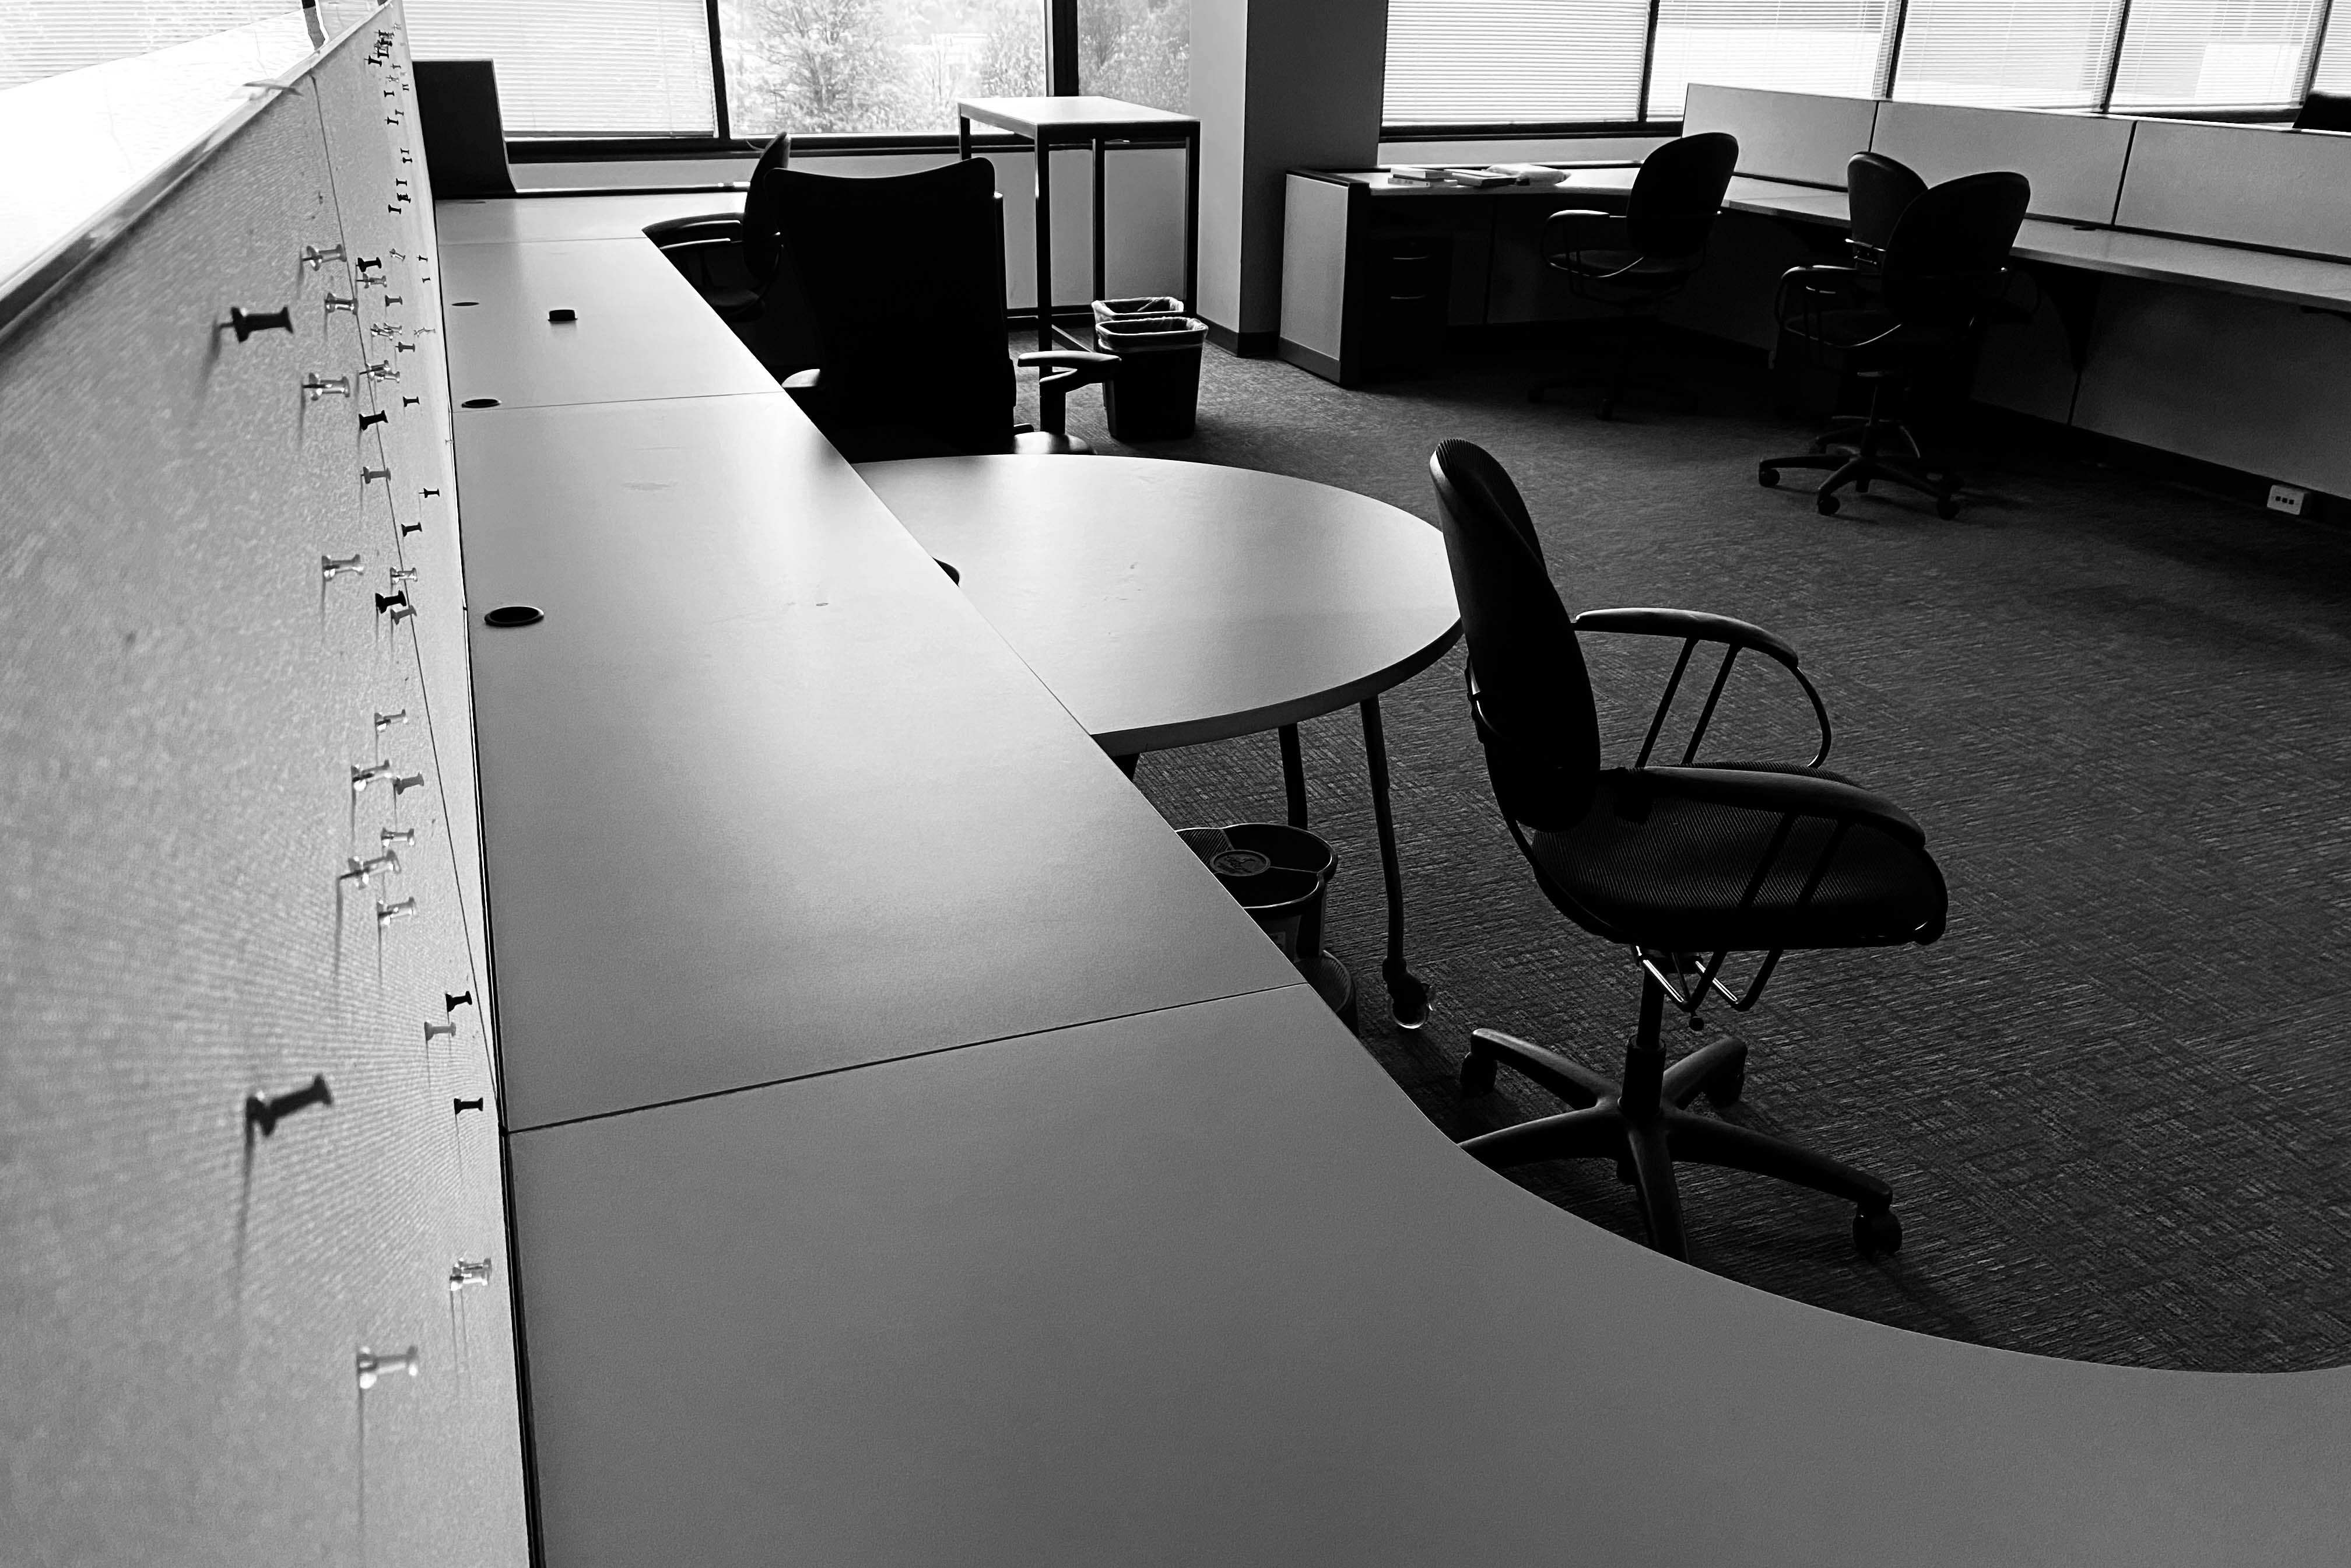
If you were lucky you packed up your computer emptied your “cube” and suddenly found yourself working at home, but not before you’ve had a few weeks of “vacation” (read “furlough”) to help you over-think your “Post-Covid” future.
Working from home or not quite “working from home,” Kids suddenly home from school. “self isolating,” “social distancing,” realizing that it’s been weeks since I’ve talked to someone who isn’t a family member, the faint smell of Clorox everywhere and washing hands … constantly.
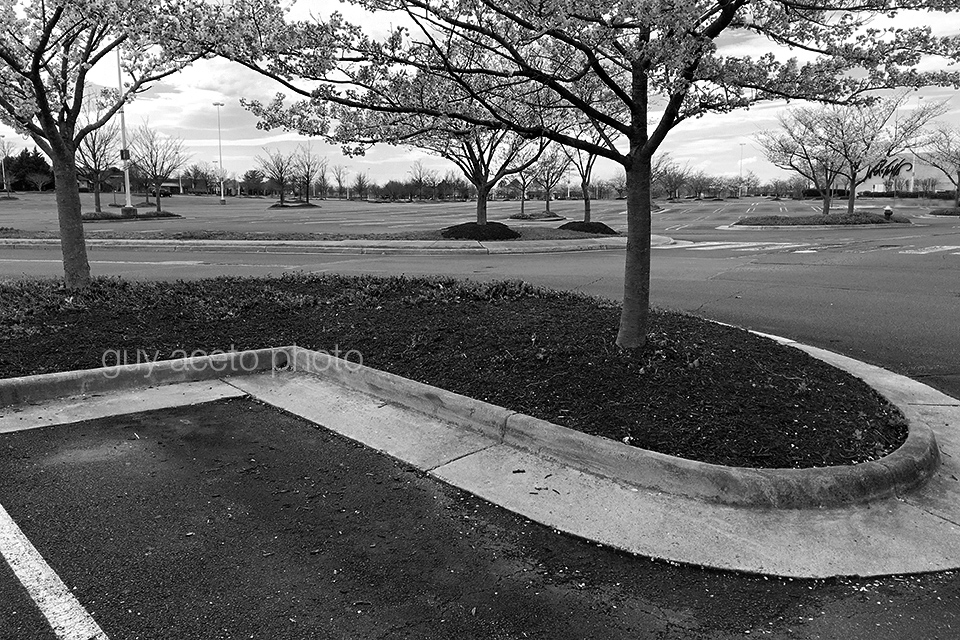
And yet … Summer comes anyway. The squirrels (your new office co-workers) still steal too much bird seed. The lawn needs mowing and I should paint the living room. Everyone takes up some sort of hobby. For some reason, sourdough bread has started trending and you can’t seem to find those little packets of yeast in the grocery store.

There is a dichotomy in the shadows of empty shelves and shuttered stores. The five star restaurant delivers now, sometimes using the same “Doordash” guy that’s delivering the pizza your neighbor ordered. Everyone’s gotta eat.
Surgical masks hung from rearview mirrors like a twisted pair of Covid-19 fuzzy dice. If you had stocked up on canned beans and tomatoes you probably also had a shelf full of disinfectant spray and Purell. Groceries delivered to your front door, Clorox wipes on nearly everything before it even comes in the house. You keep everyone at a literal “arms length.” Working remotely has you not seeing or speaking to an adult you’re not related to for days on end. The world of the introvert.
The lab coats come through and there’s a vaccine, a light at the end of the tunnel. People rush to stand in line for the shot in hopes of putting an end to over a year of all of this.
But
You knew by now there had to be a “but.”
Yes, there’s a “but” at the end of that sentence.
For reasons I still don’t understand, a good sized part of the population decided that they just didn’t want to participate. Poor leadership, short attention span, cynicism with a dash of mistrust. Suddenly it’s not a health care issue, somehow it’s a political one. Cries of repression (But, I don’t want to wear a mask, it’s uncomfortable and it restricts my “freedom”). Inane conspiracy theories (tiny chips in the vaccine will control you or allow you to be followed, or it’s the mark of satan or worse yet … it’ll turn you into a Democrat). You can’t make this shit up.
Trust and civility seems to evaporate causing every disagreement into “us vs. them” shouting matches and amazingly, even death threats. Not much of a middle ground.
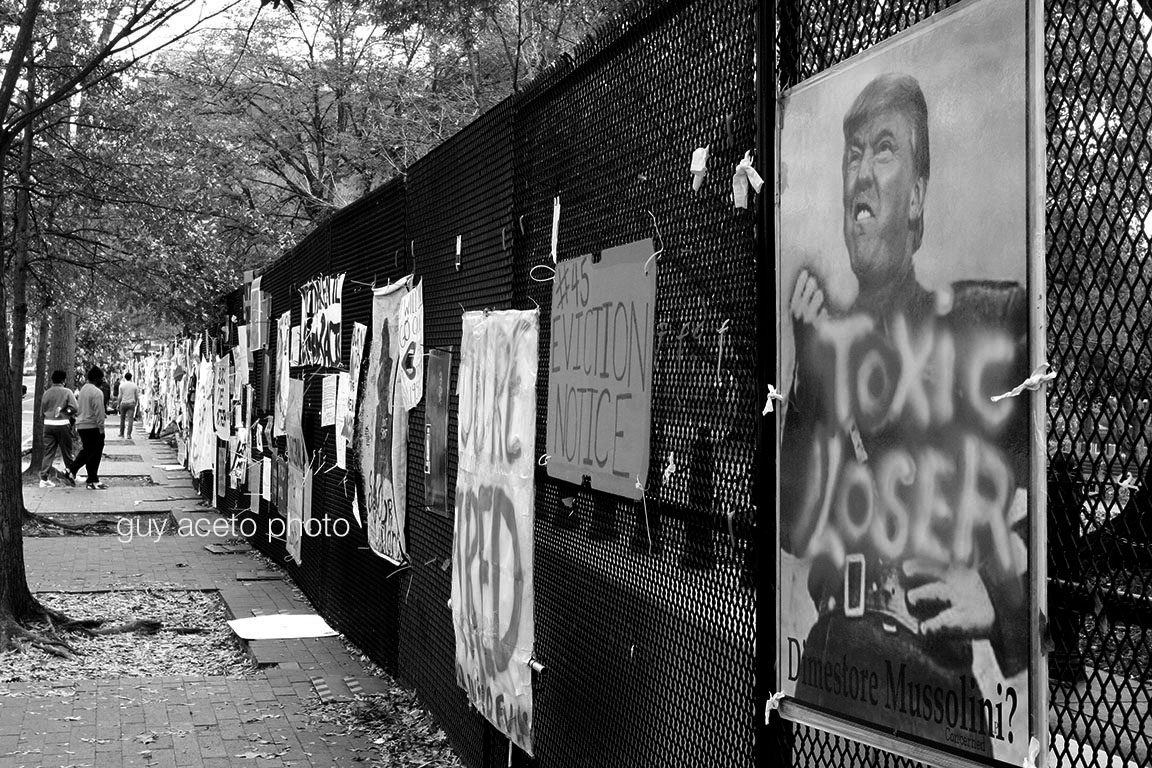
There’s an election and the people who lost decide that they didn’t, insidious plots, conspiracies, and amazingly, and what amounts to an attempted coup follows. Who was responsible for turning the country into some bizarre banana republic remains to be seen, accountability vs. the possibility that it could all happen again just feeds the contentious arguments among people who used to be friends or even family members.
Militia groups bent on tearing down the government. They used to hold up in the far flung parts of Montana and North Dakota but they see the opportunity and come out of hiding to take point in the coup, joined by an angry mob that wants to burn it down and start over in their own exclusive image.
What happens next. is anyone’s guess on a daily basis. To be continued.
Right in Your Own Backyard
I drove past it nearly every day
There are things in our own backyard that deserve a second look, or even a third. Guilty of taking the same route to work and then back home. Muscle memory and a travel mug full of coffee and before you know it you’ve clocked in and almost as quickly, returned home. I missed it again.
This time I finally stopped and took a longer look.
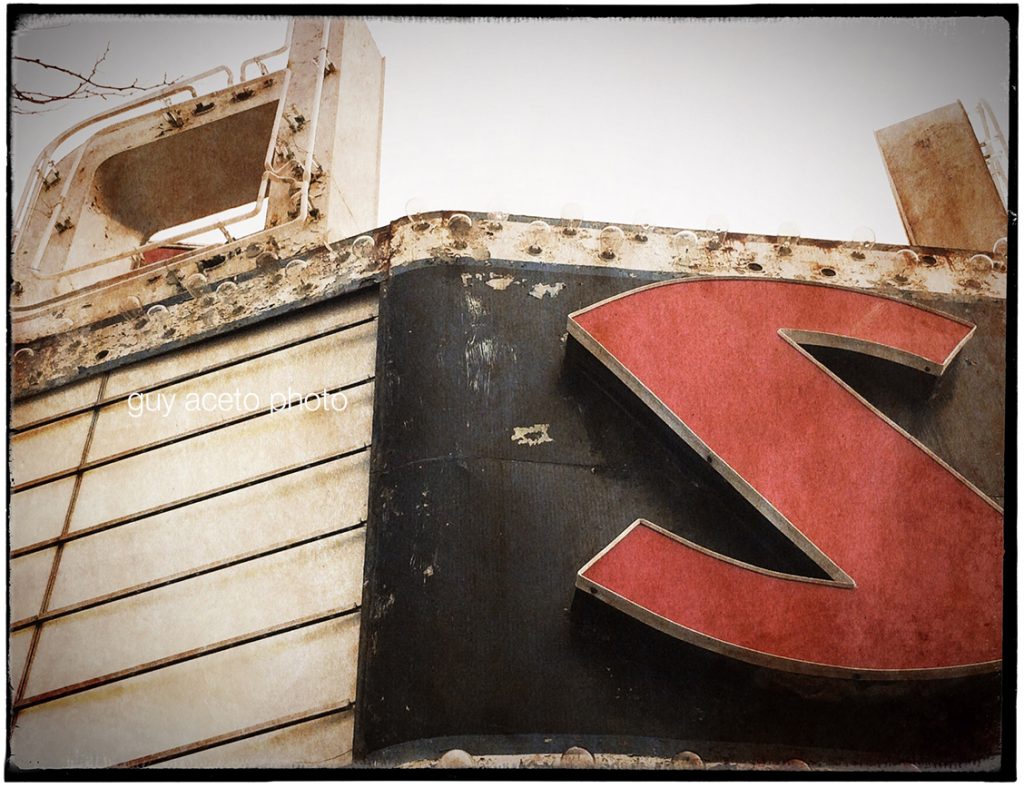
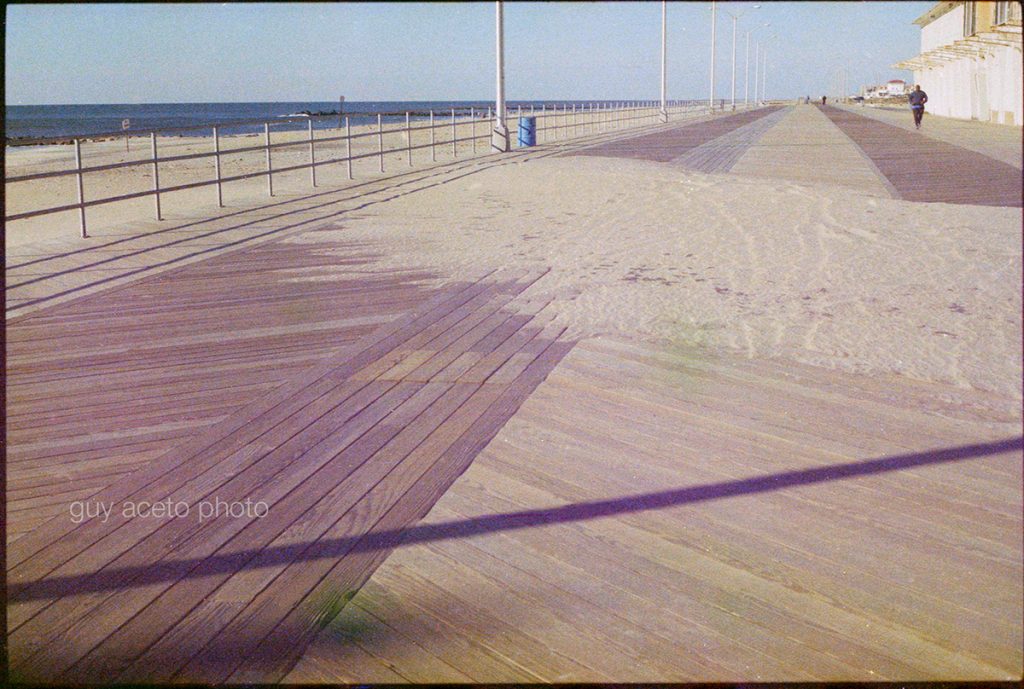
Asbury Park, New Jersey
This town clinks like empty beer bottles at 2AM
Bleeds like steam from old pipes
Crackles like the final 5 seconds of an old LP
— graffiti left inside the old casino building
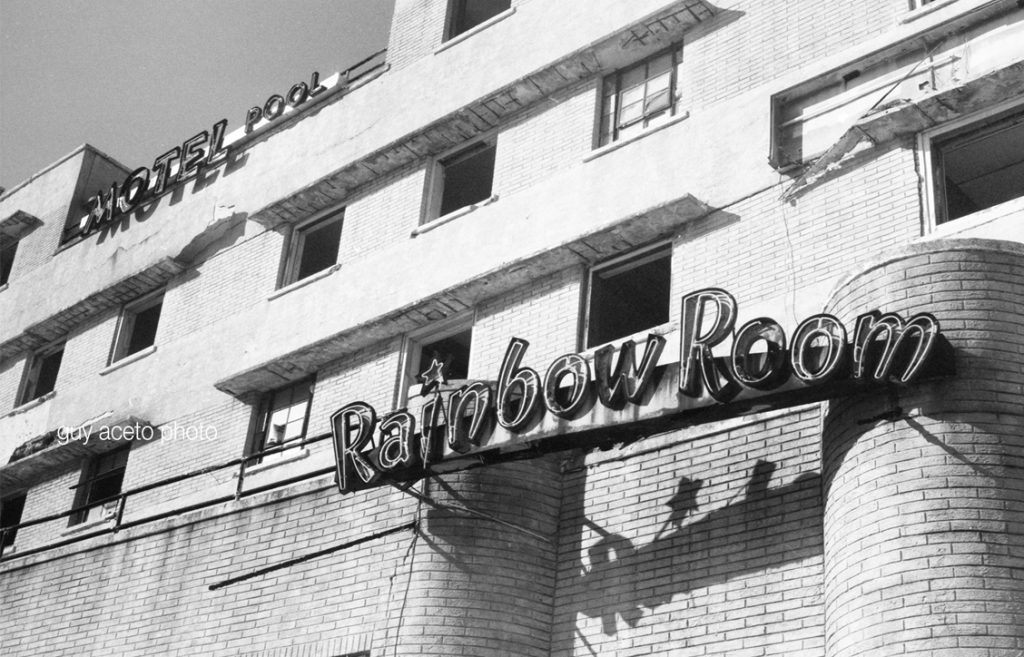
It’s good to see the town crawling back into the light, a busy boardwalk full of shoppers, bistros with hungry patrons and a beach full of coconut scented sunbathers. It sure wasn’t that way the first time I walked down Kingsley Avenue.
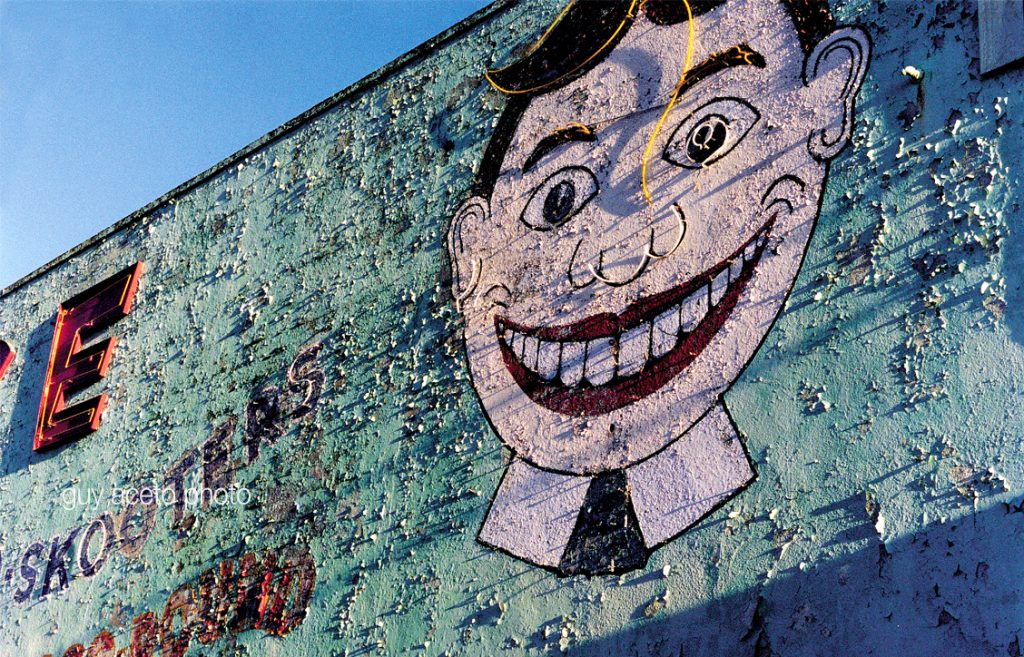
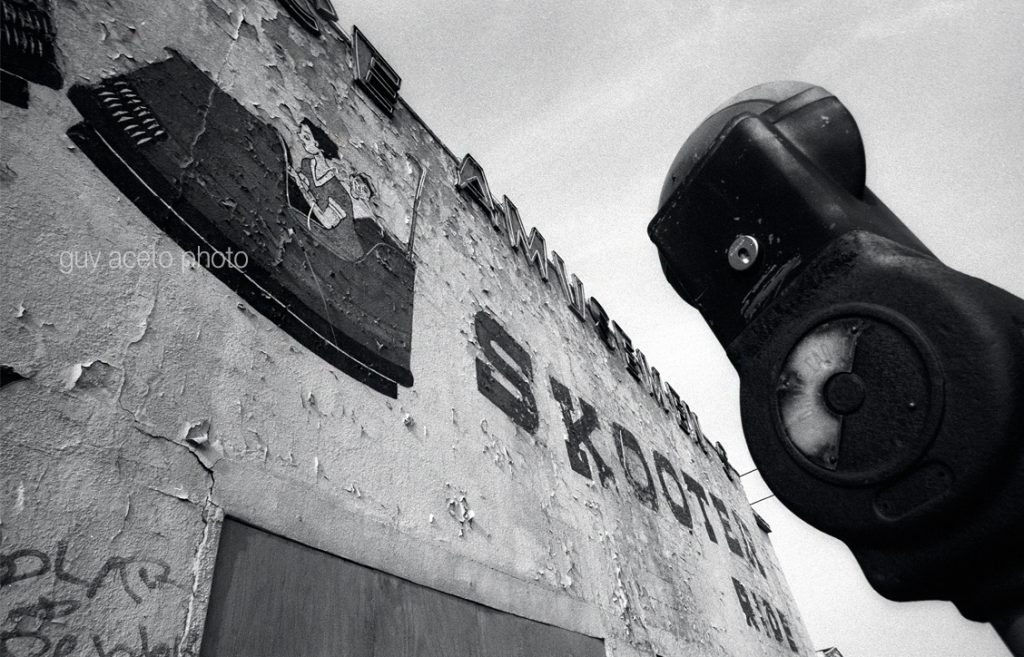
Frankly, I found the decay oddly appealing, the colors and textures of rust and cracked plaster, the remains of Tillie’s neon hanging off his brow like some sort of disheveled cowlick. The last couple of local watering holes were only proof that there was some sort of life left in this windswept no-mans-land between Kingsley and Ocean avenues.
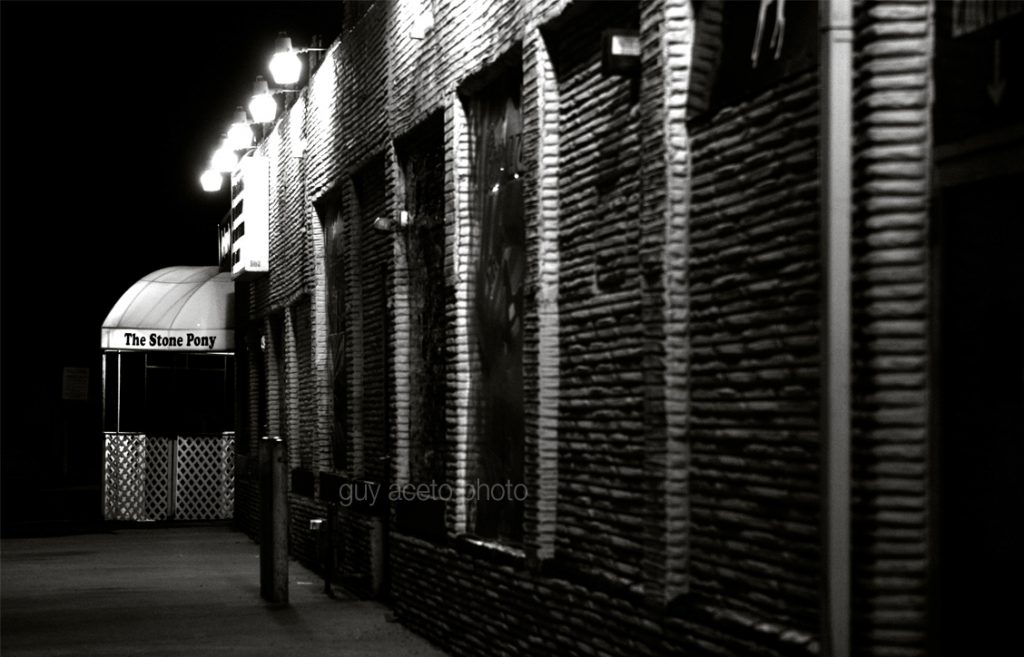
I went to the shore that first time, on a cold, dank President’s Day weekend. The chill and spitting surf just added to the ambiance, fitting perfectly with the Springsteen lyrics swirling in my head. I was there as a rock and roll pilgrim, waiting for the next quartet of local kids to mount the stage at the Stone Pony and take the world by storm.
They didn’t get to the promised land that night, they did play hard and gave it all they had. Musical pilgrims themselves, I’m sure they tried to soak in a little bit of the luck that their heros might have left behind.
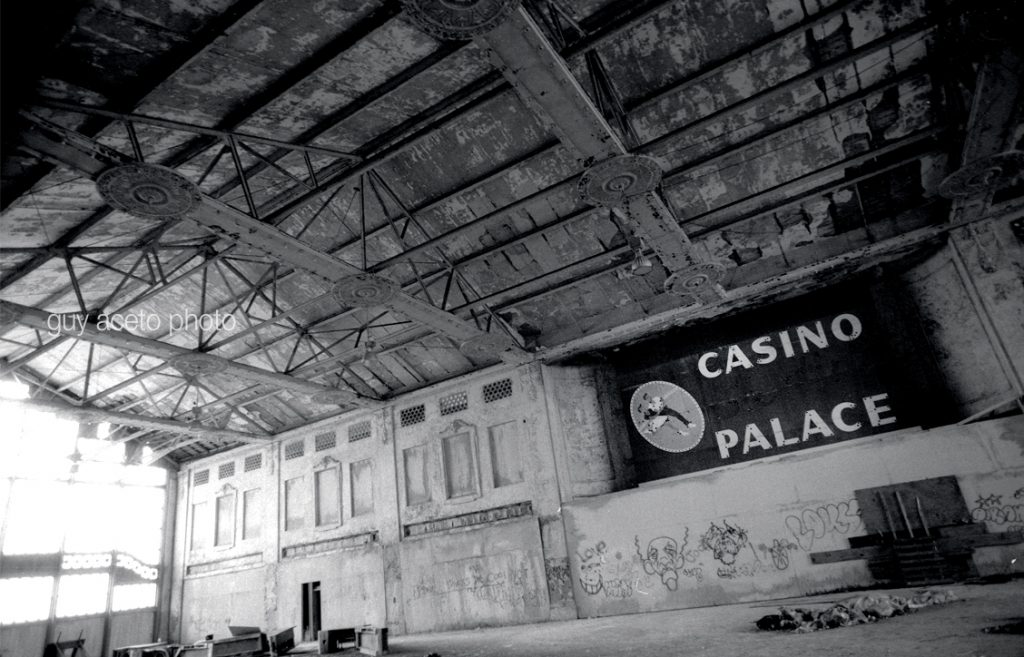
Convention Hall is still a beautiful building even if it does seem to be one step ahead of a wrecking ball. Faint echos of roller derbys and Led Zeppelin still drift through the halls. At the opposite end of the beach the bookend to the hall is all but gone. The Palace, a ghost— The Casino, a mere tunnel between Asbury and it’s more “proper” victorian cousin, Ocean Grove.
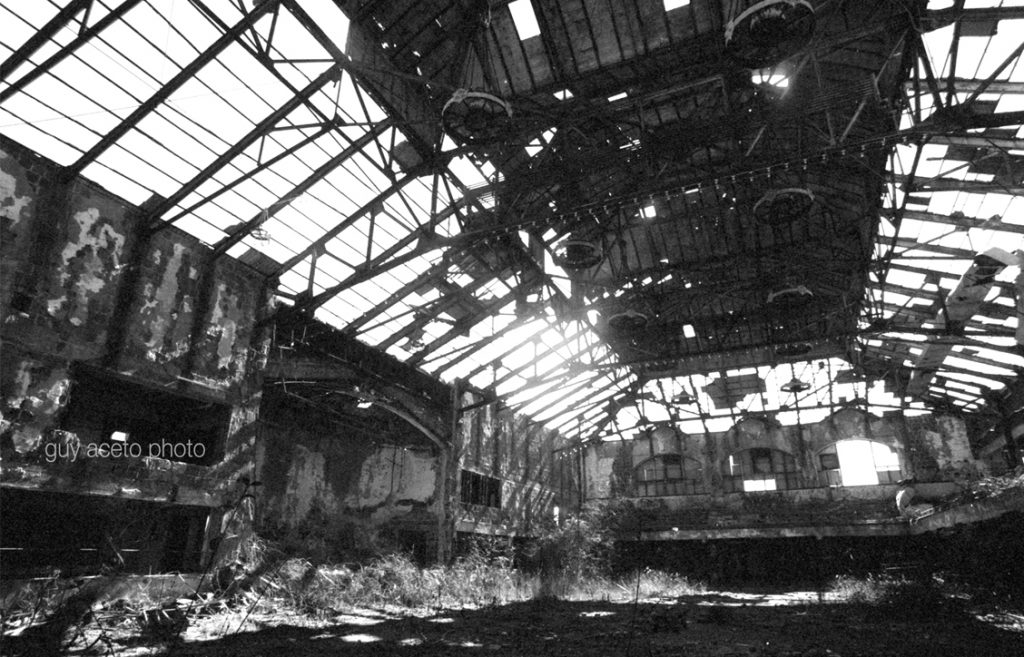

I’m glad I saw it when I did. Carefully crawling through chain link fences and around sheets of plywood to find my shot, stumbling across some curious graffiti. For a little while, on those cold empty days and nights, Asbury Park was for me, more than “that place Springsteen sings about,” it was quite literally, each and every word off the first three records.
Watching that First Step
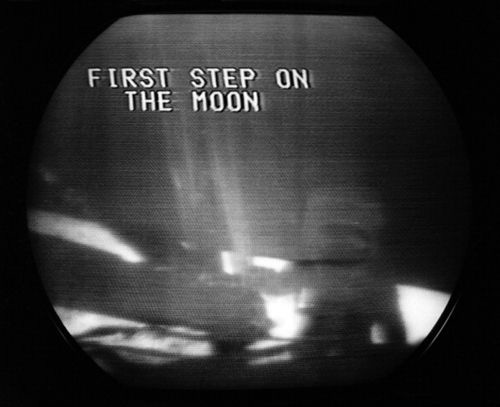
I didn’t know what Bob Gibson’s ERA was (it was 2.18, I had to look it up) but I sure knew that Neil Armstrong was from someplace called Wapakoneta, Ohio and that he had flown the X-15. I knew that Buzz Aldrin had shot down two MiGs in Korea. They were my heros (are, actually). I had a favorite Mercury astronaut and I cried as if my dog had died when I found out Gus Grissom had been killed in the Apollo 1 fire along with Roger Chaffee and Ed White (he had walked in space on Gemini 4, take that Bob Gibson.)
So it’s no surprise that I got to stay up late along with the rest of the world that night, trying to figure out how to take a photo off the TV screen with my dad in the middle of the living room floor. Then, after taking the roll of film to the Fotomat, we kept our fingers crossed for a few days, hoping that the photo would come out. That’s how I remember that night, the whole mission in fact, and every one after that, right up until December 19, 1972 when Apollo 17 splashed into the Pacific, the last of the Apollo missions.