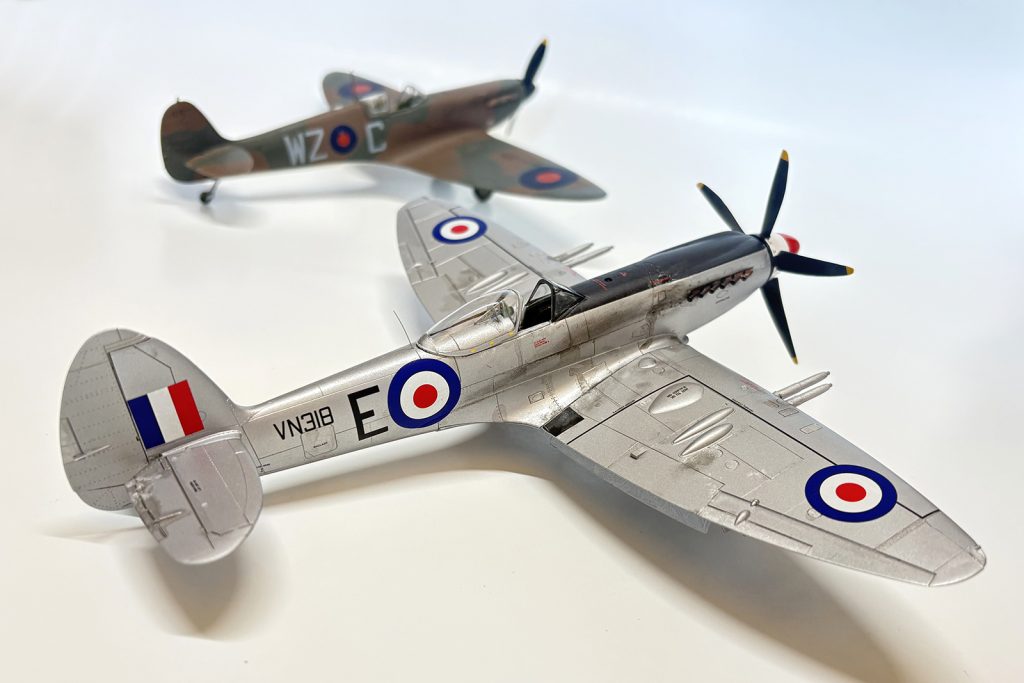
Of course … there’s room on the display shelf. There’s always room for a sleek, silver Griffon powered bookend to any Spitfire collection.
An Iconic Fighter Finali
I’ve been a fan of Reginald Mitchell’s masterpiece since I first saw the fighter chase “movie Messerschmitts” across the big screen of my local theater when the film The Battle of Britain was released in 1968 … I was hooked. I read everything I could on the airplane and the summer of 1940 that cemented the fighter’s reputation in aviation history.
The first model kit I ever built was an Airfix Spitfire. It came in a bag, hanging off a display in a corner of a sporting goods store in the little town I grew up in. A lot of my lawn mowing money wound up at that place. Since then a Spitfire has been a regular on my workbench.
The Kit
Airfix released their 1/48 scale version of the Spitfire’s final mark in 1996. This boxing of the kit was came out in 2018 with markings for two fighters, one of them, a Mk. 24 was the final operational version of the legendary fighter. The kit holds up well and was reboxed in 2008 by the Czech company Eduard. Sticklers for accuracy, I always thought it was a bit of compliment to the Airfix kit.
The Fighter Pilot’s Office
Starting with the cockpit, the first order of business is the “gray-greenish” color for the interior bracing and bulkheads. The seat should be painted a reddish brown to mimic the color of the early form of “plastic” it was made from. Actually the seat was made out of paper, a synthetic resin bonded paper that was pressed into molds much the same way composite carbon fiber would be today.
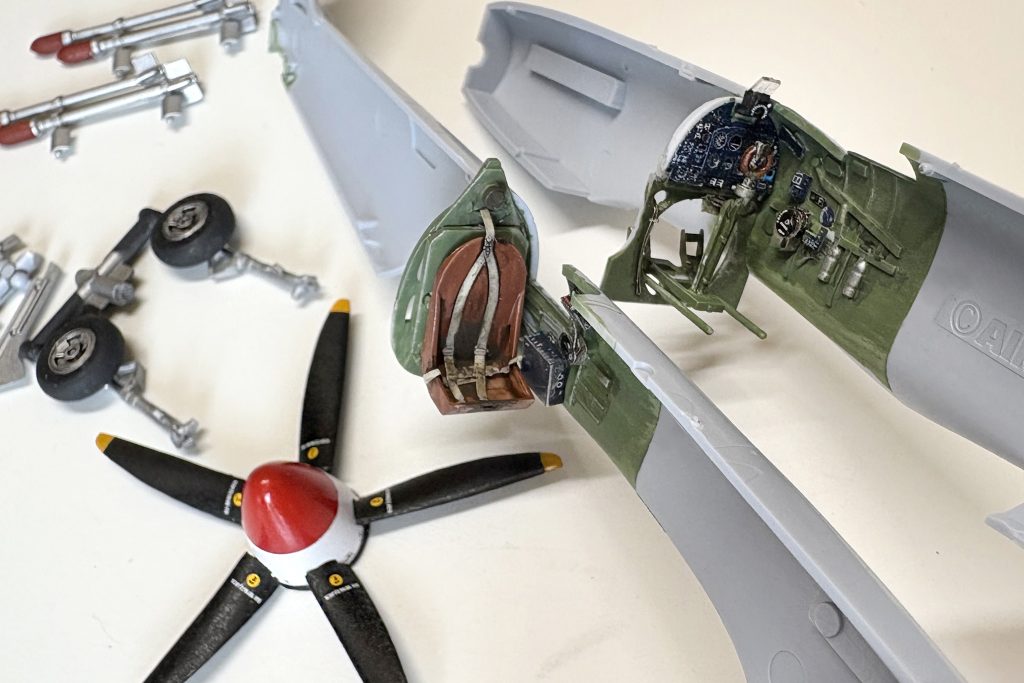
An etched metal detail set from Eduard (FE 924) will be a nice addition, and while I won’t add every tiny metal shard to the kit, the seat harness, control panel and a number of other bits will add interest to the heart of this Spitfire.
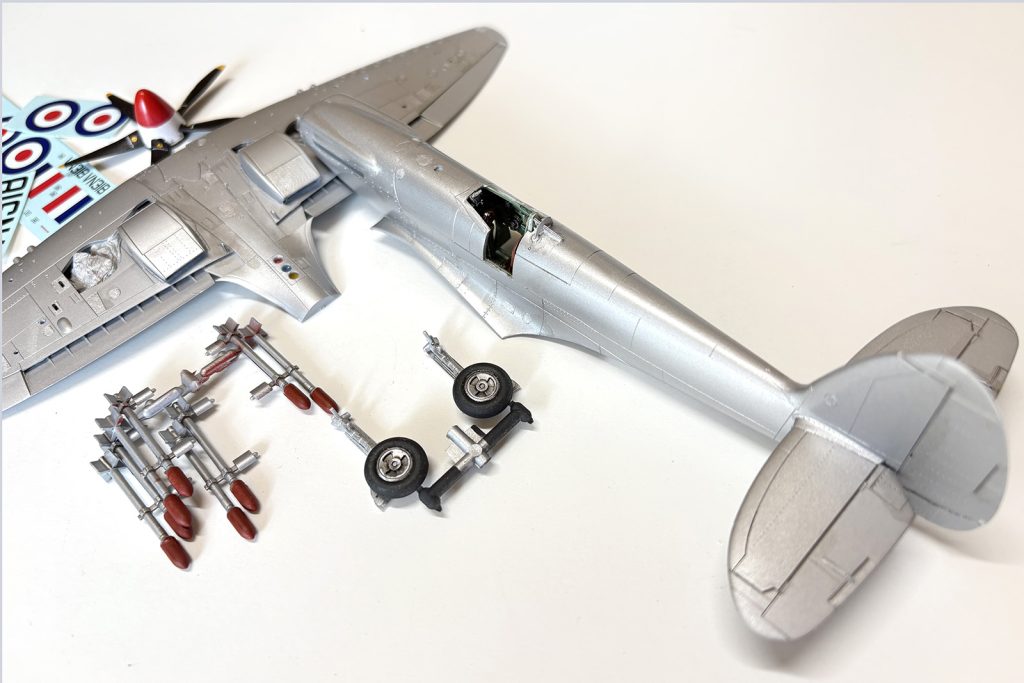
While the cockpit assemblies dry, start on the five bladed propeller (black with yellow tips) and the landing gear (aluminum with “rubber black” for the tires).
Next, assemble the wing, adding the two radiators and drilling out the holes for the set of eight air-to-ground rockets. Set the completed wing aside.
Natural Camouflage
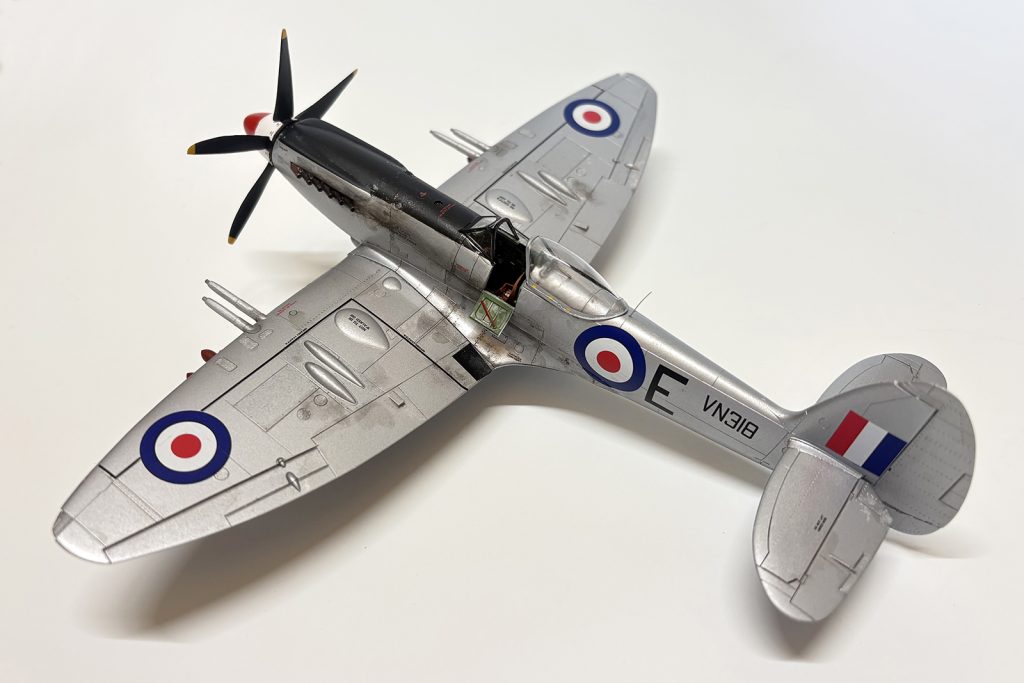
Since the scheme of this fighter is an overall natural metal, alternating tone and hue will help make the airplane a little less … silver. After an initial coat of gloss Aluminum, take some time to mask off panels to paint a darker shade. Using a gloss or matt varnish along with some subtle weathering will give a bit of interest to the finish.
Cement the completed pilot’s seat and control panel to the fuselage sides then bring the halves together. Here is where most modelers have a bone to pick with Airfix, adding the bulges for the Griffon engine’s rocker covers. The shape isn’t quite correct and it’s the one part of the model where your patience, modeling putty and sandpaper will be sorely tested. An aftermarket replacement piece is available for those more adept at the surgery it’ll take to fix the problem. In this case, putty and patience will have to do.
Attach the completed wing to the fuselage and add the horizontal stabilizers. Mask off the forward anti-glare panel and paint the area matt black, that’s the extent of the camouflage on this aircraft.
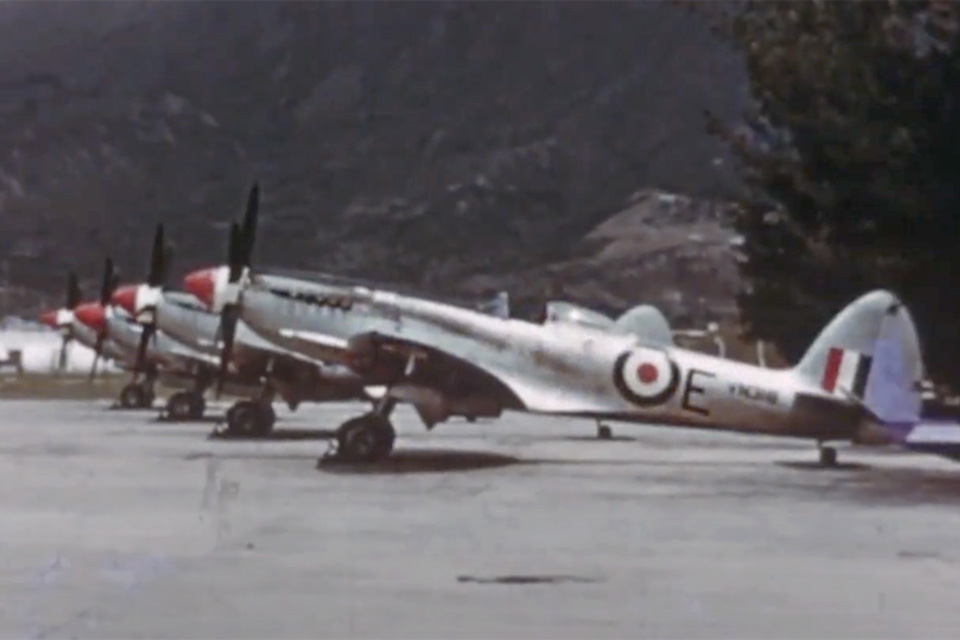
VN 318 “E” for Elizabeth
Time to start adding markings, stencils and the weathering one would see on an aircraft working in the heat and humidity of Hong Kong. The Royal Hong Kong Auxiliary Air Force was one of the last units to operate the Spitfire and this one belonged to No. 80 Squadron. This aircraft, VN318 was part of a fly past in April 1955 to celebrate the queen’s birthday. That flight would come to be one of the final sorties, ending more than 17 years of Spitfires in Royal Air Force service.
Eight 60 lb. armor piercing rockets round out the armament of this fighter. Silver with reddish brown warheads add plenty of interest under those broad elliptical wings.
Finally, attach the completed landing gear, outer gear doors and pitot tube. Use white glue to attach the two piece canopy and a bit of stretched sprue for the ventral antenna just behind the cockpit.
With the “tiny bits” taken care of this late model Spitfire is ready for the display shelf. Placed next to an early Spitfire Mk.I, the two fighters span the history of one of the most iconic aircraft of World War II.