What? Another Spitfire?

Of course … there’s room on the display shelf. There’s always room for a sleek, silver Griffon powered bookend to any Spitfire collection.
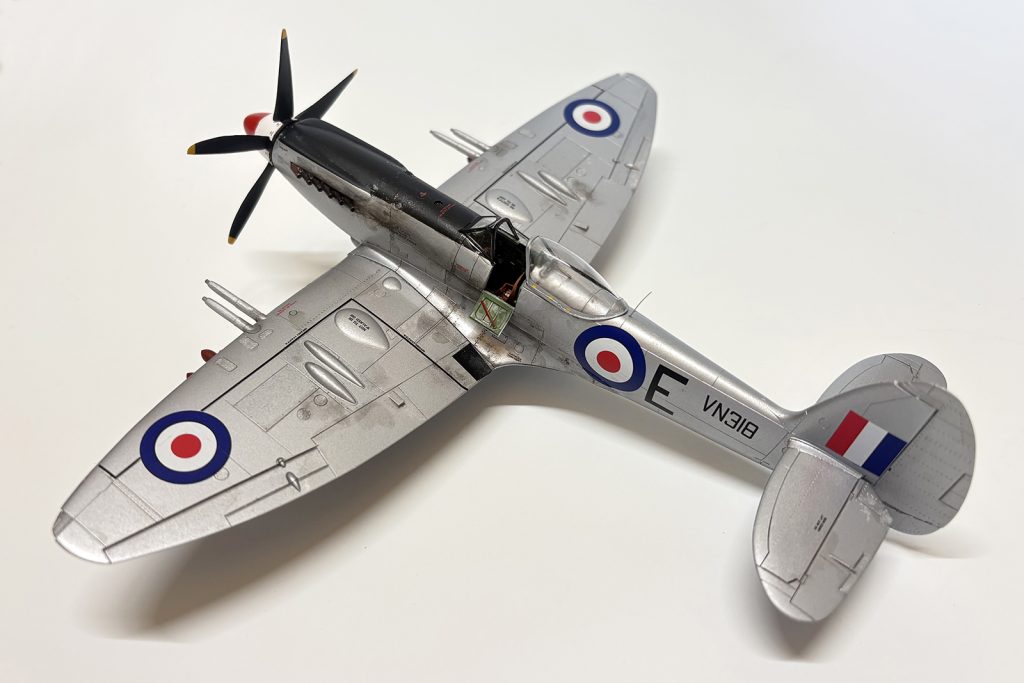
Five bladed prop and bubble canopy aside, the lines of Mitchell’s original design are unmistakable.

An Iconic Fighter Finali

I’ve been a fan of Reginald Mitchell’s masterpiece since I first saw the fighter chase “movie Messerschmitts” across the big screen of my local theater when the film The Battle of Britain was released in 1968 … I was hooked. I read everything I could on the airplane and the summer of 1940 that cemented the fighter’s reputation in aviation history.

The first model kit I ever built was an Airfix Spitfire. It came in a bag, hanging off a display in a corner of a sporting goods store in the little town I grew up in. A lot of my lawn mowing money wound up at that place. Since then a Spitfire has been a regular on my workbench. 

The Kit

Airfix released their 1/48 scale version of the Spitfire’s final mark in 1996. This boxing of the kit was came out in 2018 with markings for two fighters, one of them, a Mk. 24 was the final operational version of the legendary fighter. The kit holds up well and was reboxed in 2008 by the Czech company Eduard. Sticklers for accuracy, I always thought it was a bit of compliment to the Airfix kit.

The Fighter Pilot’s Office

Starting with the cockpit, the first order of business is the “gray-greenish” color for the interior bracing and bulkheads. The seat should be painted a reddish brown to mimic the color of the early form of “plastic” it was made from. Actually the seat was made out of paper, a synthetic resin bonded paper that was pressed into molds much the same way composite carbon fiber would be today.
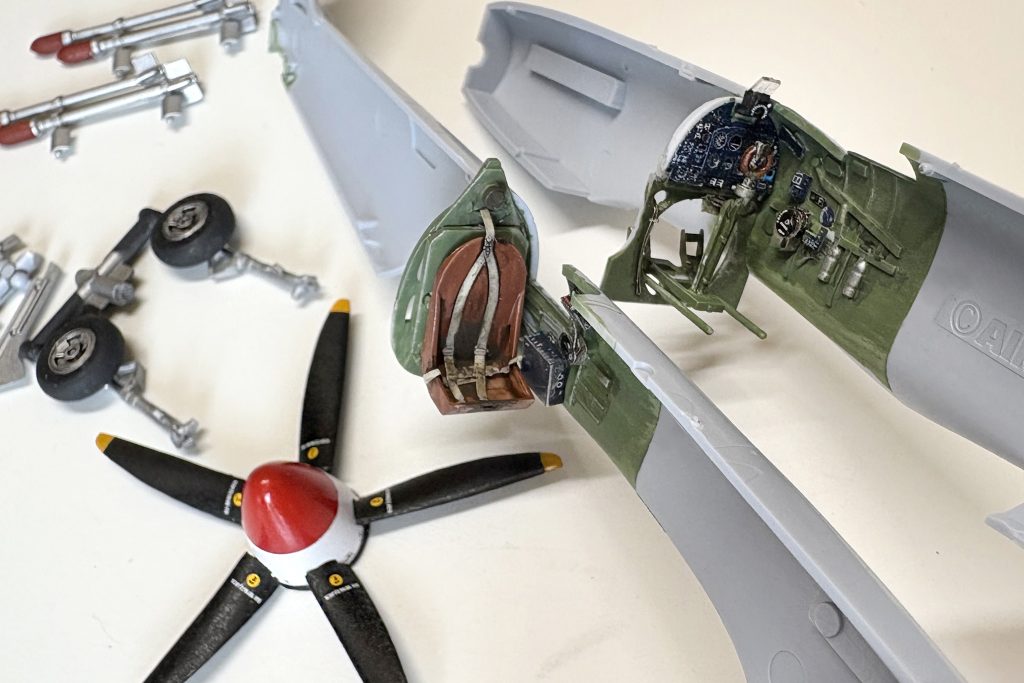
With a little effort this 30 year old cockpit still has a bit of life left in it.

An etched metal detail set from Eduard (FE 924) will be a nice addition, and while I won’t add every tiny metal shard to the kit, the seat harness, control panel and a number of other bits will add interest to the heart of this Spitfire.

While the cockpit assemblies dry, start on the five bladed propeller (black with yellow tips) and the landing gear (aluminum with “rubber black” for the tires).

Next, assemble the wing, adding the two radiators and drilling out the holes for the set of eight air-to-ground rockets. Set the completed wing aside.

Natural Camouflage 

Since the scheme of this fighter is an overall natural metal, alternating tone and hue will help make the airplane a little less … silver. After an initial coat of gloss Aluminum, take some time to mask off panels to paint a darker shade. Using a gloss or matt varnish along with some subtle weathering will give a bit of interest to the finish.
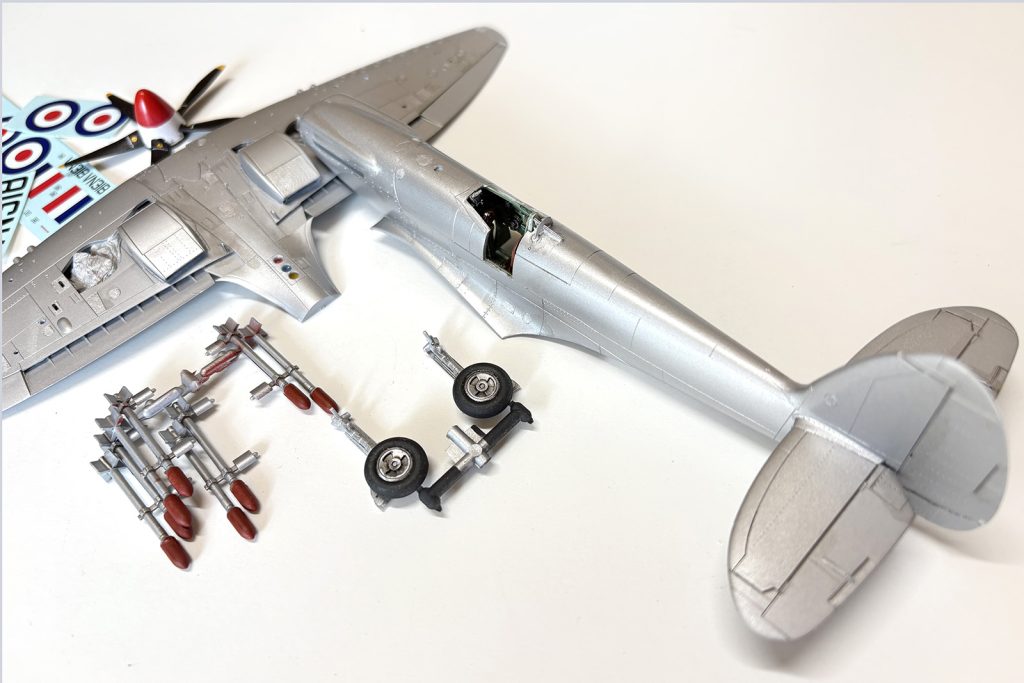
Alternating tones and hues of an all natural metal livery can be just as daunting as a multi color camouflage pattern.

Cement the completed pilot’s seat and control panel to the fuselage sides then bring the halves together. Here is where most modelers have a bone to pick with Airfix, adding the bulges for the Griffon engine’s rocker covers. The shape isn’t quite correct and it’s the one part of the model where your patience, modeling putty and sandpaper will be sorely tested. An aftermarket replacement piece is available for those more adept at the surgery it’ll take to fix the problem. In this case, putty and patience will have to do.

Attach the completed wing to the fuselage and add the horizontal stabilizers. Mask off the forward anti-glare panel and paint the area matt black, that’s the extent of the camouflage on this aircraft.

VN 318 “E” for Elizabeth

Time to start adding markings, stencils and the weathering one would see on an aircraft working in the heat and humidity of Hong Kong. The Royal Hong Kong Auxiliary Air Force was one of the last units to operate the Spitfire and this one belonged to No. 80 Squadron. This aircraft, VN318 was part of a fly past in April 1955 to celebrate the queen’s birthday. That flight would come to be one of the final sorties, ending more than 17 years of Spitfires in Royal Air Force service.
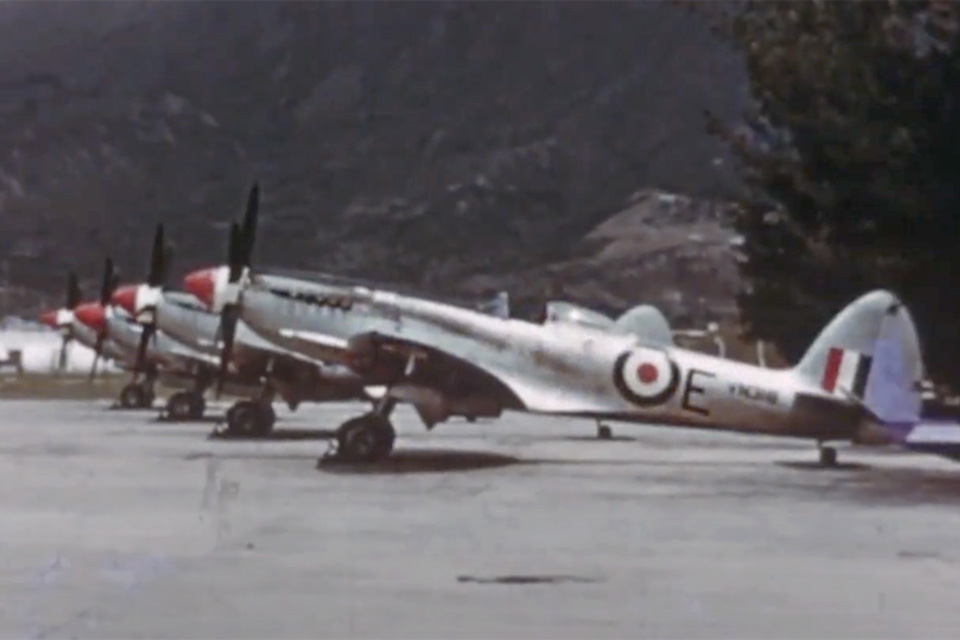
This still from a 1955 newsreel shows our Mk.24 ready to celebrate the Queen’s birthday. (IWM)

Eight 60 lb. armor piercing rockets round out the armament of this fighter. Silver with reddish brown warheads add plenty of interest under those broad elliptical wings.

Finally, attach the completed landing gear, outer gear doors and pitot tube. Use white glue to attach the two piece canopy and a bit of stretched sprue for the ventral antenna just behind the cockpit.

With the “tiny bits” taken care of this late model Spitfire is ready for the display shelf. Placed next to an early Spitfire Mk.I, the two fighters span the history of one of the most iconic aircraft of World War II.
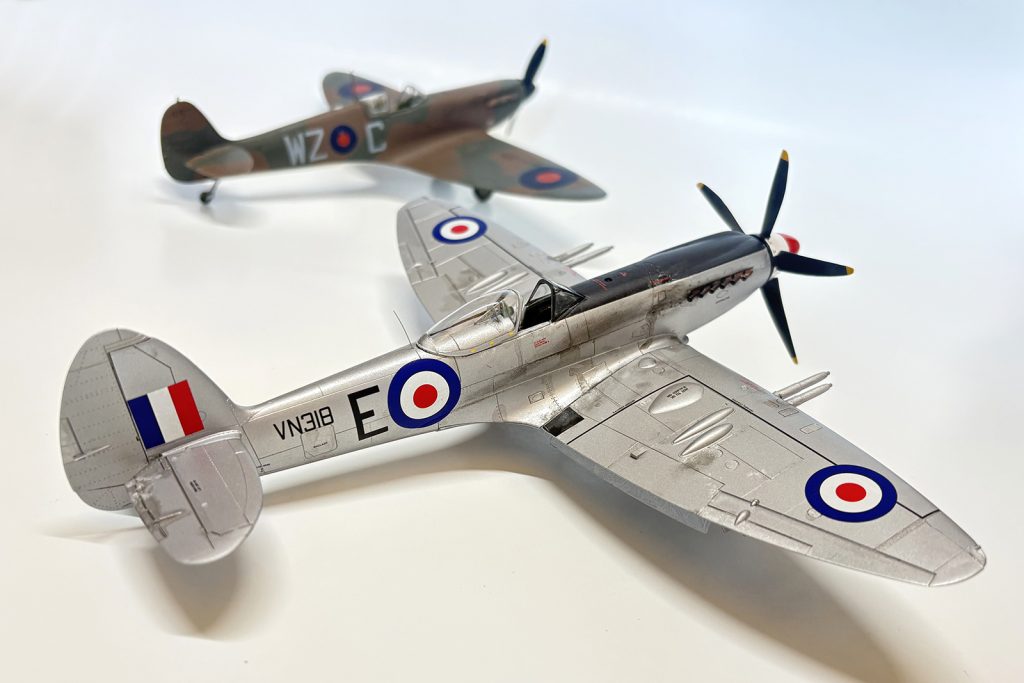
Almost two decades separate the Mk.I Spitfire from its thoroughbred Mk. 24

Jimmy Doolittle and His Thirty Second Calculated Risk

After a disaster at Pearl Harbor an aviation pioneer led sixteen untested bomber crews into history

The Japanese attack on Pearl Harbor caught the United States flatfooted. An unprepared American military had been rocked on its heels. The country was desperate for some sort of “payback” and just about anything was considered. One idea was the brainchild of Navy Captain Francis Low, the plan was to launch land based bombers from an aircraft carrier, strike targets in Japan and land in China to form the nucleus of an Allied bomber force.

For the head of the Army Air Forces, General Henry “Hap” Arnold, one person came to mind to plan and lead the mission, James Harold Doolittle. Known as the “master of the calculated risk,” Doolittle was a record setting racing pilot with a doctorate in aeronautical engineering from MIT, Doolittle seemed an obvious choice to lead “Special Aviation Project No. 1.”

Doolittle and Low chose the North American B-25 “Mitchell” as the aircraft to do the job. A twin engine powerhouse, it was the perfect size for the dangerous mission. Doolittle assembled and trained eighty men, matching them with sixteen airplanes, to launch from the pitching deck of a ship and bring the war to Tokyo’s doorstep.

The B-25 served in nearly every theater of operations during World War II. While the ionic medium bomber was continuously modified and redesigned for a wide variety of roles, some of the most famous B-25s were among the earliest produced. The modified B-25Bs that launched from the USS Hornet for their “Thirty Seconds Over Tokyo” were fresh off the assembly line as were their crews.

The Kit

Airfix totally retooled their 1/72nd-scale B-25 in 2018. The kit that emerged was designed from the outset to be built in a number of versions. In 2019 the company released their newest version of the kit which could be built as one of those sixteen famous “Doolittle Raiders.”

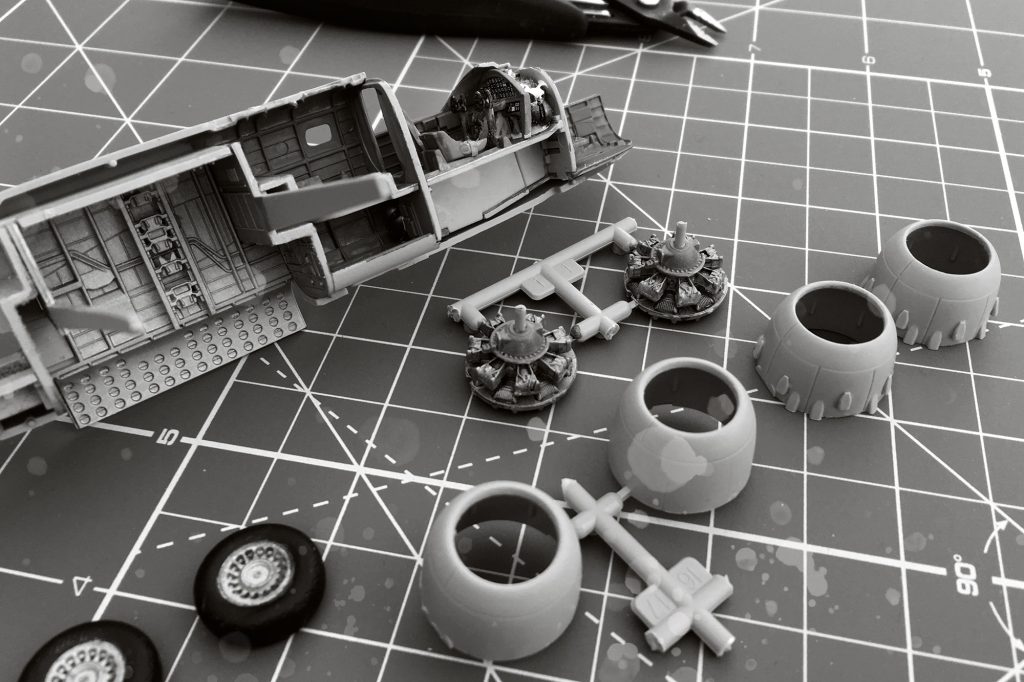
An alternative cowling with its series of individual exhaust vents, hints at other versions of the Mitchell to come.

The kit has very nice detail and is well engineered. The instructions are clear and easy to follow. An extra parts tree is included with pieces particular to the Raiders: an M7 cluster incendiary bomb, the clear tail cone with holes for two dummy machine guns and even the substitute “Mark Twain” bombsight.

Begin with the cockpit. A decal is provided to represent the instrument panel, but metal-etched detail sets are available to give the cockpit that extra boost. The cockpit assembly includes the bombardier’s position. Once it’s complete, install the assembled flight deck to the left half of the fuselage. Following the instructions, add the bulkheads that also make up the bomb bay. The bomb bay section of early Mitchells was sometimes left natural metal rather than the standard interior green (FS34151) found in the rest of the airplane. A natural aluminum color will help set off the B-25’s ordnance. For the Doolittle Raid, most of the Mitchells carried three 500-pound bombs and one M7 incendiary. Paint the bombs a yellowish chromate green. Early in the war most of the available bombs were painted this color as opposed to the more familiar olive drab.

A pre-cut set of masks for the canopy and cockpit glass is well worth the expense.

The B-25 wants to be a “tail sitter,” so added weight in the nose is a must. Small lead fishing sinkers work well tucked into the spaces around the cockpit, though the glass nose does limit the available space. If you find you can’t add enough weight to keep the bomber on its tricycle landing gear, there is a solution (see below) during the final stages of assembly. Now bring the fuselage halves together. Putty as necessary—the overall fit is very good—and set the assembly aside.

With the fuselage complete, it’s time to paint and assemble the two Wright R-2600 Double Cyclone radial engines. There are two sets of engine cowlings—choose the smooth version and check the instructions. The second set has a series of small cooling intakes around the back half of the cowling, a modification in later aircraft.

Doolittle’s “Upgrades”

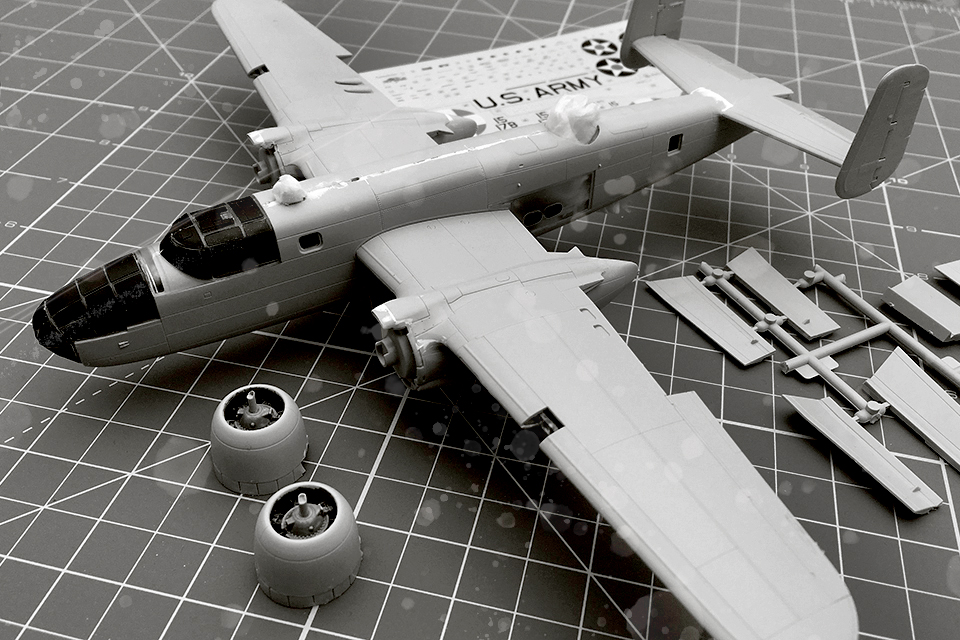
Put together the horizontal and vertical stabilizers and attach the assembly to the fuselage. Use the piece provided to cover the ventral machine gun turret position. The remotely powered machine gun turret was one of the first things removed as Lt. Col. Jimmy Doolittle looked to save weight and increase the bomber’s range. Attach the wings and the aircraft begins to take on its classic shape.

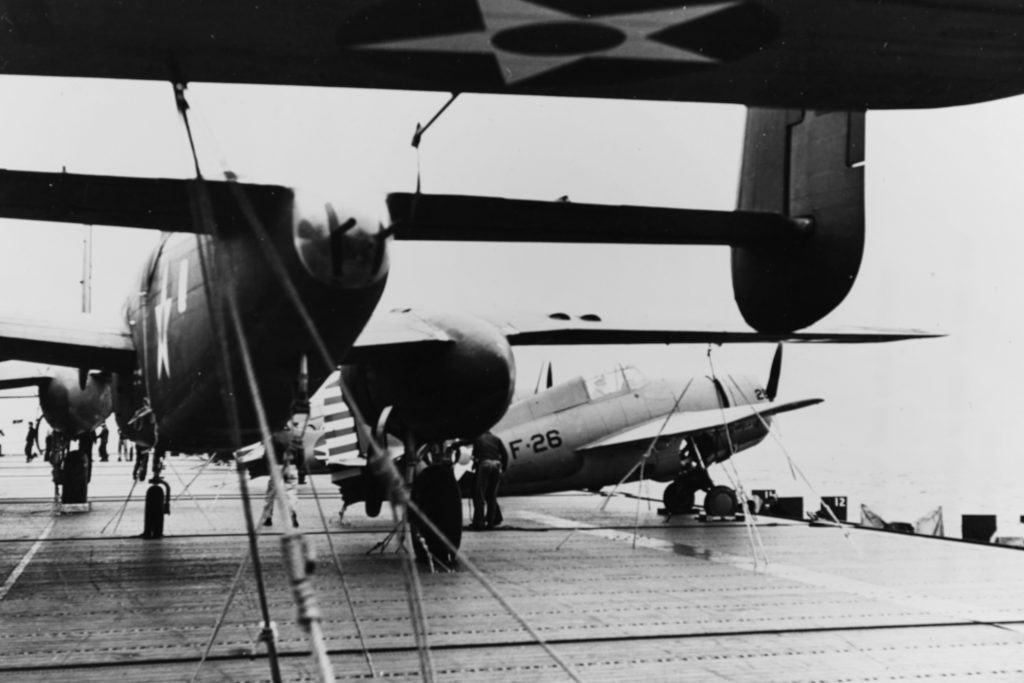
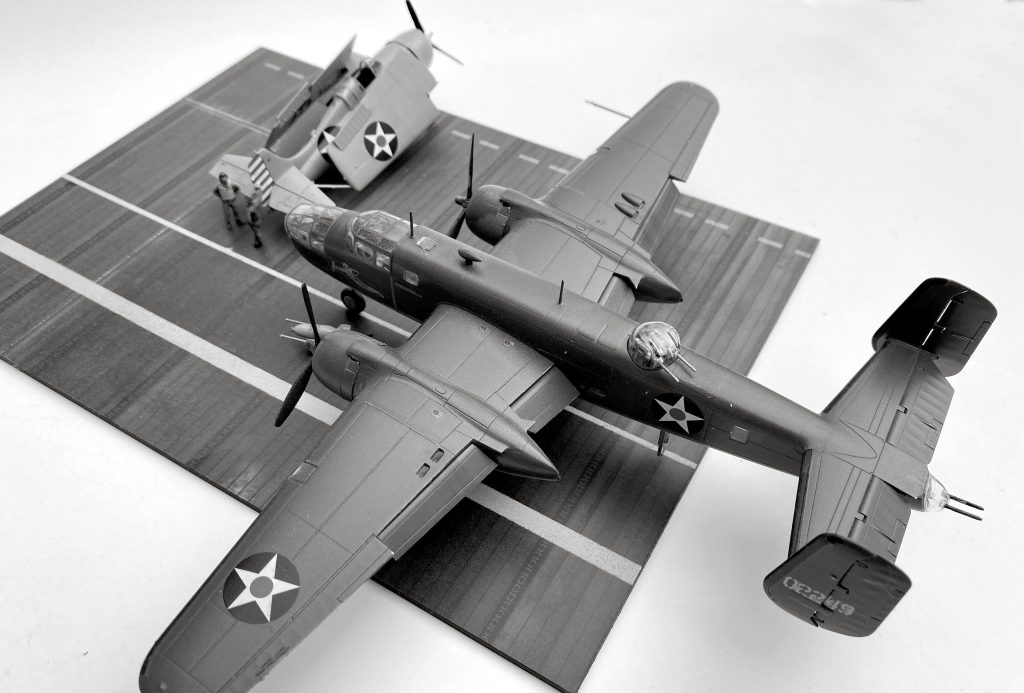
This photo was the inspiration for the display of “Hari-Karri-er.” The carrier Hornet kept a few of its F4F Wildcat fighters “just in case.” Of course, the Airfix kit was an obvious choice.

Invest in a set of precut adhesive masks. The “greenhouse” Plexiglas panes that make up the cockpit and nose section are difficult to cut by hand. Attach those sections to the fuselage, wrap the landing gear, fill the top turret position with tissue and the airplane is ready for a coat of paint.

The retooled Airfix Grumman F4-F Wildcat and a carrier deck base make a great addition to our USS Hornet vignette.

The bomber was painted olive drab (FS34087) over neutral gray (FS36270) undersurfaces. Don’t forget the black deicer boots along the leading edges of the wings and tail. Once the masking and painting is complete, a coat of clear gloss gets the model ready for a set of decals.

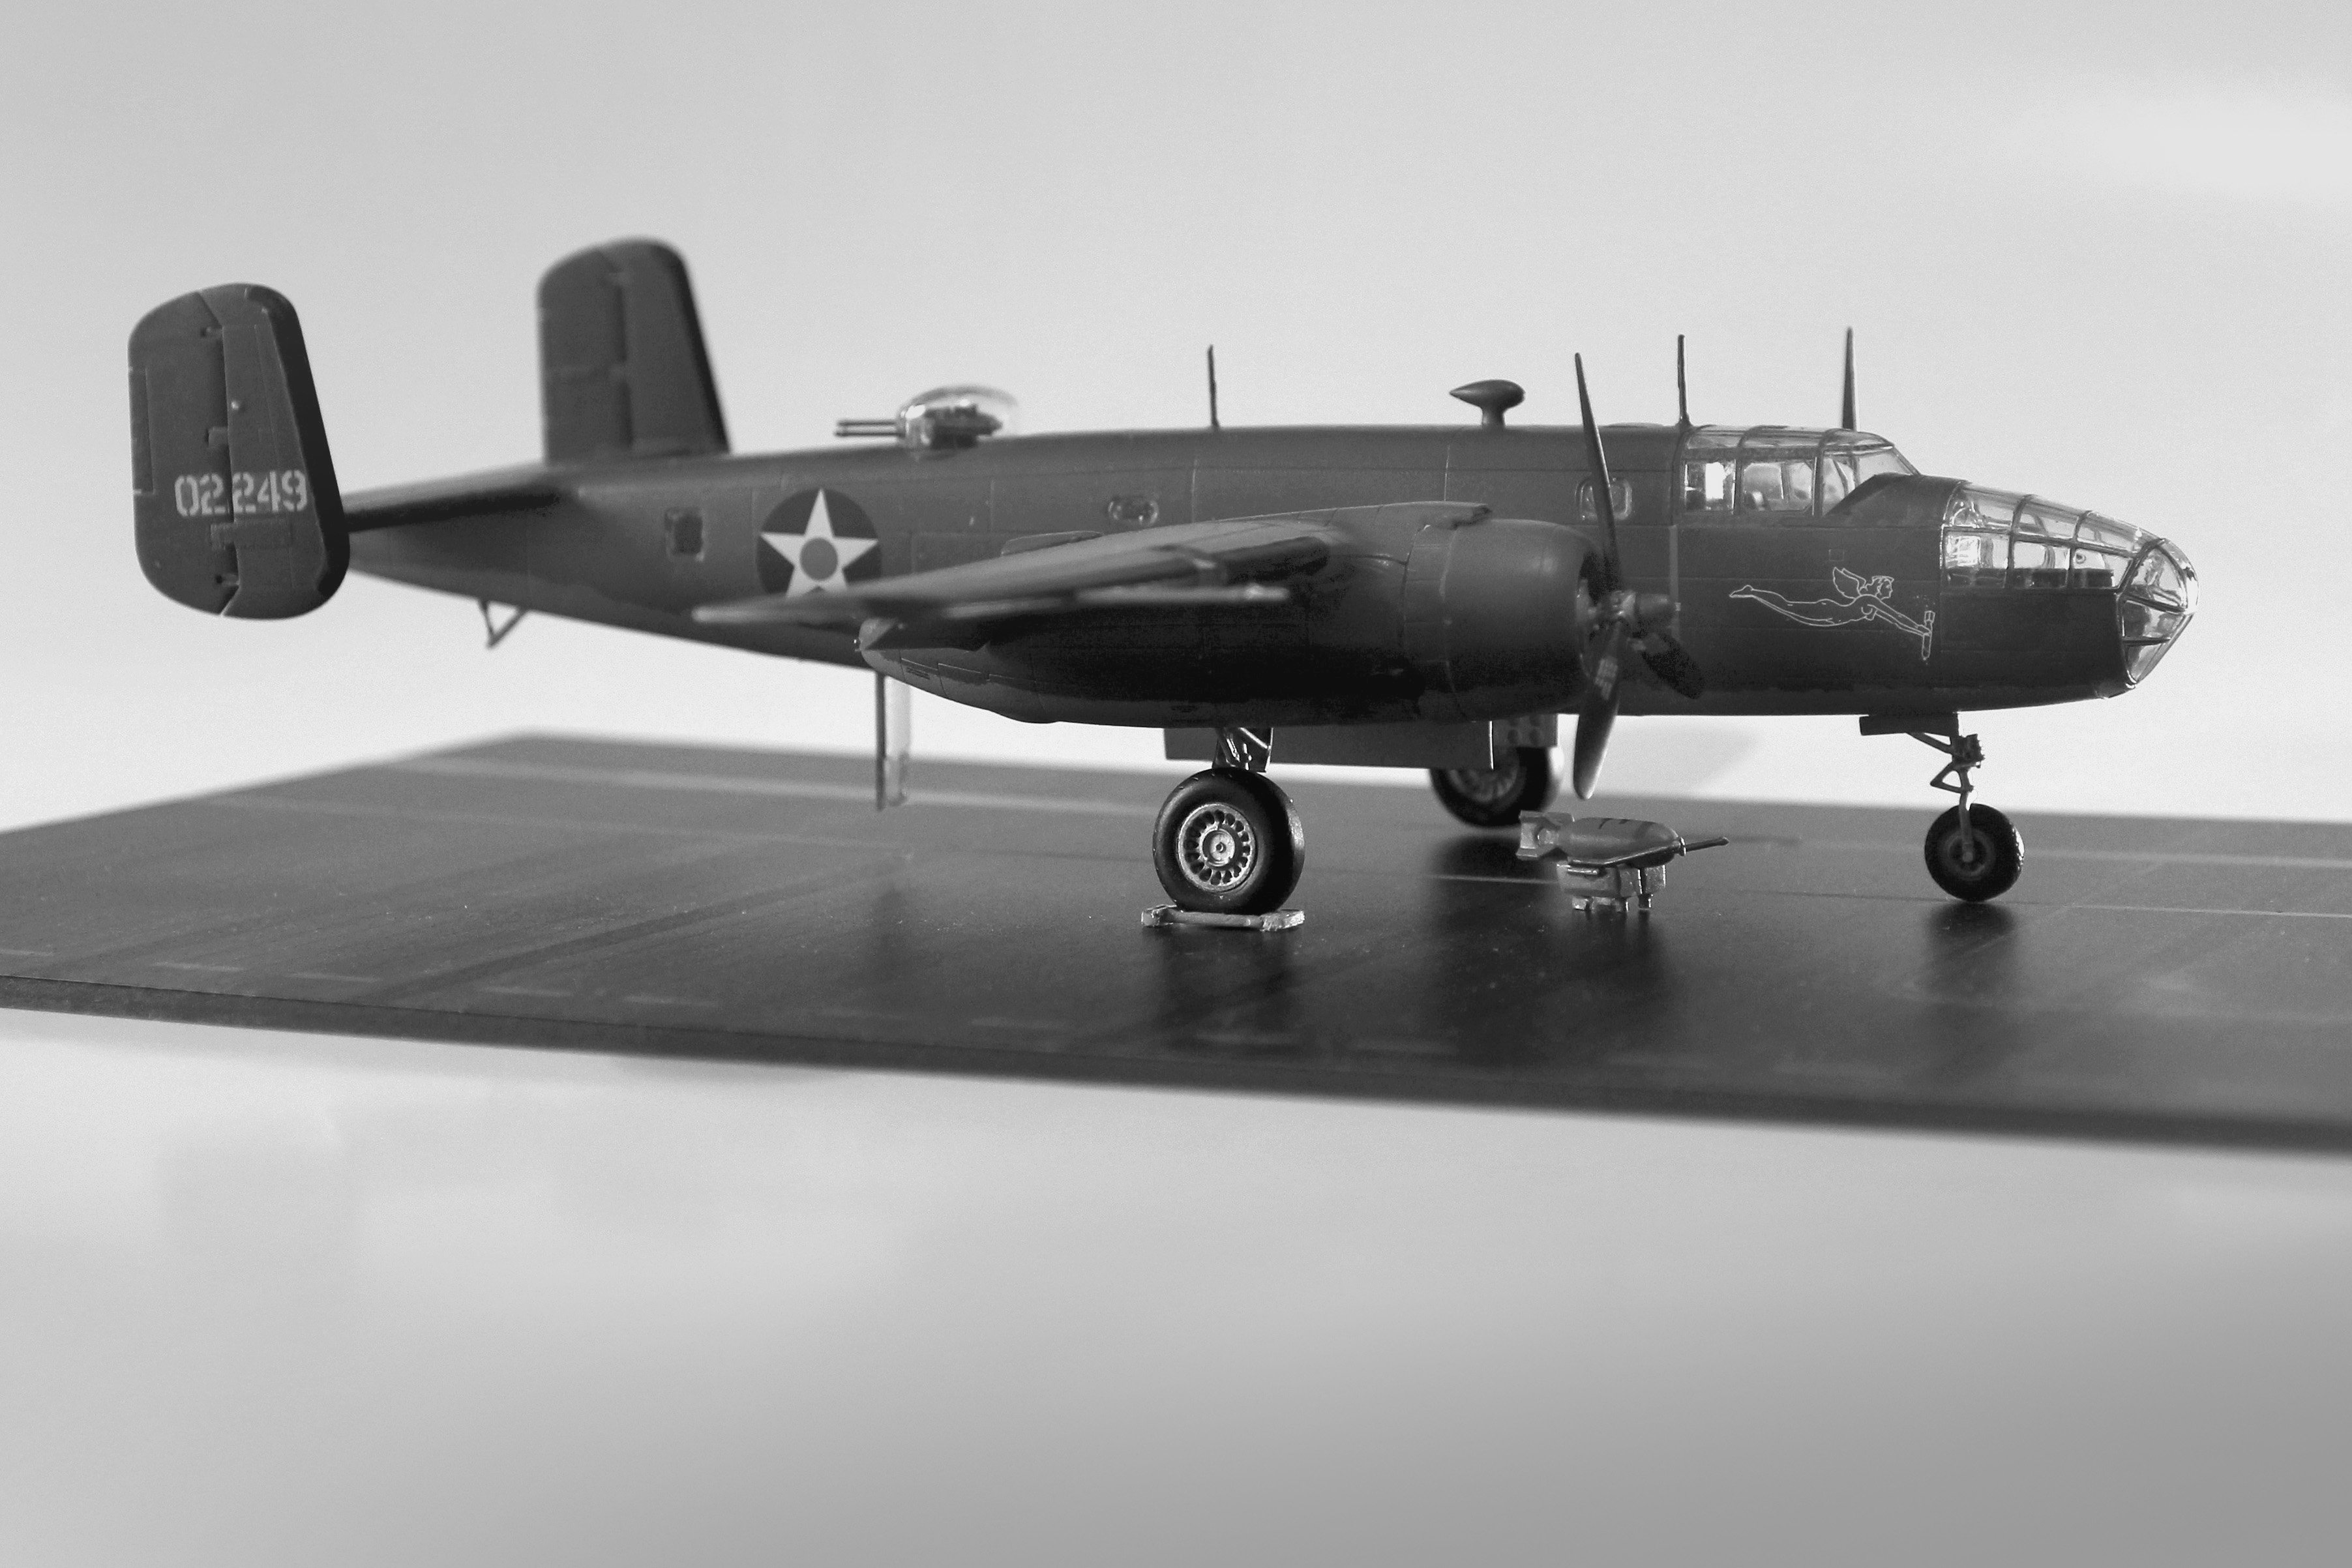
11 of 16, Hari Kari-er

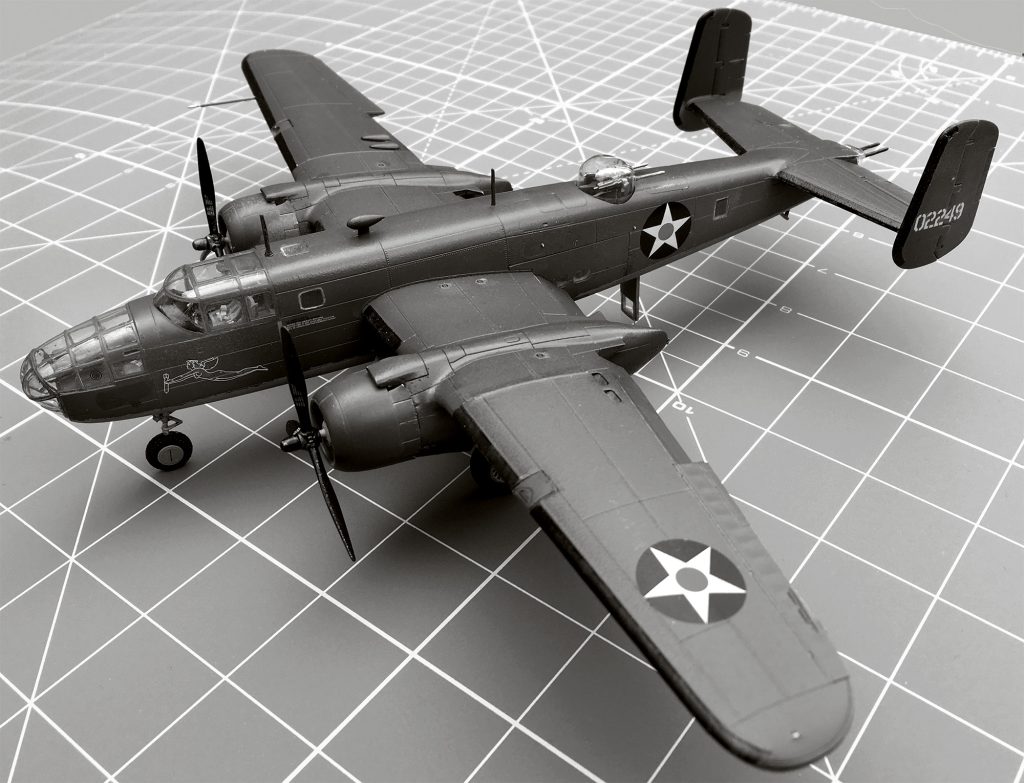
The kit comes with two choices of markings, but the obvious one for most modelers is sure to be Hari Kari-er, the 11th Doolittle Raider to launch. This bomber is one of the few for which photographic evidence exists of its nose art while on Hornet’s deck. The kit decals are very nice and settle comfortably into panel lines with the help of a setting solution.

Apply a flat clear coat and Hari Kari-er is almost complete. It’s time to attach the smaller detail parts, the tail skid, main gear tires and antennas. The model was designed so that a number of fuselage windows can be added from the outside, after painting. Most kits require these clear parts to be glued in place from the inside, requiring additional masking.

02249 was the 11th aircraft off the deck of the Hornet. The crew were Capt. C. Ross Greening, pilot; Lt. Kenneth E. Reddy, copilot; Lt. Frank A. Kappeler, navigator; SSgt. William L. Birch, bombardier and Sgt. Melvin J. Gardner, flight engineer/gunner. It was one of the few aircraft that had nose art chalked on its nose. Hari Kari-er hit targets at the Kosukan Naval Yard in Yokohama

The crew hatches can be displayed opened or closed, but an open rear hatch will help the bomber sit correctly on its landing gear. If you attach a small piece of clear sheet plastic to that crew door it will aid in supporting the aft section of the airplane.

Attach the propellers and the clear tail cone, complete with two fake machine guns meant to deter enemy fighters. Finally, slide the completed dorsal machine gun turret into place and your Doolittle Raider is ready for its famous mission.