Building Grumman’s Sub-Killing Avenger

This Avenger wasn’t looking for the fictitious Thanos, the Grumman TBF/M Avenger torpedo bomber had a more dangerous enemy in mind.
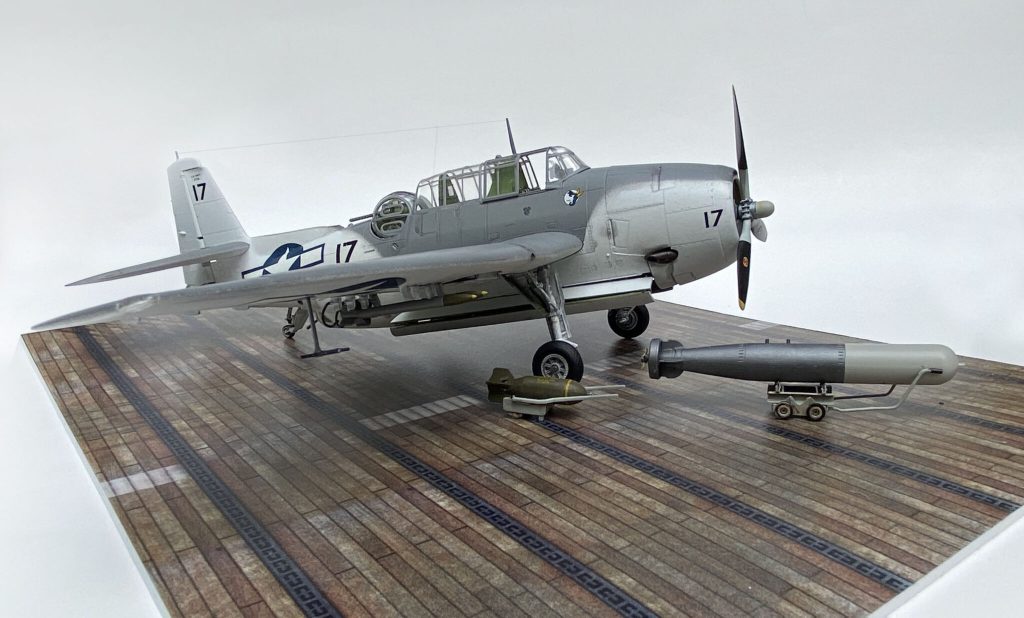
Designed as a replacement for the aging TBD Devastator, the Grumman TBF/M Avenger was arguably the finest torpedo bomber of the war. Best known for its combat record in the Pacific, the Avenger also proved to be a potent weapon in the Atlantic. Operating from small escort carriers, Avengers hunted U-Boats using aerial depth charges, conventional bombs and rockets. Avengers were directly responsible for over thirty submarines and served as the “hunter” part of hunter-killer teams scouring the Atlantic.
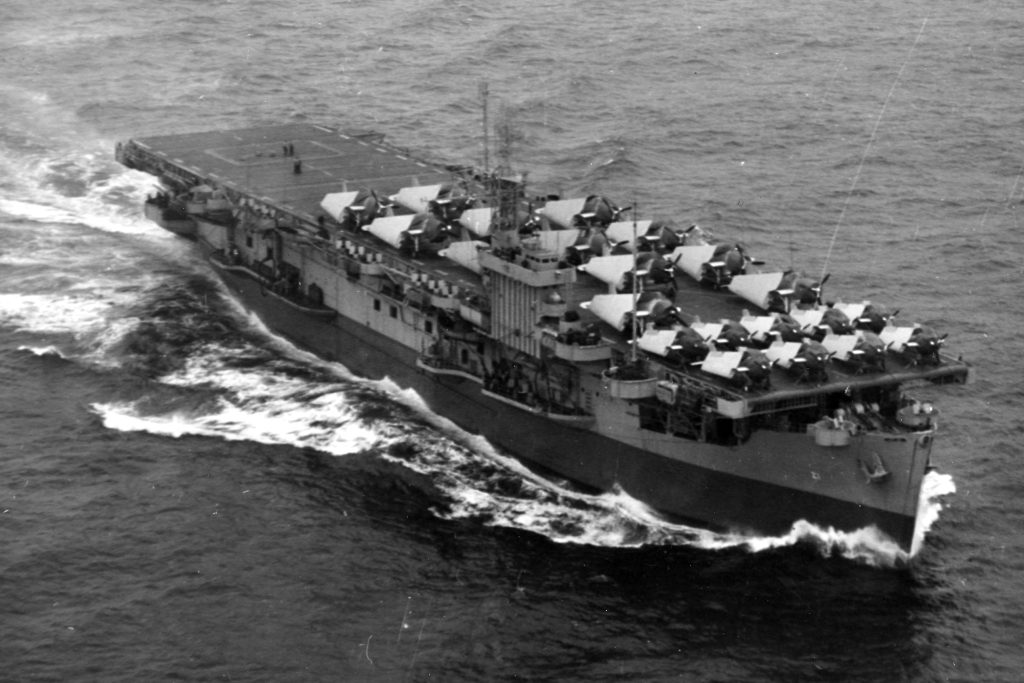
Our Avenger operated fron the USS Block Island shown here with most of it’s compliment of TBF/M Avengers and FM-2 Wildcats. The hunter killer team of the nimble Wildcat and the Avenger proved deadly to U-Boats in the Atlantic. The size difference between the Avengers and the carrier are clearly evident. (US Navy)

These “sub-killing” bombers had a unique look that makes for an interesting addition to the collection.

The Kit

The South Korean based model company, Academy, Re-released the 1996 Accurate Miniatures TBF-1C Avenger in 2013.  With a lot of detail and good fit, it was well received by modelers looking for a 1/48th scale replica of the famed torpedo bomber.

This Avenger comes with a choice of weapons, the standard Mk. XIII torpedo, 500lb general purpose bombs and Mk 54 depth charges. Perfect for this U-Boat hunting airplane.
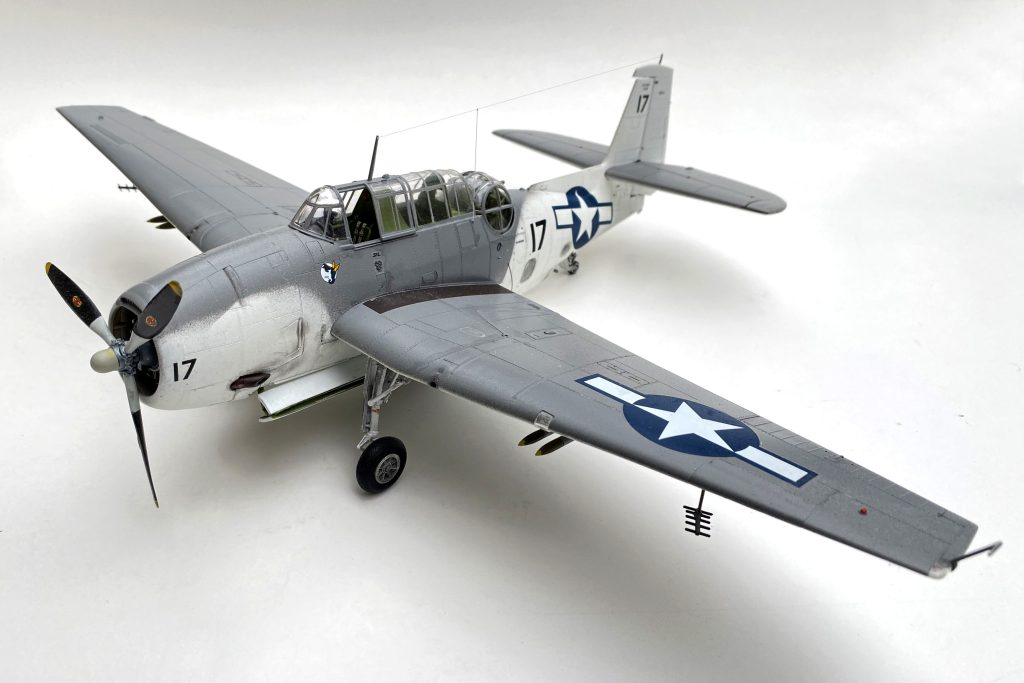
The Avenger had a wingspan or over 54 feet and fully loaded could weigh as much as over 15,500 pounds. The big three man bomber had three machine guns for self defense including a .50 calibre gun in a powered turret.

Following the instructions, start with the cockpit painting it an interior Chromate Green (FS 34151). There is plenty of detail from the cockpit through to the bombardier’s station and the rear gunner’s turret. Paint consoles and electronic boxes black, white dials and switches. Add seatbelts and a harness to the pilot’s seat and to the small bench for the bombardier located in the cramped lower part of the airplane, just aft of the bomb bay. The bomb bay itself is part of the entire assembly that runs the length of one of the fuselage sides. Finally, after all that detail, painting and assembly, bring the fuselage halves together and set aside the completed fuselage.

The wing halves, rudder and horizontal stabilizers are a much simpler part of the build. Cement the parts together and set aside.

The unique powered turret

Next, it’s time to build the Avenger’s gun turret. Do your research. This part of the model is not for the novice. The turret, with its .50 caliber machine gun is a complicated little model in itself, comprising ten separate parts. Putting it all together requires extra patience. Take your time and dry fit pieces before final assembly.

Paint most of the pieces interior green. The machine gun should be a steel color with the ammunition chute aluminum. A brown leather armrest on the gunner’s seat, along with a set of seat belts add to the detail that’s already there. After the interior is finished put together the two clear parts of the turret with white glue or a cement designed for clear plastic.

The kit comes with a set of adhesive masks cut to the size of each pane of glass on the Avenger’s large greenhouse of a cockpit canopy. Gently peel off the mask bits and position them in their spots indicated in the instructions. For the turret, carefully stuff the interior of the completed ball shape with a small wad of paper towel and paint the piece the same dark gull gray color (FS 36231) as the upper part of the completed aircraft. Set the pieces of the turret aside to dry thoroughly.

Mask off the cockpit and bomb bay to prepare the model for painting. This Avenger depicts one of the aircraft from VC-55 on the USS Block Island.
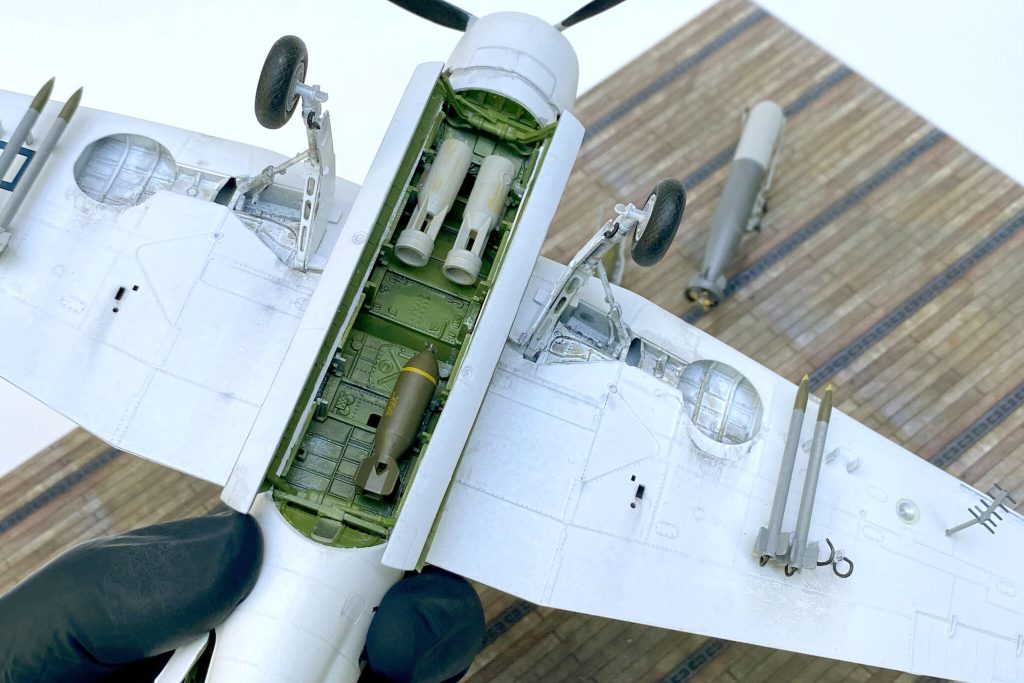
The Academy kit has an interesting selection of weapons, 500lb general purpose bombs and Mk. 54 aerial depth charges The addition of a quartet of 5 inch HVAR (High Velocity Rockets) mounted under the wings came from the parts box and were a commonly seen on sub-hunting TBF-3C Avengers.

Based aboard small, fast escort carriers, the aircraft were painted Dark Gull Gray on the upper surfaces and white underneath with the white color extending up along the sides of the fuselage. The pattern is a marked difference from the variety of blue schemes seen in the Pacific theater. Mask and paint the fuselage and then attach the wings and horizontal stabilizers, painting along the way. Give the model a coat of clear gloss to get it ready for the decals.

While the aircraft dries, assemble the tires and landing gear. Struts are all painted white including the landing gear bays. Paint the propeller black with a silver hub and white or pale gray “cuffs” at the base of each propeller blade.
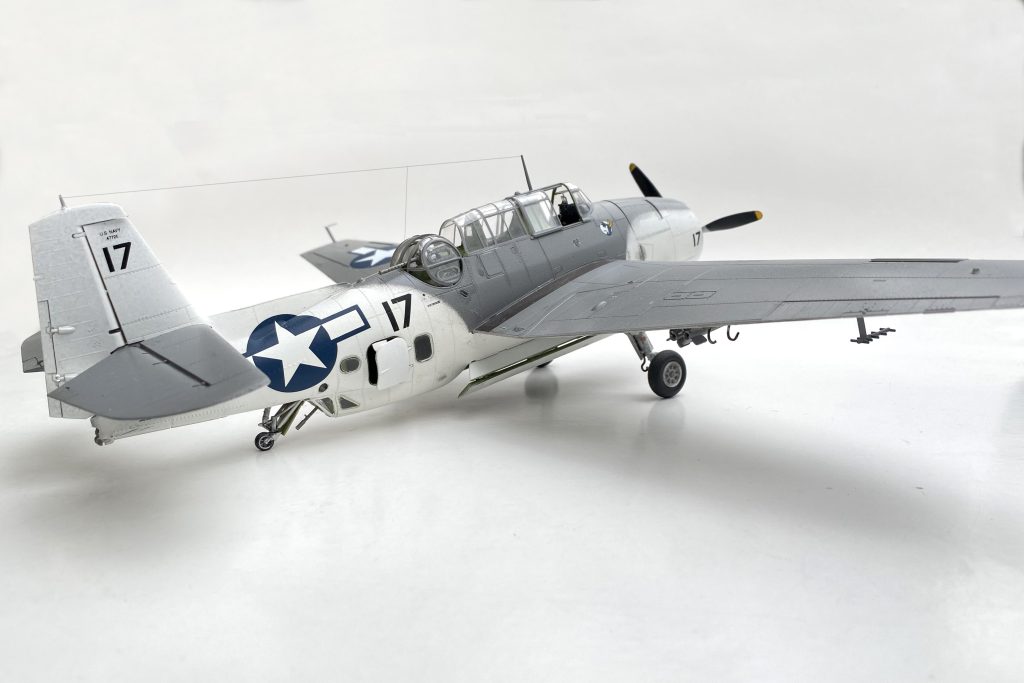
The camouflage of Dark Gull Gray and white was worn by both the torpedo bomber and Wildcat fighters during operations in the Atlantic.

Cement the bombs into the bomb bay with the two aerial mines forward and the two general purpose bombs to the rear. The bomb bay doors come as two pieces but will need to be split to pose the doors in an open position. Use a razor saw to cut the doors apart and attach them to the door struts.

Final details 

Attach the landing gear and gear doors making sure the airplane sits correctly and give the model a coat of flat varnish to seal the decals.

Carefully, very carefully place the gunner’s turret in its position on the airplane. The fit is extremely tight so take care in adding the completed turret. Next, add the rest of the canopy using a cement designed for clear plastic. Be sure to pose the cockpit open to show off all that detail and hard work. Last, attach the “tiny bits,” the distinct upward canted pitot tube, clear pieces for the red and green formation lights, the delicate surface radar antenna beneath each wing and this TBF-1C Avenger is ready to head out to hunt U-Boats or just start a conversation on the display shelf.
Jimmy Doolittle and His Thirty Second Calculated Risk

After a disaster at Pearl Harbor an aviation pioneer led sixteen untested bomber crews into history

The Japanese attack on Pearl Harbor caught the United States flatfooted. An unprepared American military had been rocked on its heels. The country was desperate for some sort of “payback” and just about anything was considered. One idea was the brainchild of Navy Captain Francis Low, the plan was to launch land based bombers from an aircraft carrier, strike targets in Japan and land in China to form the nucleus of an Allied bomber force.

For the head of the Army Air Forces, General Henry “Hap” Arnold, one person came to mind to plan and lead the mission, James Harold Doolittle. Known as the “master of the calculated risk,” Doolittle was a record setting racing pilot with a doctorate in aeronautical engineering from MIT, Doolittle seemed an obvious choice to lead “Special Aviation Project No. 1.”

Doolittle and Low chose the North American B-25 “Mitchell” as the aircraft to do the job. A twin engine powerhouse, it was the perfect size for the dangerous mission. Doolittle assembled and trained eighty men, matching them with sixteen airplanes, to launch from the pitching deck of a ship and bring the war to Tokyo’s doorstep.

The B-25 served in nearly every theater of operations during World War II. While the ionic medium bomber was continuously modified and redesigned for a wide variety of roles, some of the most famous B-25s were among the earliest produced. The modified B-25Bs that launched from the USS Hornet for their “Thirty Seconds Over Tokyo” were fresh off the assembly line as were their crews.

The Kit

Airfix totally retooled their 1/72nd-scale B-25 in 2018. The kit that emerged was designed from the outset to be built in a number of versions. In 2019 the company released their newest version of the kit which could be built as one of those sixteen famous “Doolittle Raiders.”

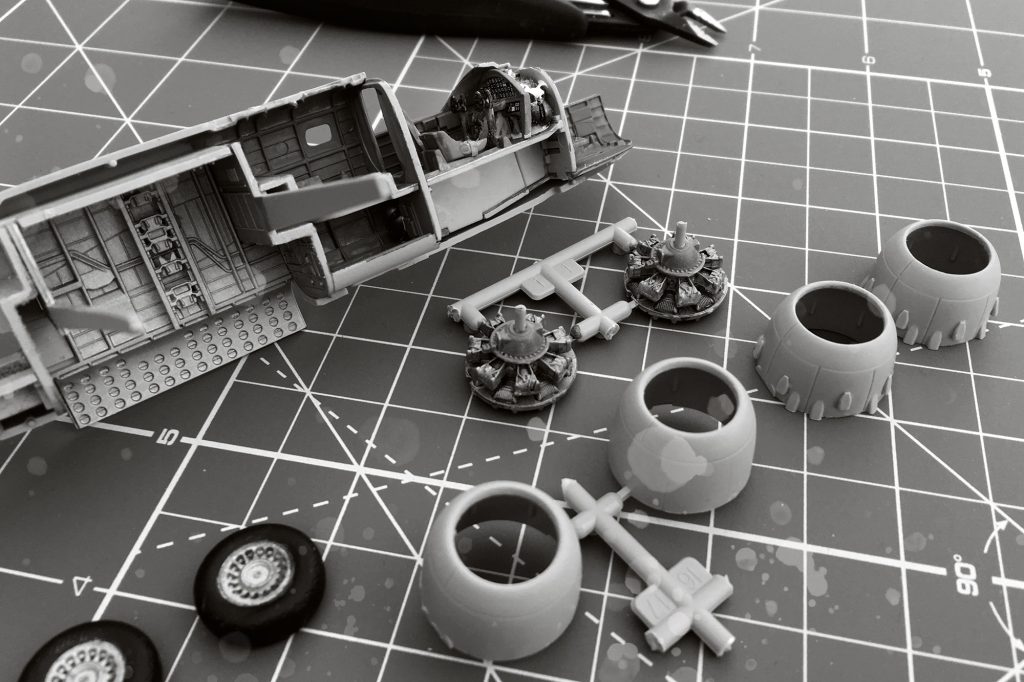
An alternative cowling with its series of individual exhaust vents, hints at other versions of the Mitchell to come.

The kit has very nice detail and is well engineered. The instructions are clear and easy to follow. An extra parts tree is included with pieces particular to the Raiders: an M7 cluster incendiary bomb, the clear tail cone with holes for two dummy machine guns and even the substitute “Mark Twain” bombsight.

Begin with the cockpit. A decal is provided to represent the instrument panel, but metal-etched detail sets are available to give the cockpit that extra boost. The cockpit assembly includes the bombardier’s position. Once it’s complete, install the assembled flight deck to the left half of the fuselage. Following the instructions, add the bulkheads that also make up the bomb bay. The bomb bay section of early Mitchells was sometimes left natural metal rather than the standard interior green (FS34151) found in the rest of the airplane. A natural aluminum color will help set off the B-25’s ordnance. For the Doolittle Raid, most of the Mitchells carried three 500-pound bombs and one M7 incendiary. Paint the bombs a yellowish chromate green. Early in the war most of the available bombs were painted this color as opposed to the more familiar olive drab.

A pre-cut set of masks for the canopy and cockpit glass is well worth the expense.

The B-25 wants to be a “tail sitter,” so added weight in the nose is a must. Small lead fishing sinkers work well tucked into the spaces around the cockpit, though the glass nose does limit the available space. If you find you can’t add enough weight to keep the bomber on its tricycle landing gear, there is a solution (see below) during the final stages of assembly. Now bring the fuselage halves together. Putty as necessary—the overall fit is very good—and set the assembly aside.

With the fuselage complete, it’s time to paint and assemble the two Wright R-2600 Double Cyclone radial engines. There are two sets of engine cowlings—choose the smooth version and check the instructions. The second set has a series of small cooling intakes around the back half of the cowling, a modification in later aircraft.

Doolittle’s “Upgrades”

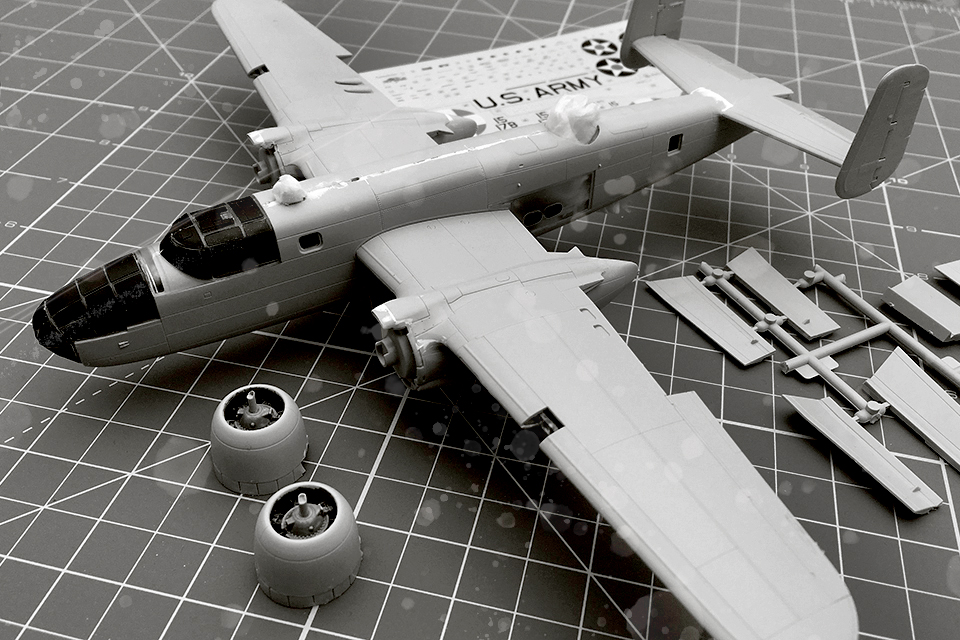
Put together the horizontal and vertical stabilizers and attach the assembly to the fuselage. Use the piece provided to cover the ventral machine gun turret position. The remotely powered machine gun turret was one of the first things removed as Lt. Col. Jimmy Doolittle looked to save weight and increase the bomber’s range. Attach the wings and the aircraft begins to take on its classic shape.

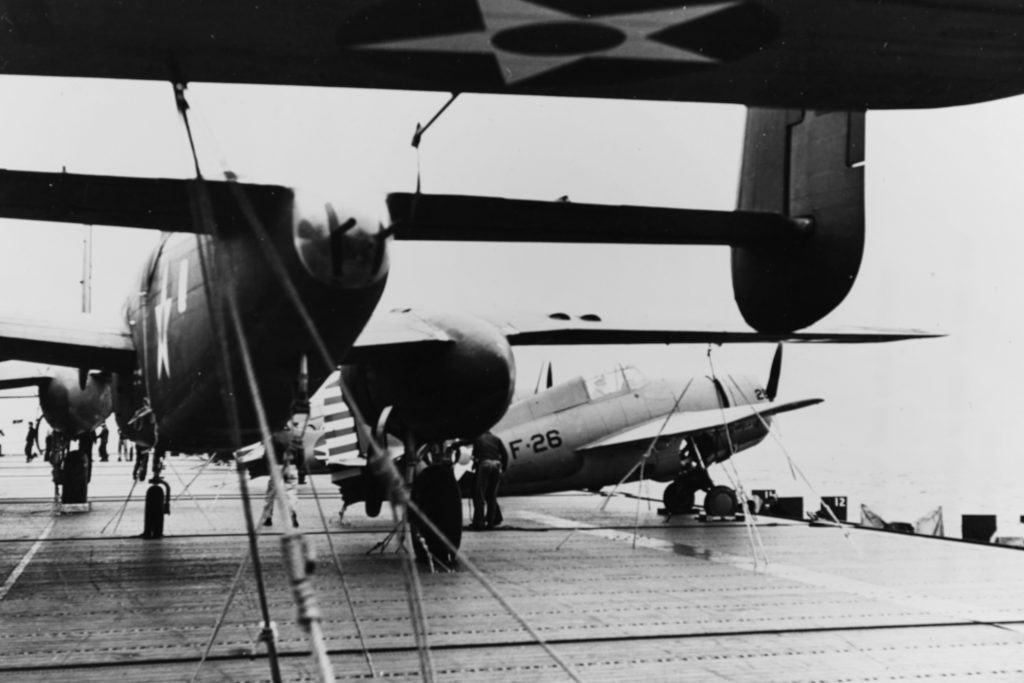
This photo was the inspiration for the display of “Hari-Karri-er.” The carrier Hornet kept a few of its F4F Wildcat fighters “just in case.” Of course, the Airfix kit was an obvious choice.

Invest in a set of precut adhesive masks. The “greenhouse” Plexiglas panes that make up the cockpit and nose section are difficult to cut by hand. Attach those sections to the fuselage, wrap the landing gear, fill the top turret position with tissue and the airplane is ready for a coat of paint.

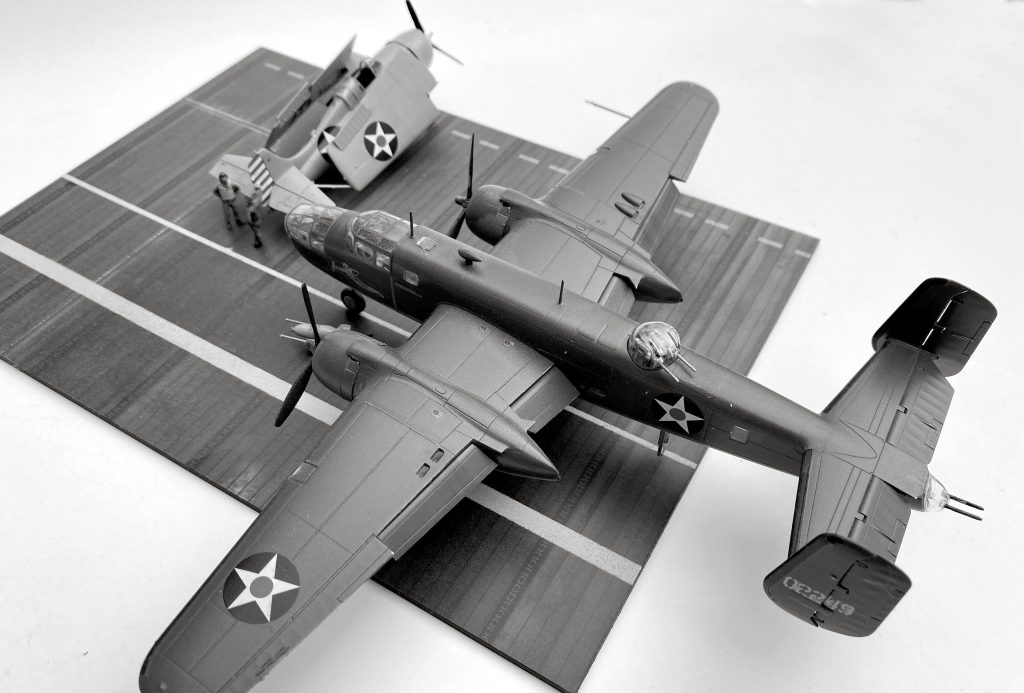
The retooled Airfix Grumman F4-F Wildcat and a carrier deck base make a great addition to our USS Hornet vignette.

The bomber was painted olive drab (FS34087) over neutral gray (FS36270) undersurfaces. Don’t forget the black deicer boots along the leading edges of the wings and tail. Once the masking and painting is complete, a coat of clear gloss gets the model ready for a set of decals.

11 of 16, Hari Kari-er

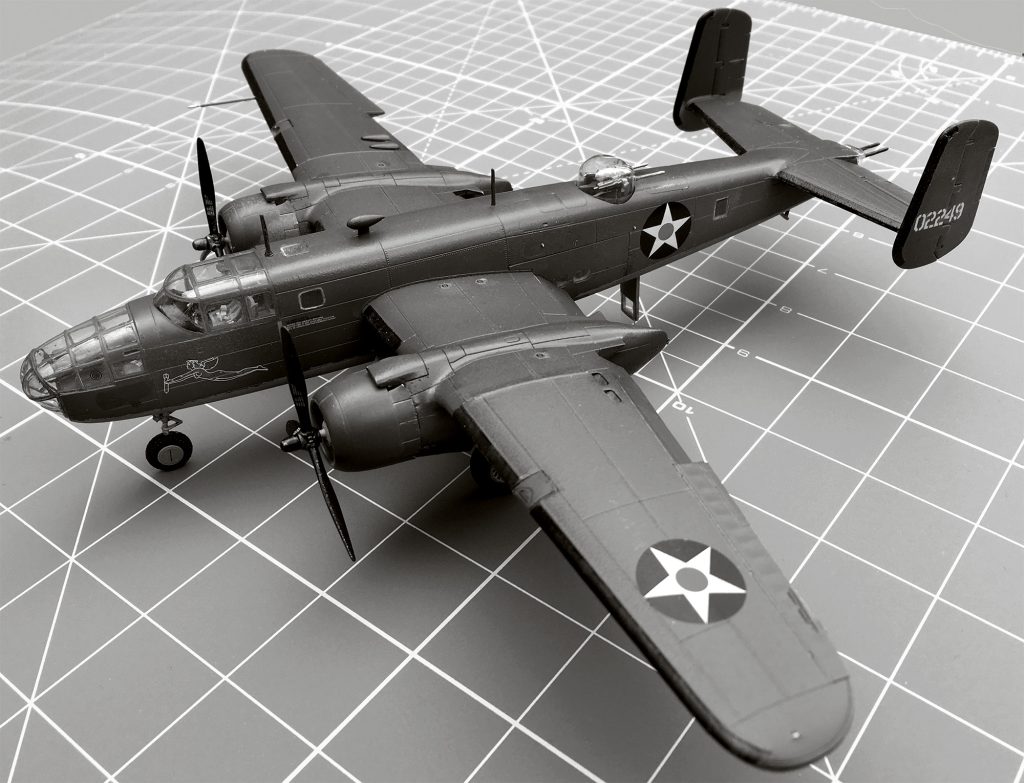
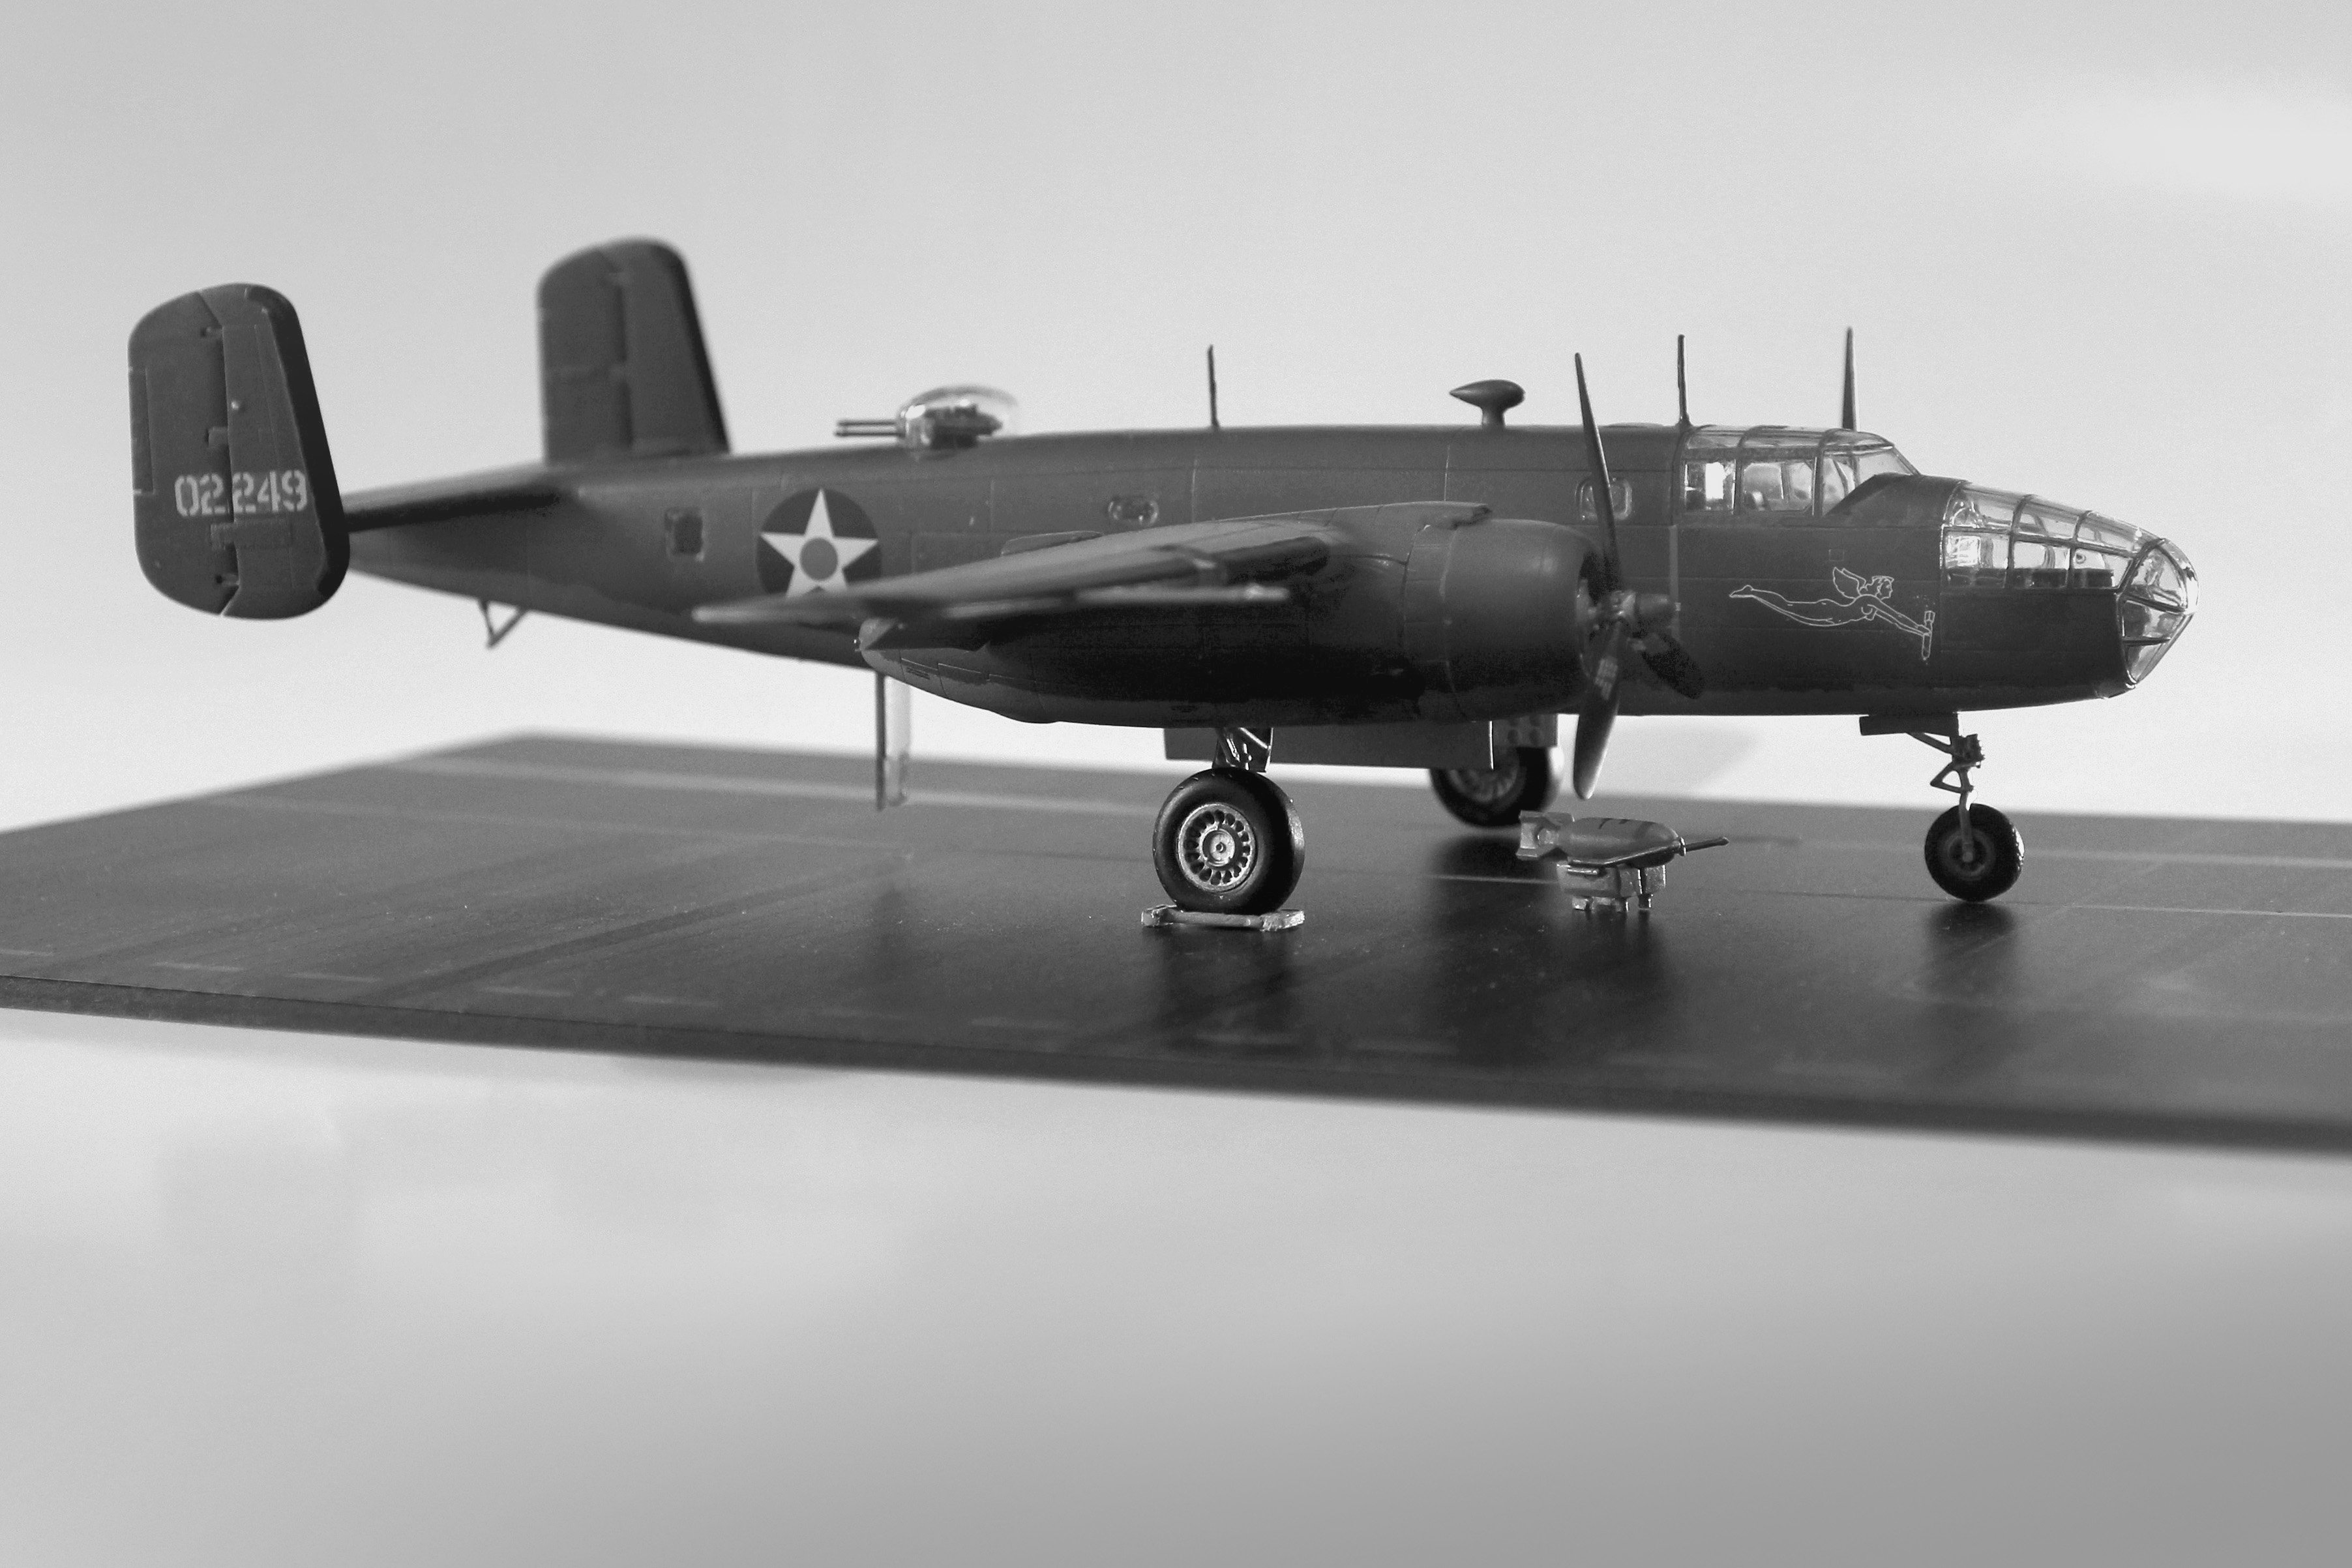
The kit comes with two choices of markings, but the obvious one for most modelers is sure to be Hari Kari-er, the 11th Doolittle Raider to launch. This bomber is one of the few for which photographic evidence exists of its nose art while on Hornet’s deck. The kit decals are very nice and settle comfortably into panel lines with the help of a setting solution.

Apply a flat clear coat and Hari Kari-er is almost complete. It’s time to attach the smaller detail parts, the tail skid, main gear tires and antennas. The model was designed so that a number of fuselage windows can be added from the outside, after painting. Most kits require these clear parts to be glued in place from the inside, requiring additional masking.

02249 was the 11th aircraft off the deck of the Hornet. The crew were Capt. C. Ross Greening, pilot; Lt. Kenneth E. Reddy, copilot; Lt. Frank A. Kappeler, navigator; SSgt. William L. Birch, bombardier and Sgt. Melvin J. Gardner, flight engineer/gunner. It was one of the few aircraft that had nose art chalked on its nose. Hari Kari-er hit targets at the Kosukan Naval Yard in Yokohama

The crew hatches can be displayed opened or closed, but an open rear hatch will help the bomber sit correctly on its landing gear. If you attach a small piece of clear sheet plastic to that crew door it will aid in supporting the aft section of the airplane.

Attach the propellers and the clear tail cone, complete with two fake machine guns meant to deter enemy fighters. Finally, slide the completed dorsal machine gun turret into place and your Doolittle Raider is ready for its famous mission.

The First Three Songs

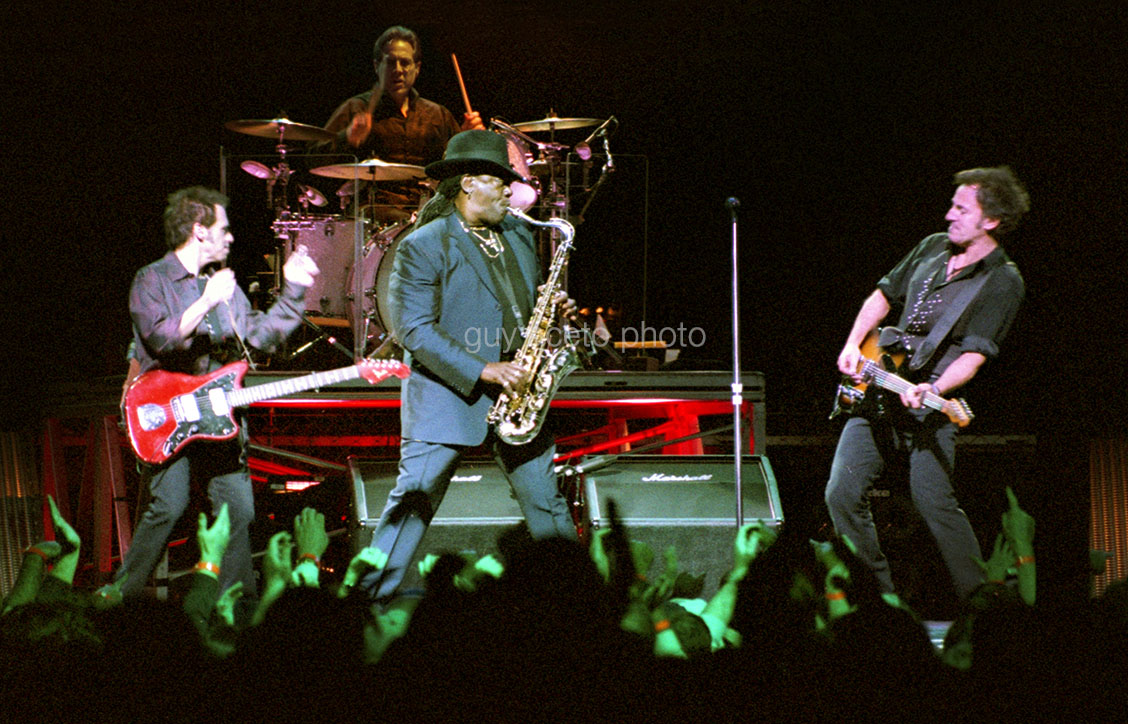
It’s become a concert staple for the press pool photographers. Shoot the first three songs, no flash, then off you go.

You and a half dozen or so of your fellow “shooters,” along with their gear, are placed on a rather small riser next to the soundboard. All of us looking for those two or three shots to accompany the all important review in the next days paper. Shoot hard and fast during those first three tunes, then we’re hustled away. Check out your images and in this age of instant digital gratification, upload the good ones to run with our respective publications.

However … on that chilly December night in Charlotte, North Carolina, for me, it was all on film.

It was on film, wasn’t it? I sure as hell hoped it was. I hadn’t joined the digital masses quite yet. This would be my first time shooting something like this and I’d be lying if I said, I wasn’t just a little bit apprehensive. I actually practiced, camera and tripod in the middle of the living room, standing in front of the television with an old concert video. I tried to answer the question, ” Just how many rolls of film could I shoot, rewind and shoot, in the time it would take to play those first three songs?”

It didn’t take long. I don’t even remember what those first three songs were. It was pretty much a blur. Film to the lab and it was up to the darkroom.

If you’re also a fan , you’ve grabbed a ticket. You sprint to the car to stash your gear and head back for the rest of the show. That’s me, I’m the fan who just shot Bruce Springsteen in concert for the very first time and I’m definitely seeing the rest of this show.

The film is back and … It came out … ok, I guess.

I could have done better, maybe next time.

Wait, would there even be a next time? I did come back with the goods, the editor was happy, and my foot was firmly planted in the door.

There would be a next time. In fact, there would be a couple of dozen next times (and counting).


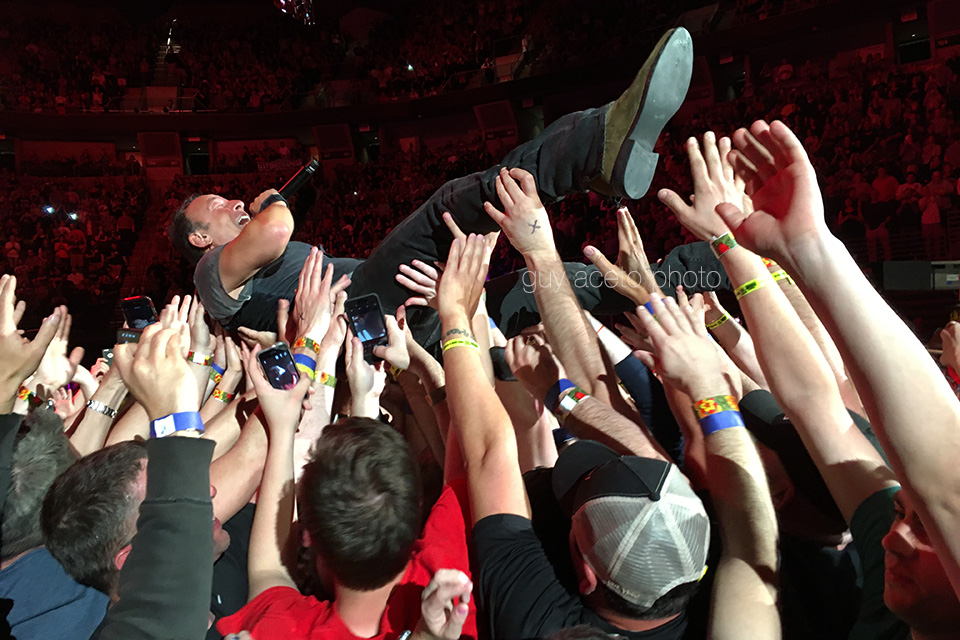
It’s a unique and challenging type of photography. Unpredictable, and dynamic as you attempt to capture “that moment” on stage.  The goal is to translate that “healing power of rock and roll” into a still image that takes the viewer straight to center stage, or reminds them of the show that they saw and their own particular “moment.”

Each show is different, but each one is the same. There is a yin and yang sort of thing going on. You prepare, you tell yourself you’re ready, you’d like to think you know what’s going to happen, but you’re never. quite. sure.

I hear that voice in my head, keep shooting, keep shooting, you’ve only got three songs.

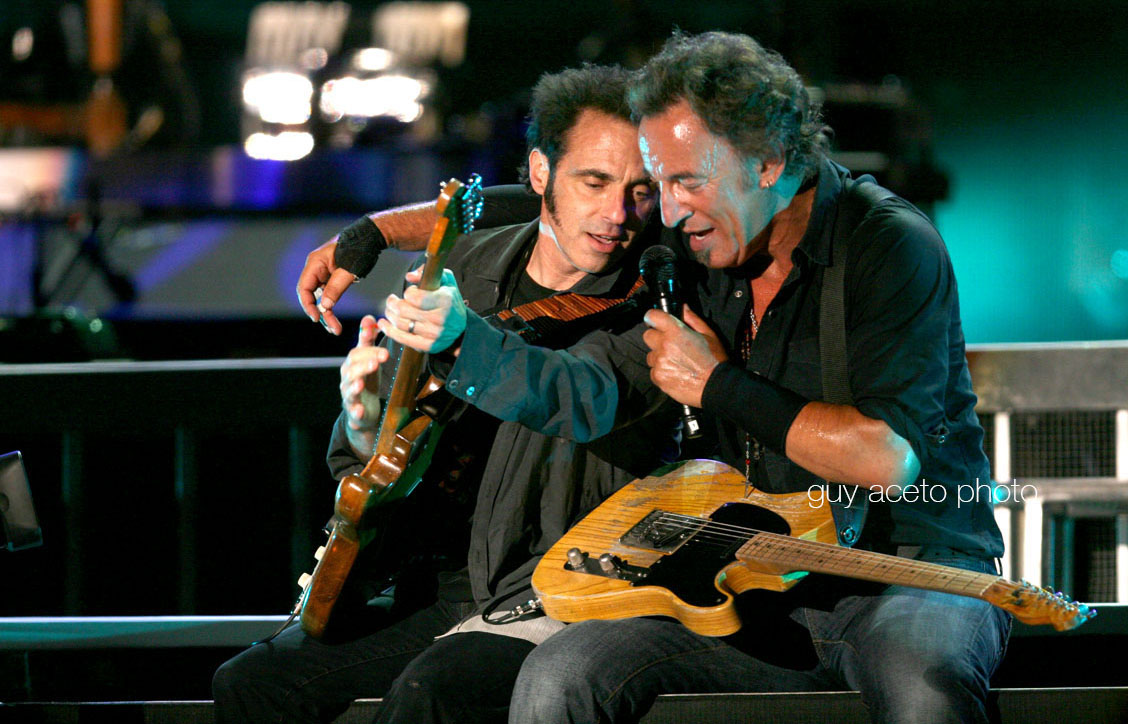
There’s a sense of satisfaction when you realize you’ve gotten the shot. It’s an image that you feel is just a bit different. The image that shows the connection the band has onstage with each other and with the audience. The bonus is when someone else sees it too, when someone else points to your image and says “yeah, that one.”

Lately, I’ve realized that I’ve been pretty lucky to stand on that little riser, press pass stuck to my jeans, for over a decade. I’ve been told I have a “library of images,” a “body of work,” go figure.

I’m just looking forward to adding to that library , three songs at a time.


Good Shot, Bad Shot

“Beauty is in the eye of the beholder”

Sometimes people see something different in your image, something that even you didn’t see.

During Bruce Springsteen’s 2006 Devils and Dust tour, I was asked by an editor to shoot for his publication. I said yes. Are you kidding, of course I said yes. I grabbed my camera (and film, yes … film), hopped in the car headed on down the road.

The venue was as moody and dark as the album. When you’re in the business of “collecting light” the lack of it can make for a challenging evening. When in doubt, load the camera and shoot. I knew even before the film was developed that I probably wasn’t going to like the result but I knew I had done the best I could under the circumstances. I filed away the negs and was happy that I had been able to stay for the show.

Fast forward a decade and a phone call from a photographer friend who asked me if I had shot anything during that tour. I admitted that I had, but I had never been happy with … she stopped me and quickly said, ”someone will email you, send a half dozen at least!”

An email did come and I spent an evening pulling the negatives, trying not to think too much about how dark they were. I rescanned a few, gathered everything together and sent them off.

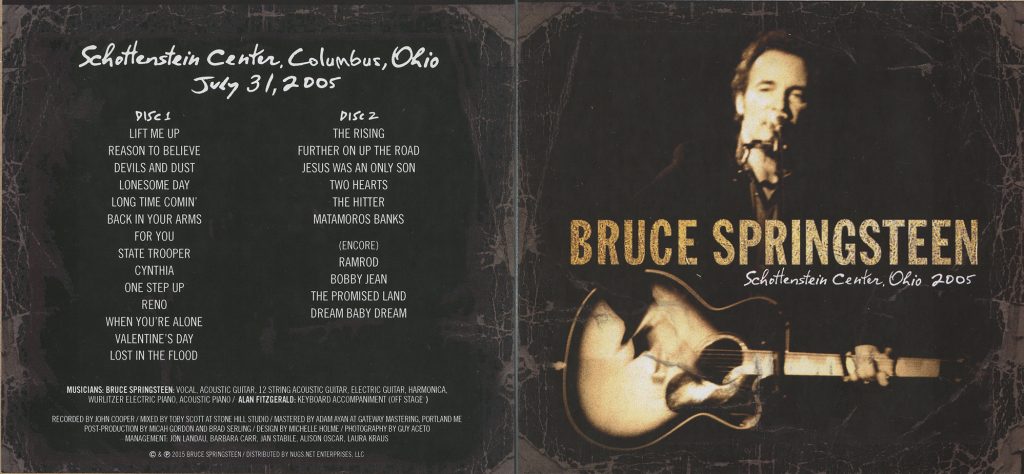
A day or two later, one of those images, one that I had never really thought much of, had been picked for the cover of a live, Bruce Springsteen, Devils and Dust tour cd release. It became part of a series of live performances being offered through brucespringsteen.net, his official website.

That dark, grainy photo, one I had never thought much of, has since become one of my very favorites.

Did I save the images because I was a fan? Probably, but I would like to think that in the back of my mind I thought “just in case” as I slipped the proof sheets and strips of exposed film into a binder. Lesson learned; save the work anyway, and when the word goes out and someone asks to see it … send it to them. You never know.