A last ditch fighter designed to keep the Allies at bay, jet technology and plywood wasn’t enough. It was however, a unique, innovative design that certainly turned heads.
Too little, too late
By 1944 Hitler had directed the development of new cutting edge technology in hopes of creating a series of Wunderwaffen, “Wonder Weapons,” that he decided could stop the Allies and maybe even … win. The Luftwaffe had long been interested in jet and rocket technology. They would field the first operational jet powered fighter, the Messerschmitt Me 262. While it slashed its way through bomber formations there were never enough to make a real difference. The Luftwaffe had to look at just about anything that could help.
Commanders began the Jägernotprogramm, the “Emergency Fighter Program,” designed to get some of their cutting edge designs off the drawing board and into the air as quickly as possible.
One of those designs was the Heinkel He-162 Volksjäger, the “Peoples Fighter.” It was meant to be built quickly from “non-strategic” materials, primarily plywood. Small, even for a fighter, it still packed a punch with two 20mm cannon and later a pair of 30mm guns. A single turbojet engine sat across the spine of the fuselage giving the craft its “hunchback” look as well as a top speed of nearly 520 mph.
It was a relatively simple airplane to produce, and meant to be simple to fly. Meant to be manned by young Hitler Youth, it actually took experienced pilots to master its handling qualities. During an all to brief operational career the fighter did see combat scoring at least one Royal Air Force fighter on April 19, 1945. Over 120 were built with as many as 600 more discovered in a number of underground factories and assembly areas at the end of the war. Captured He-162s were test flown by a number of allied pilots including Eric Brown, the legendary test pilot from the Royal Navy’s Fleet Air Arm and American test pilot Bob Hoover.
The Kit
There are a number of kits of the He-162 available, the 1/48th scale Tamiya kit was first released in 2006 and has nice detail and a number of great features.
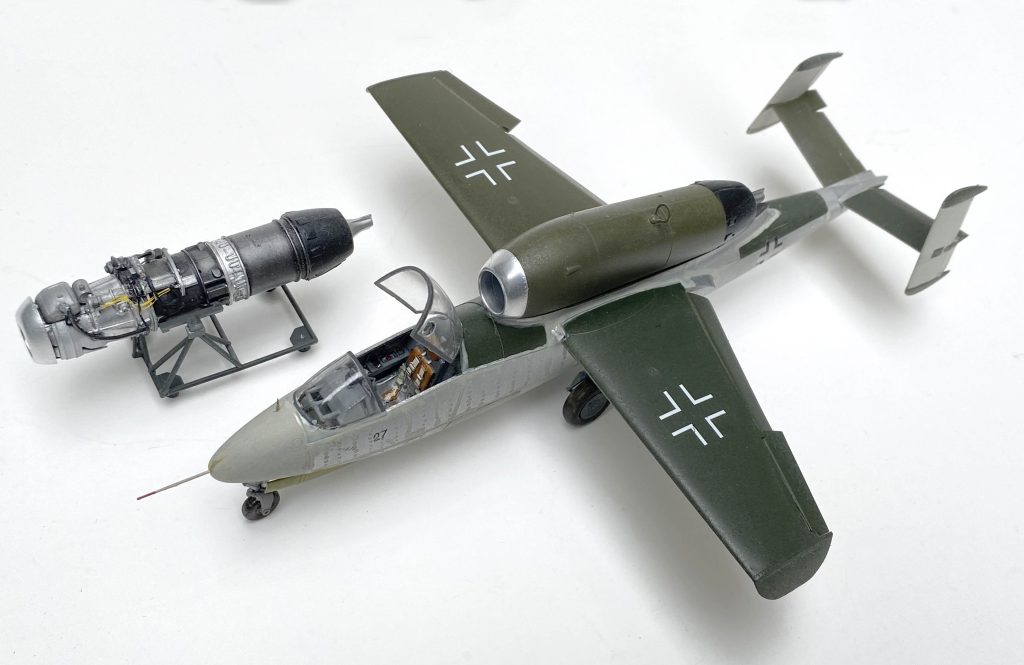
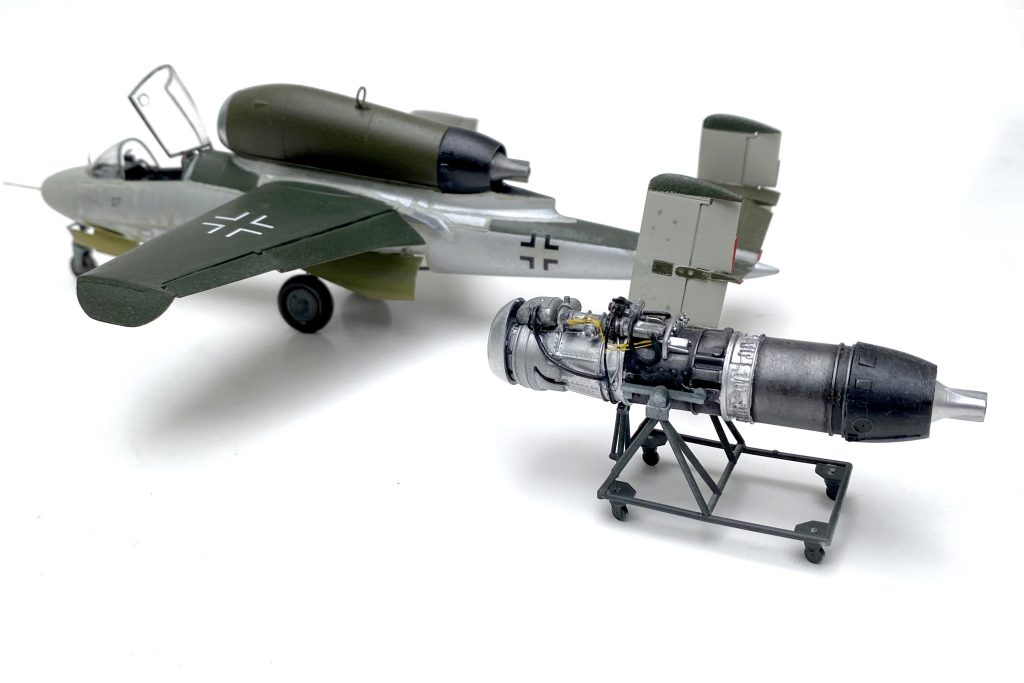
There’s actually an opportunity, to make two models. The kit is engineered to have the builder display the model with the engine bay closed or open to expose a very nice BMW 003 E-1 turbojet engine. I decided to build the engine separately and display it on its maintenance stand. It should sit nicely next to the finished jet.
Start with the engine. It’s hard to resist the temptation to add extra hydraulics and a little wiring. The majority of the engine is painted aluminum with the back half a darker metallic color to mimic the discoloration from the heat of the engine. Set the completed engine aside. On to the aircraft itself.
The aftermarket
Next come a couple of small sub-assemblies. The cockpit has nice detail but a number of aftermarket parts are available. Quickboost makes a great version of the early ejection seat used in the He-162. Paint the new seat and the separate control panel. The nose gear and wheel well form the lower front end of the cockpit. Sandwich the main landing gear and wheel well, the cockpit and nose gear assemblies along with a large ball bearing (conveniently supplied in the kit) so that the jet will not become a tail-sitter between the two fuselage halves. The completed fuselage needs minimal filler and the overall fit is very good.
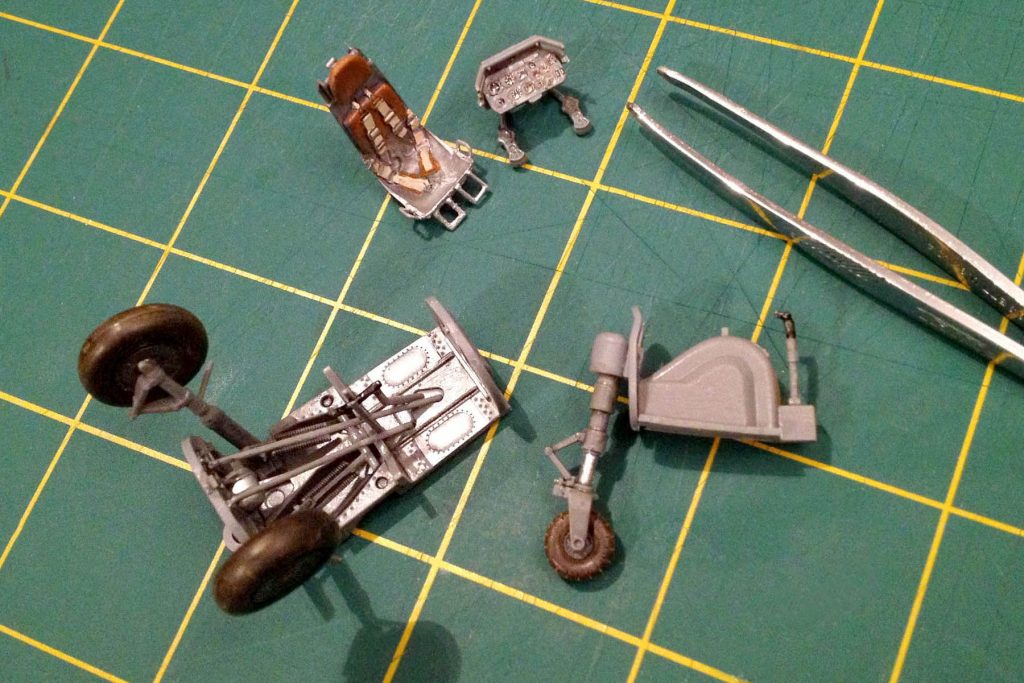
The Czech company CMK makes a nice resin set of the airplane’s control surfaces, flaps, ailerons and a complete tail assembly. The dropped flaps and ailerons, just a little off kilter, all add to the look we’re going for. Using a razor saw cut away the existing flaps. Once they’re removed the resin versions can be set in place, It’s an easy fit. The finished tail assembly fits great too. The seat and control panel are complete but they’ll go in later after the fuselage has been painted.
A different sort of camouflage
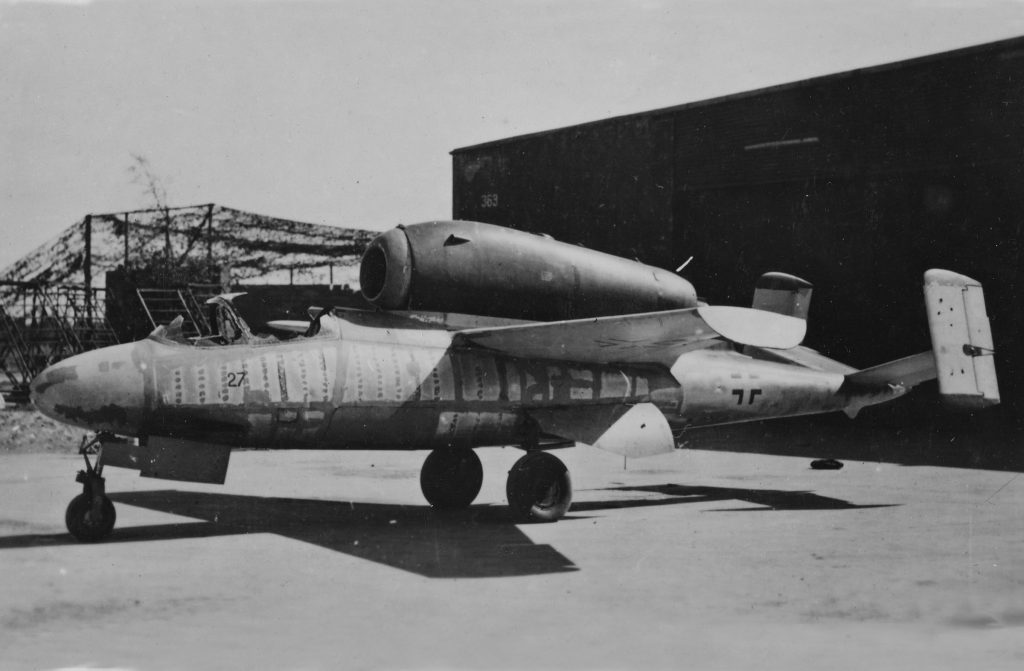
The inspiration for the model came from a photo of an unfinished aircraft found by allied forces at the end of the war. The aircraft had the natural metal surfaces set off by putty over the riveting. The engine nacelle and the wings were painted, as was the tail and other surfaces constructed of other ‘non-strategic’ materials. Mostof the rear of the airplane was plywood and gets a smooth light gray color.
I used a can of Testors aluminum plate that I had tucked away and despite its age it went on very well. The paint is ‘buffed’ after it dries and has a nice sheen to it. Then it’s a fair amount of hand work with a small brush and ‘Light Gull Grey’ to simulate the putty marks over the top of the Aluminum sections of the fuselage. Unsure of the actual colors, I used the “TLAR” system, ‘That Looks About Right.
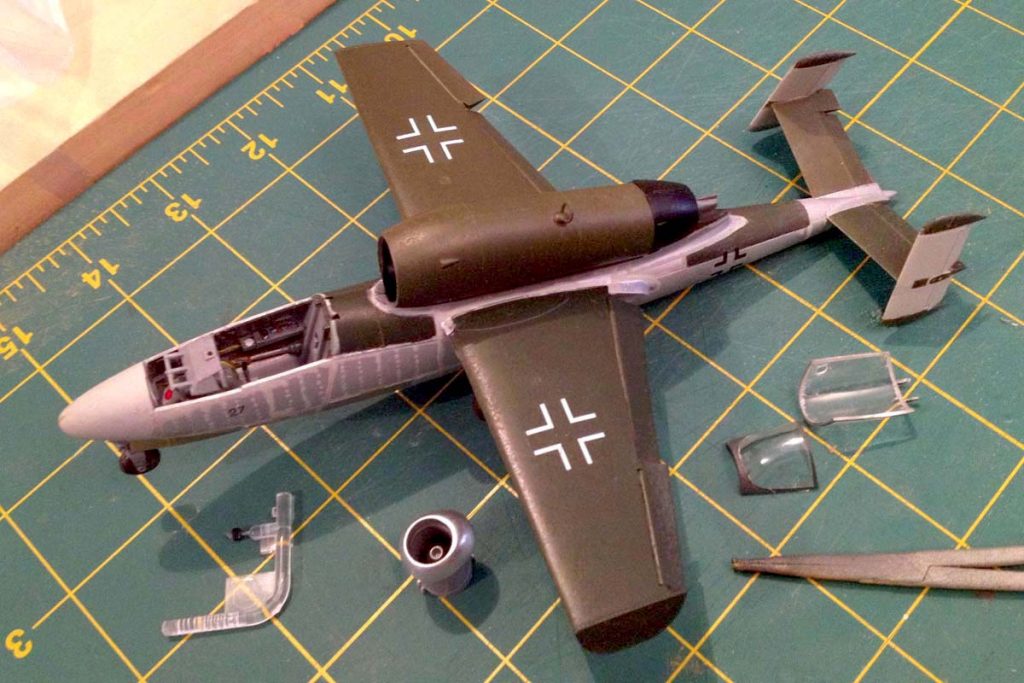
Painting the tail requires a bit of masking to give it that unfinished look, using my photo reference as a guide. By the end of the war Heinkel didn’t seem to go in for the standard ‘splinter’ camouflage most Luftwaffe aircraft had. The Heilkel had to get out of the factory and into the air quickly, no time to waste! The wings and engine nacelle are painted different shades of Luftwaffe Hellgrün (RLM 82) Olivenbraun (RLM 81). By the end of the war there were many slight variations in these colors so The individual modeler has a little leeway.
With the wings and tail on, the jet starts to look like an airplane. Clearcoat, and add what little there were in the way of decals . The markings included in the kit go on just fine.
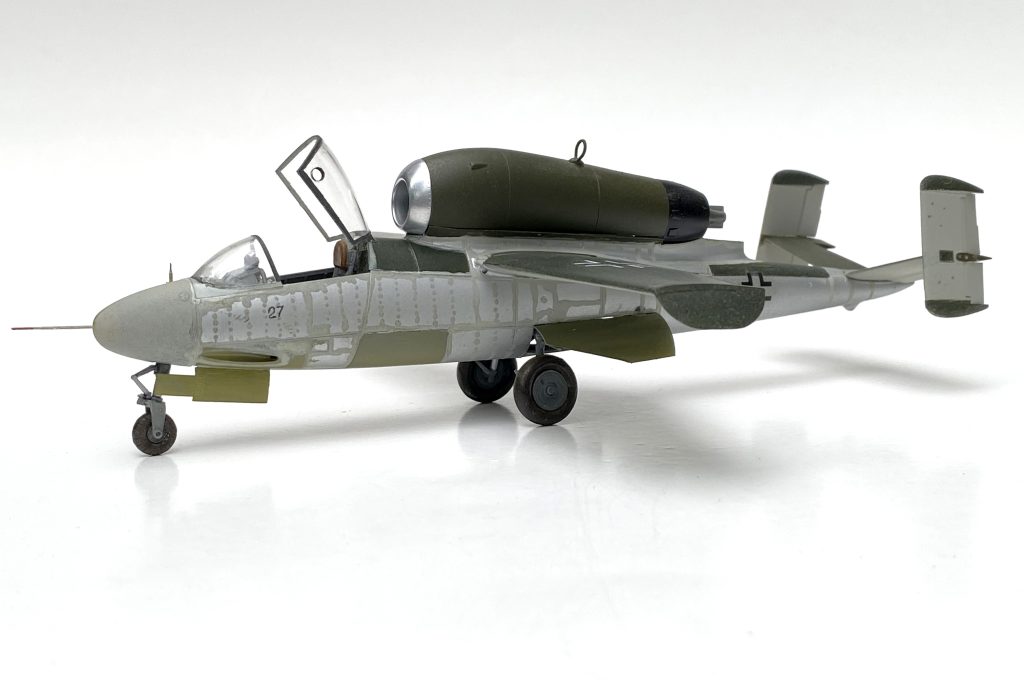
Time to mask and paint the canopy. A lighter grey first, then a much darker grey. I want it to seem as if the interior structure of the canopy frame is lighter than the exterior. The photo I’m using shows the canopy smashed but I just can’t bring myself to destroy that much of the cockpit. The resin seat is a little big but superglue solves the problem and sliding this early ejection seat down the rails needs a little patience. The detail of the seat and harness really makes a difference in the cockpit.
Another layer of clearcoat once the decals are on and we’re almost done. The control panel slips onto the forward part of the cockpit. A small fine point art pen works well for the small ‘27’ on the forward part of the fuselage. Use white glue attach the canopy and the unique fighter is complete. The finished Heinkel He-162 alongside its power-plant make a nice addition to a collection of some of the Luftwaffe’s more unique last ditch aircraft designs on the display shelf.